Announcement

Collapse
No announcement yet.

HID Bi-Xenon High/Low Beam Installation

Collapse
X
 
  • Filter
  • Time
  • Show
Clear All
new posts

  • HID Bi-Xenon High/Low Beam Installation

    I decided after much reading on this site to go ahead and purchase (from Fleabay) a kit of Bi-Xenon HID inserts to replace the standard headlamp globes as I am sick of having the road lit up and dipping the lights for oncoming vehicles only to end up in what seems like total darkness because of the poor standard lights.
    The kit cost me $269 plus $15 postage and arrived overnight after I had paid!

    I spent a total of 2hrs installing it myself today and taking the time for photos etc I reckon it was quite quick and simple.

    I took before and after shots (all at exactly the same exposure so it is a fair comparison) of the lights against my carport wall and also of the installation of the components.

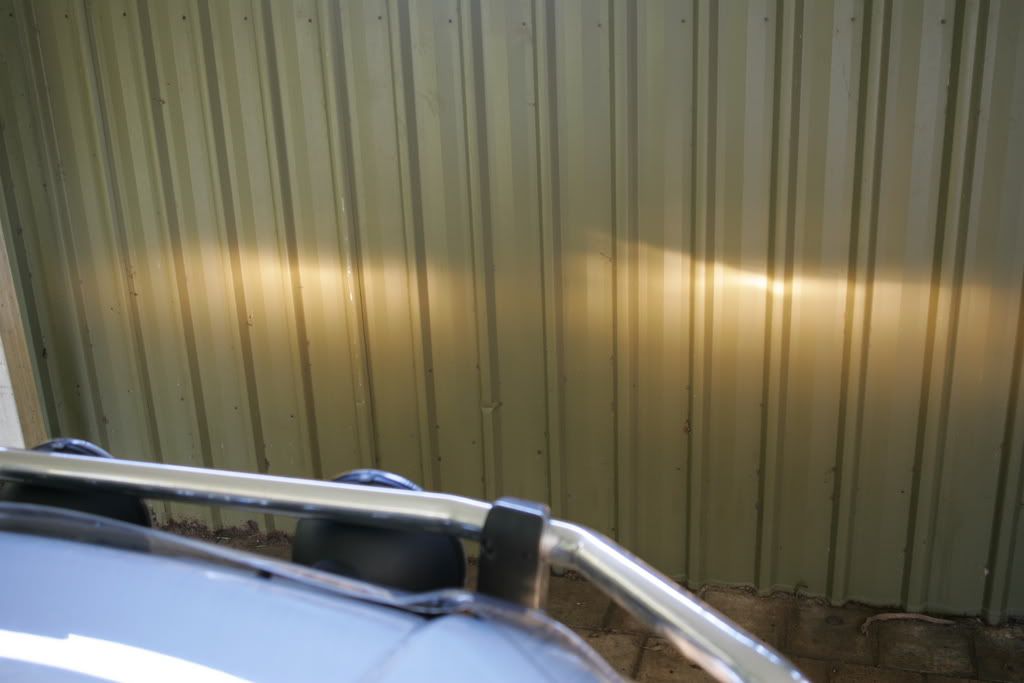
    Before shot of standard low beam


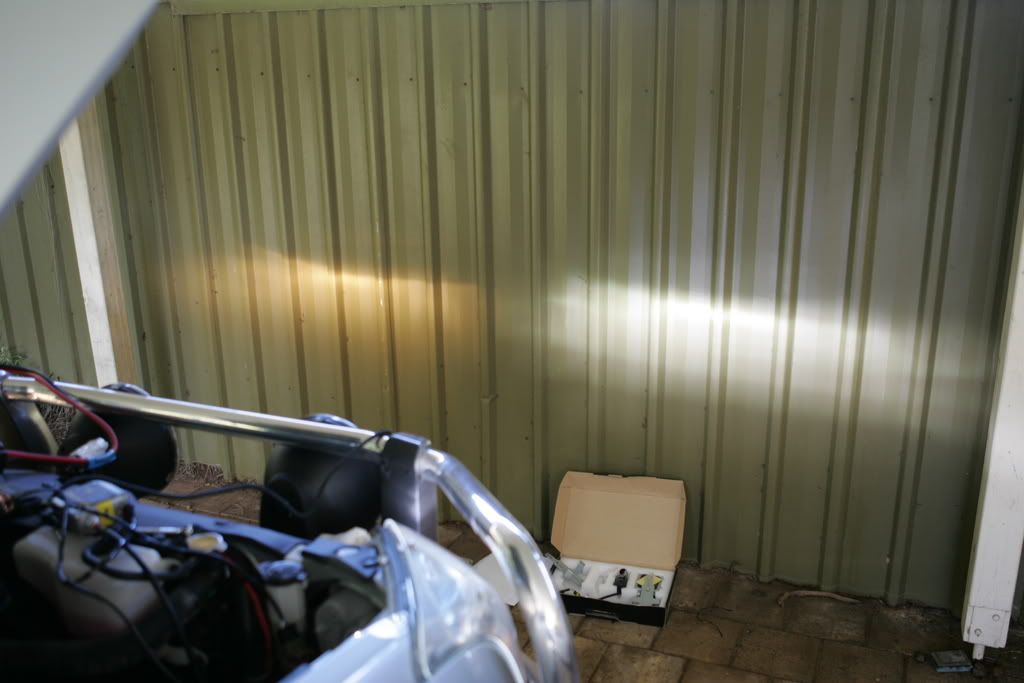
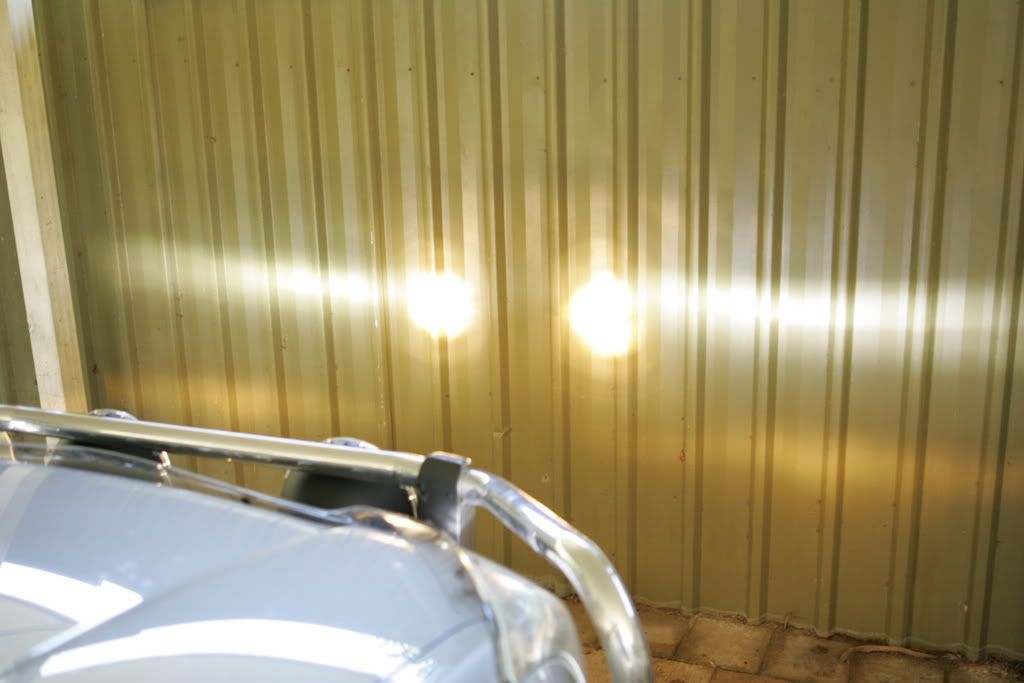
    One standard (Left) and one HID (Right)
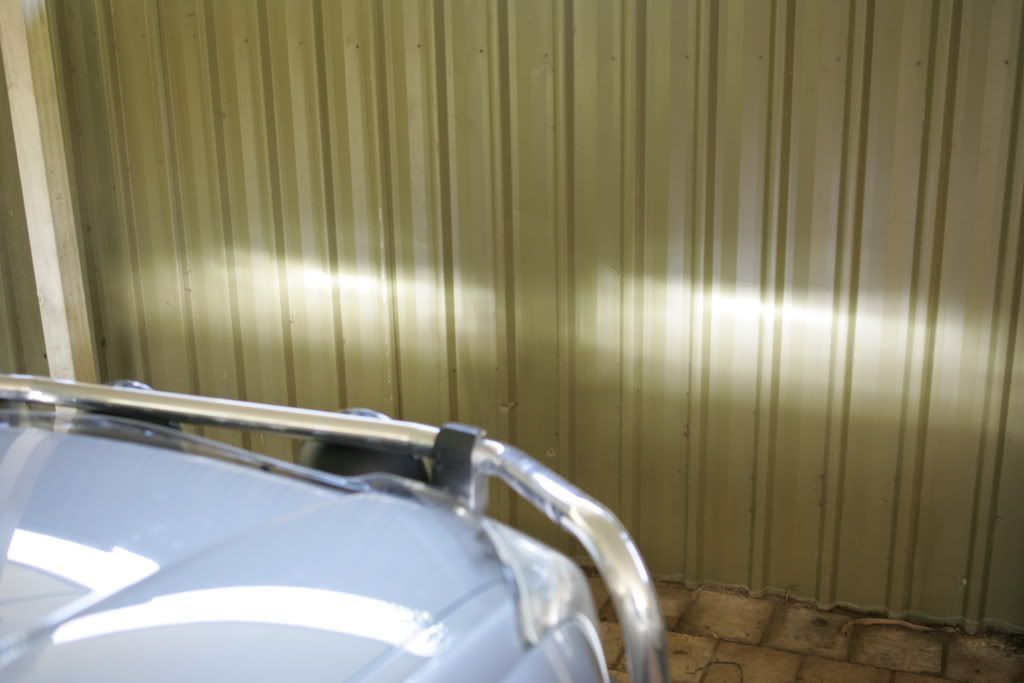


    Both HID Low beam


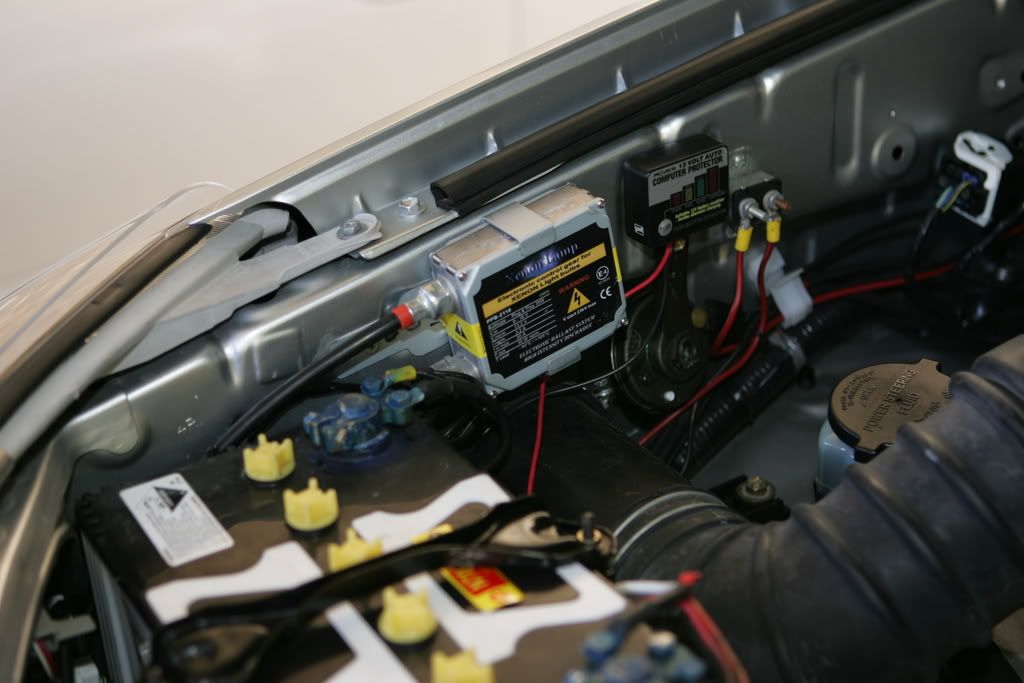
    The install is really plug and play as described. I needed to mount the controller unit which I attached on the LHS near the battery and also a ballast on either side. You can just see the ballast for the left side behind the fuse box attached to the LHS also.


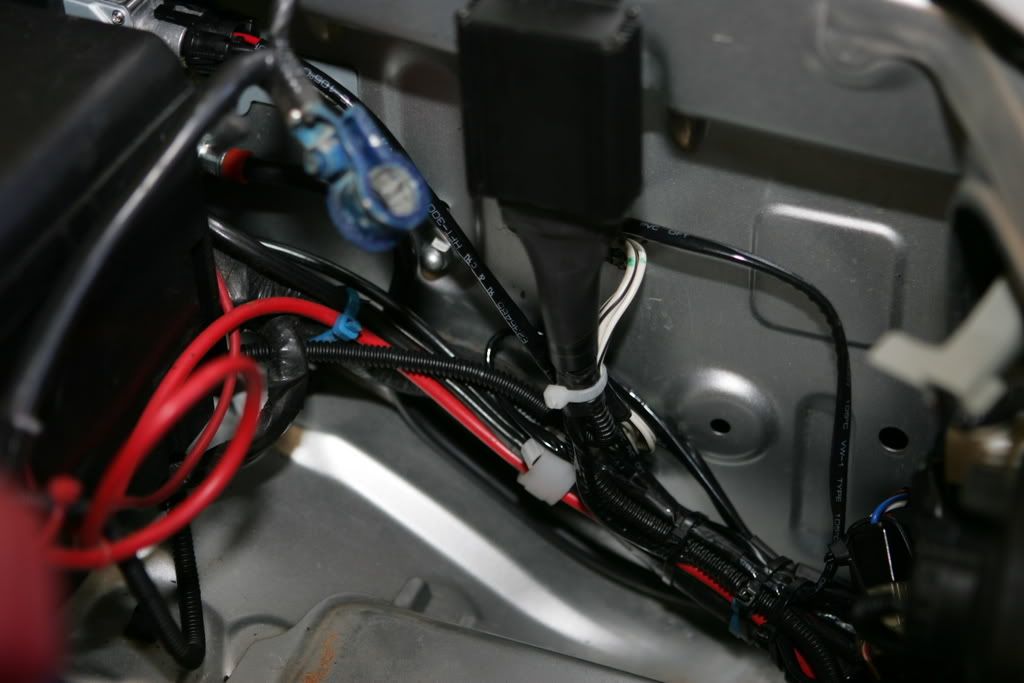
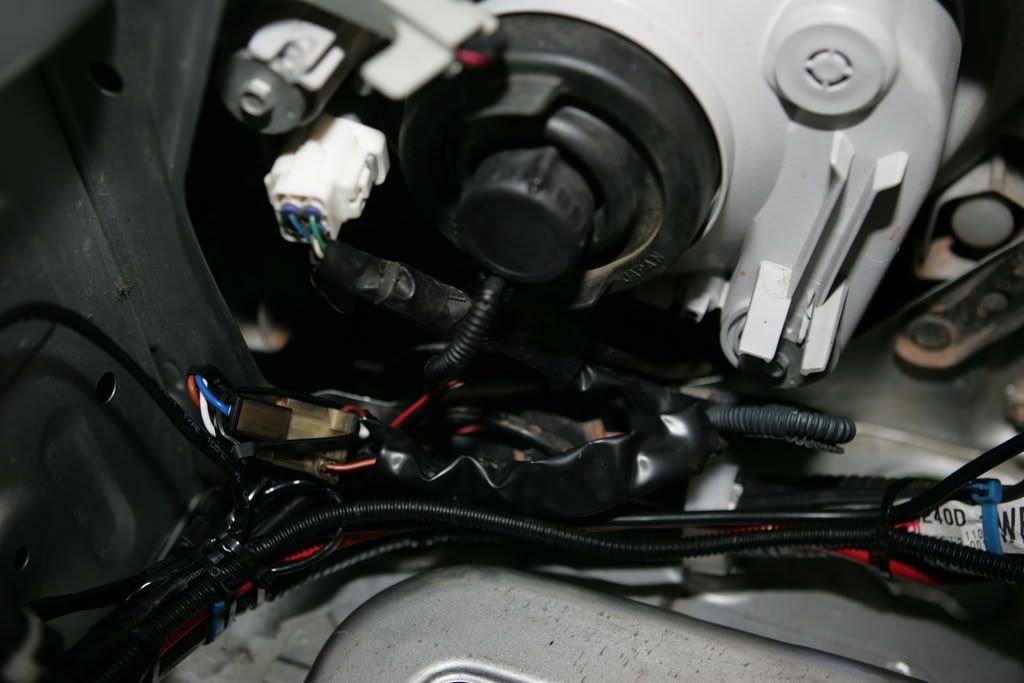
    The RHS was nice and easy. Just the ballast to install (on the RHS near the AUX battery and plug in the globe.


    The issue for me was are they going to be better than the standard lights?
    Well, by looking at the initial output compared to the standard lights I have no doubt. I am also very impressed with the light pattern on both high and low beam.
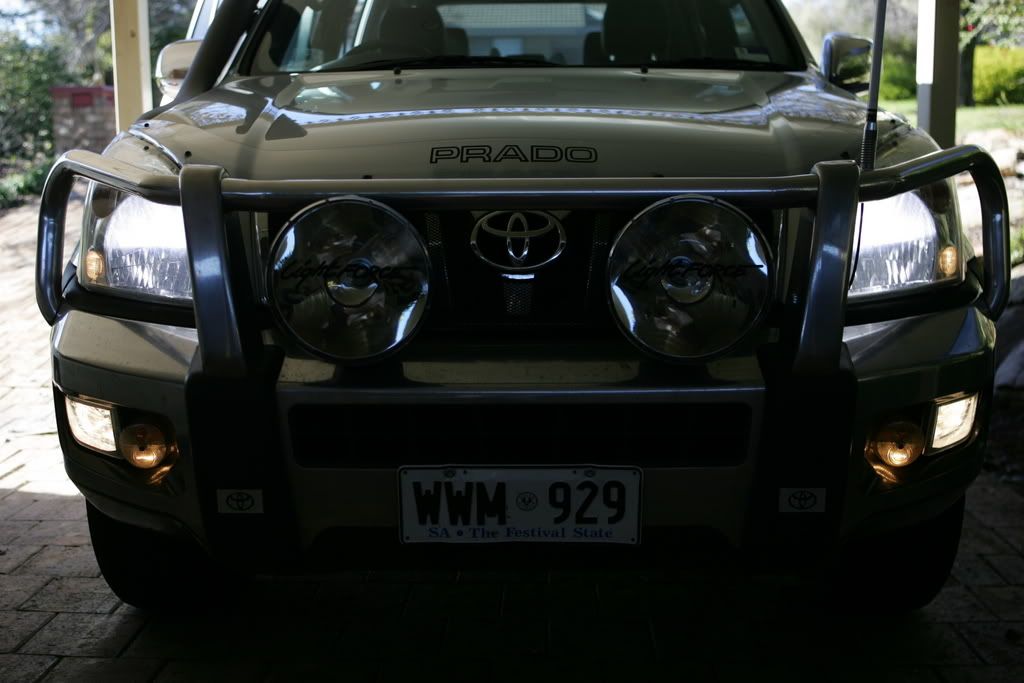
    If you look at the front on shot, there is very little light scatter as some others have reported. I can't wait until it gets dark so I can go for a drive.

    Oh....warm up time - yes I am in Adelaide and its cold! They come on instantly and start a bluish colour and the go to a brilliant white after about 10 secs. Low to high beam is absolutely instantaneous (you can see the XGTs slowly come to full brightness in comparison).
    I went out just now and bought the blue filters for the XGTs as I am sure the difference in colour will annoy me. They seem better now but I haven't taken a pic as yet.

    HID Low beam (with Fog lights on)


    HID High Beam (with XGTs and Fog)


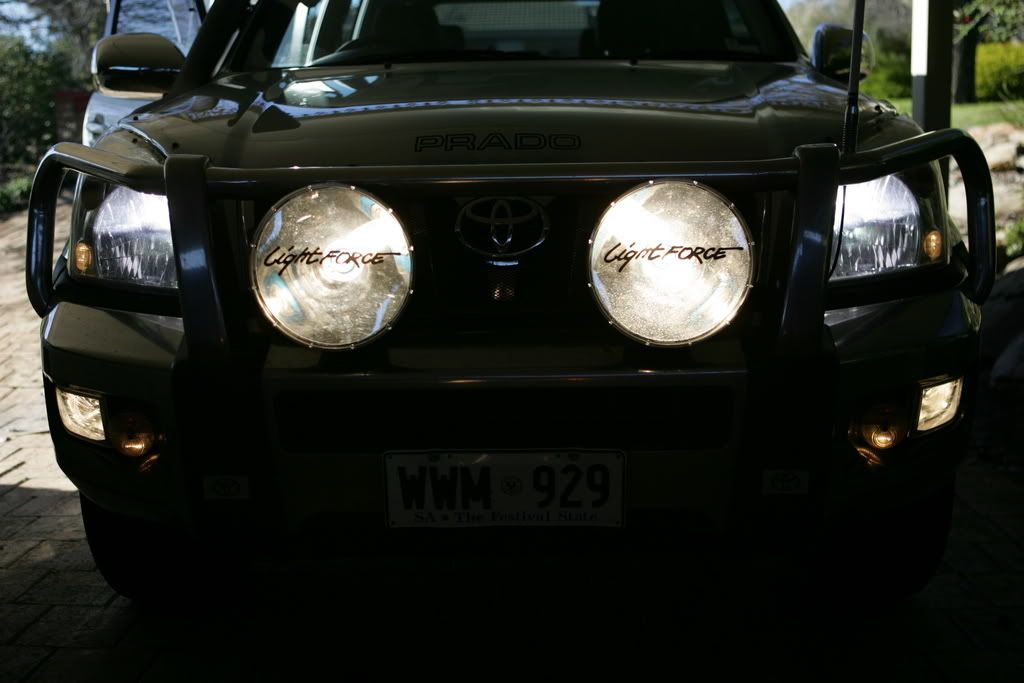
    HID Low Beam (Front on) - purposely underexposed


    HID High Beam (and XGTs) - purposely underexposed


    I would certainly recommend this upgrade. I will comment further once I have tested them out at night.

    Cheers,

    Richo
    [B]2011 KDJ150 GX[/B]
    HID low & high beam upgrade
    Polaris Satnav with reverse camera and Bluetooth
    Outback drawer system
    [B]2012 KDJ150 Kakadu[/B] HID high beam...mod list being slowly ticked off

  • #2
    Richo,

    Same kit as I installed a few weeks back..... you just saved me having to load my pictures. You will be impressed with their performance.
    [color=#0040FF]Rob[/color]
    [color=#0040BF]2012 Altitude D4D &
    04 Jayco Eagle Outback[/color]

    Comment


    • #3
      Awesome Richo, thanks for posting that, it's on my to-do list after seeing TP's install pictures but always great to see that others have done it and how it turned out!

      Look forward to some "out on the road" pics!

      Comment


      • #4
        Hey Richo

        What temperature globes did you purchase?
        06 GXL D4D, 6spd, Snorkel, ARB bar, XS900 50w HID lights, 55W HID Headlight upgrades, T/bar, 7" GPS, QStarz data logger, 52L Bushman Fridge, Premier winch, Sandgrabbas, GME TX3440, AE4705 antenna, Scangauge II, Dual Batteries, Aero bars & rack, Drawers, 2" Ironman/Rancho/King lift, Under bonnet compressor, Black ducks, Voltage booster, Rear table, AVE TPMS,

        Comment


        • #5
          Nice work there Richo.

          Comment


          • #6
            Jacto - they are 6000k (I certainly wouldn't go any higher in temperature because of the advice that they lose effectiveness and its more wank factor than anything) I wanted them for better lighting! And just a touch of the wank factor

            Just been for a drive and they work awesome. Nobody flashed me and they light up the road beautifully.

            I am very happy with the whole thing.
            [B]2011 KDJ150 GX[/B]
            HID low & high beam upgrade
            Polaris Satnav with reverse camera and Bluetooth
            Outback drawer system
            [B]2012 KDJ150 Kakadu[/B] HID high beam...mod list being slowly ticked off

            Comment


            • #7
              Thanks for the great detail Richo. I've been thinking about doing this and having read your post I'm convinced that I will also get them.

              Thanks again.
              2006 D4D VX, Diesel, 5-speed Auto, Charcoal, dark window tint, Toyota hitch receiver, custom home-built drawers, Piranha Fridge slide, Waeco 50L fridge, Dual Battery, Polaris GPS and Reversing camera

              Comment


              • #8
                Just gotta find a way to upgrade the foglights now...

                Comment


                • #9
                  I am really happy with the spotlight conversion and I was thinking about putting 4300's in the headlights but will probably stick with the 6000's to match the colour of the spots. If you get some photos out on the road to post wouldn't mind a look.
                  06 GXL D4D, 6spd, Snorkel, ARB bar, XS900 50w HID lights, 55W HID Headlight upgrades, T/bar, 7" GPS, QStarz data logger, 52L Bushman Fridge, Premier winch, Sandgrabbas, GME TX3440, AE4705 antenna, Scangauge II, Dual Batteries, Aero bars & rack, Drawers, 2" Ironman/Rancho/King lift, Under bonnet compressor, Black ducks, Voltage booster, Rear table, AVE TPMS,

                  Comment


                  • #10
                    richo nice job mate, how much room do you have inbetween the second battery and also the kit you bought was that the one that says oz seller on the small pic of the item. It looks like the same brand kit i bught for my spots. And lastly is the ballast cradle built strong enough the kit i got had shitty holders for the ballasts but the ballasts look the same.
                    Cheers phil.
                    [size=1][b][i]07 D4D GXL PRADO 6spd man.[/i][/b][/size]
                    [size=7][color=blue][i]BFG AT tyres 265/70/17,55mm ATS suspension,tow safe tow bar,Mine Trans seat covers,sandgrabba mats, 60 Litre Engel fridge,front tint,safari snorkle,arb deluxe bull bar, Hella HID lights,760cca dual battery setup,uniden uhf cb, and more to come !![/i][/color][/size]

                    Comment


                    • #11
                      Cheers Phil.

                      I was worried about the distance between the second battery and the globe. This is a good 15mm and could be more if I moved the battery back a bit but the battery is nicely in the middle with plenty of clearance.

                      Yes it is the kit that has the 'oz seller' around the thumbnail.

                      *** One little tricky bit I forgot to mention although it does seem obvious is:
                      After putting the whole globe in the headlamp - remove the globe part (the carrier - the H4 bit is separate to the actual globe) then put the rubber seal on. Then the globe can be placed back in the carrier and all is sealed and dust and water proof. Don't do what I did and cut the rubber (only on one side) to try and fit the whole globe through!

                      Richo
                      [B]2011 KDJ150 GX[/B]
                      HID low & high beam upgrade
                      Polaris Satnav with reverse camera and Bluetooth
                      Outback drawer system
                      [B]2012 KDJ150 Kakadu[/B] HID high beam...mod list being slowly ticked off

                      Comment


                      • #12
                        Thats Richo this is my next job when I get back.
                        For anyone who wants to know Coventrys have a sale on all hella lights at the moment and it is a real good deal. Hella 4000 compacts $185 and also the big 4000's for 190 each. This is easy half price of rrp.
                        Get a hid kit and bingo you have predators for stuff all coin. Predators are for sale for just 1075 I think each which is cheap for them.
                        I am 90% sure this is over the counter prices. Phil
                        [size=1][b][i]07 D4D GXL PRADO 6spd man.[/i][/b][/size]
                        [size=7][color=blue][i]BFG AT tyres 265/70/17,55mm ATS suspension,tow safe tow bar,Mine Trans seat covers,sandgrabba mats, 60 Litre Engel fridge,front tint,safari snorkle,arb deluxe bull bar, Hella HID lights,760cca dual battery setup,uniden uhf cb, and more to come !![/i][/color][/size]

                        Comment


                        • #13
                          Richo,

                          Between you and Piggy you've got us all looking at these. These are the AE Int kits on ebay right?

                          Are they truly plug and play as advertised or is there splicing into the head light circuit involved in this kit?

                          Cheers

                          AJ

                          Comment


                          • #14
                            I've ordered mine - thank heaps for the heads-up Richo (mate, they should send you a spotter's fee) .

                            I went for the 5000K version, even though my driving lights are 6000K - am hoping to try and achieve just that little bit more intensity and penetration.

                            Comment


                            • #15
                              Hey AJ,

                              Definitely plug and play - have a look at the back of the headlight photo and you will see the connector that goes to the control box. (I cable tied these together because if this comes apart then all the lights will go off!). You take off the factory connector and it plugs direct in to a socket which then goes to the control box. The lights and ballasts etc just simply plug in. You need to connect a 12v connector to the battery (which is already has an eye connector) and then each ballast has a ground connector (also with eye connectors). I just added the ground to the factory ground on each side. Piece of cake.

                              Richo
                              [B]2011 KDJ150 GX[/B]
                              HID low & high beam upgrade
                              Polaris Satnav with reverse camera and Bluetooth
                              Outback drawer system
                              [B]2012 KDJ150 Kakadu[/B] HID high beam...mod list being slowly ticked off

                              Comment

                              canli bahis siteleri bahis siteleri ecebet.net
                              mencisport.com
                              antalya escort
                              tsyd.org deneme bonusu veren siteler
                              deneme bonusu veren siteler
                              gaziantep escort
                              gaziantep escort
                              asyabahis maltcasino olabahis olabahis
                              erotik film izle Rus escort gaziantep rus escort
                              atasehir escort tuzla escort
                              sikis sex hatti
                              en iyi casino siteleri
                              deneme bonusu veren siteler
                              casibom
                              deneme bonusu veren siteler
                              deneme bonusu veren siteler
                              betticket istanbulbahis
                              Working...
                              X