Announcement

Collapse
No announcement yet.

Install of ARB On-Board Air Compressor CKMA12

Collapse
X
 
  • Filter
  • Time
  • Show
Clear All
new posts

  • #31

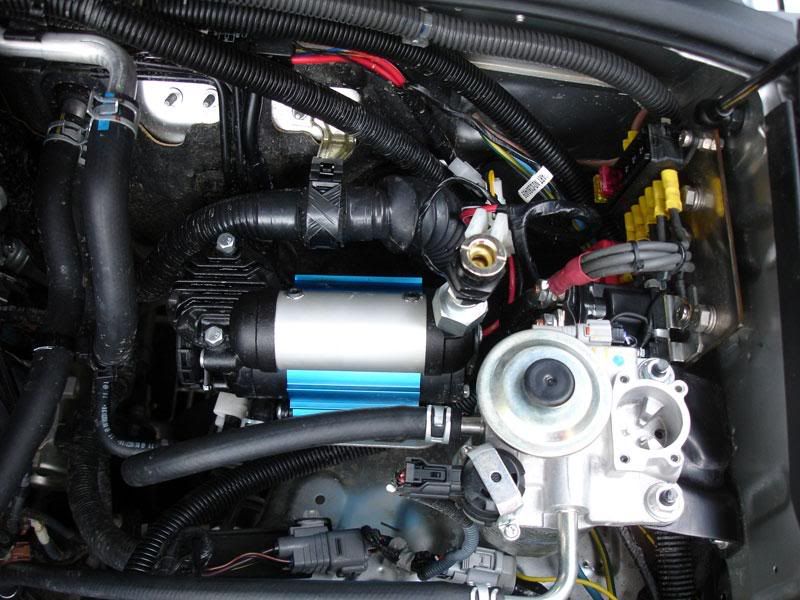
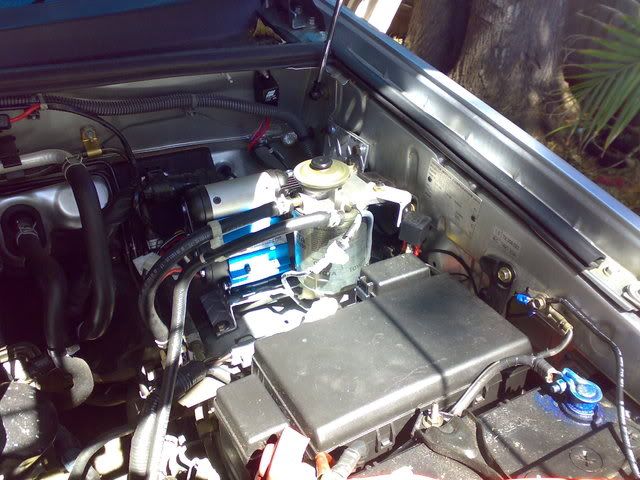
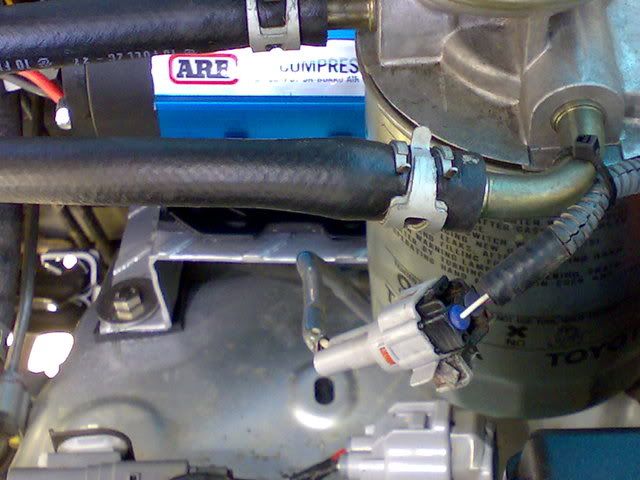
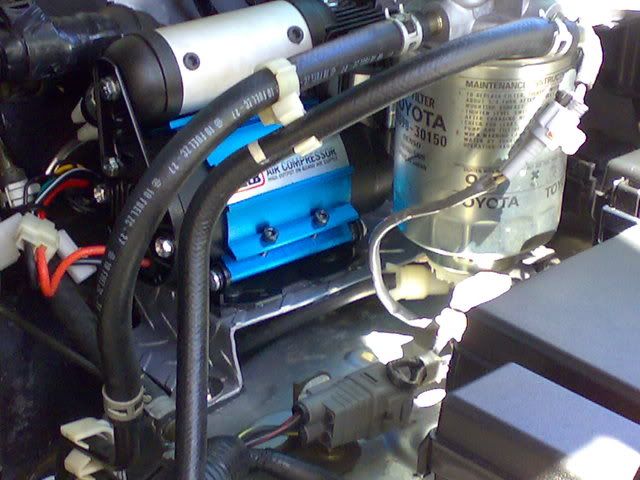
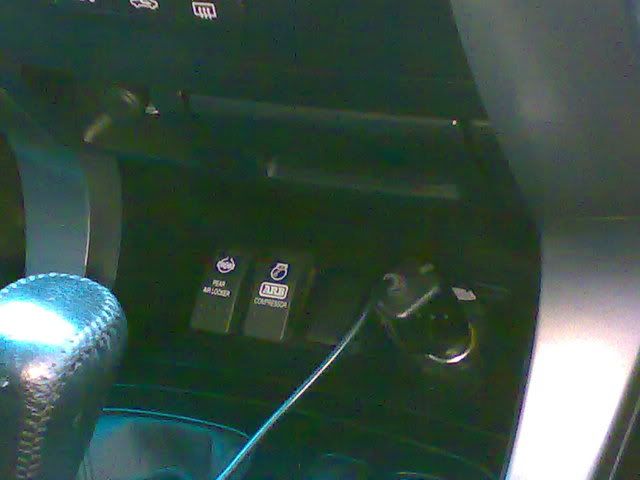
    You're not the only one Kevin to miss out on a D4D. This is my install from a previous post. Honestly, real easy and I just wired it to the switch on the fuel filter bracket and it's got power all the time so I dont need the keys. I must admit I use it at home to do pushy tires and all sorts of stuff! Bloody handy. Next to the running diesel you'd think nothing of the noise but inside, yeah, pretty bad.

    Matt

    Comment


    • #32
      It looks like you have the same room there as a D4D anyway.

      Unless kev's already got a bettery there?

      Here's mine (D4D)

      [/url]
      2008 GXL M6 D4D, Silver
      Build Up---> [url]http://www.pradopoint.com/viewtopic.php?t=2315[/url]

      [b]{[/b]ATS Ridepro/Bilstein Lift[b]}[/b] [b]{[/b]Dual Batteries with RanOx Battery Booster[b]}[/b] [b]{[/b]600w Projecta 240v Inverter[b]}[/b] [b]{[/b]Dunlop AT3's / MT MTZ's on Speedy Grande Rims[b]}[/b] [b]{[/b]ARB Deluxe Winch Bar[b]}[/b] [b]{[/b]IPF900XS Spotties - Converted to 50w 4300k HID[b]}[/b] [b]{[/b]35w H4-3 4300k HID Hi-Lo Conversion[b]}[/b] [b]{[/b]ARB Underbonnet Compressor[b]}[/b] [b]{[/b]GME TX3440[b]}[/b] [b]{[/b]T-Max 10,000lb winch[b]}[/b] [b]{[/b]Safari Snorkel[b]}[/b] [b]{[/b]Milford Cargo Barrier[b]}[/b] [b]{[/b]Rhino HD Roofies & AT1410 Roof Tray[b]}[/b] [b]{[/b]60L Waeco[b]}[/b]
      [img]http://www.gifs.net/Animation11/Transportation/Cars/4_wheel_drive.gif[/img]

      Comment


      • #33
        8) 8) OH SO SHINY!!!

        Comment


        • #34
          Well I've decided that I will get ARB to bung one under the bonnet when they install my Polyairs next Friday after I bargained with them :wink:

          Cheers,
          Kevin
          My Rig Buildup [url]http://www.pradopoint.com/viewtopic.php?f=38&t=4918[/url]

          Comment


          • #35
            C'mon Kev! Get adventurous! DIY! If you use the ARB loom it really is plug and play!

            Comment


            • #36
              As much as I would like to do it, my wife would be seriously unimpressed if I spent my first day home, after 16 days away, mucking about on the Prado, particularly with the boys being at school 8) :twisted: and school holidays about to start :roll:
              My Rig Buildup [url]http://www.pradopoint.com/viewtopic.php?f=38&t=4918[/url]

              Comment


              • #37
                thanks LFAR and everyone for there previous information re compressors
                and inflation times. that's what makes this site so good
                i just picked up the same compressor yesterday and now will have
                to fit it before the watagans next weekend.
                but with these instructions/guide, it will give me a visual helping whilst
                doing the fit up. i'm thinking of folding up a Z shaped bracket and mount
                it in this area using the existing toyota factory holes and threads here.
                then mount the compressor on a piece of neoprene to the bracket.
                i think i'll use a little of the neoprene for mounting the bracket to the car.
                this will stop any metal/metal vibration and allow some (minimal) flex.
                i'll see how it all looks at the time. i've got the ideas in the head at the
                moment (and gee isn't that a worry).
                [url=http://www.fuelly.com/driver/damonat/prado][img]http://www.fuelly.com/smallsig-metric/50578.png[/img][/url]

                Comment


                • #38
                  Originally posted by damonat
                  thanks LFAR and everyone for there previous information re compressors
                  and inflation times. that's what makes this site so good
                  i just picked up the same compressor yesterday and now will have
                  to fit it before the watagans next weekend.
                  but with these instructions/guide, it will give me a visual helping whilst
                  doing the fit up. i'm thinking of folding up a Z shaped bracket and mount
                  it in this area using the existing toyota factory holes and threads here.
                  then mount the compressor on a piece of neoprene to the bracket.
                  i think i'll use a little of the neoprene for mounting the bracket to the car.
                  this will stop any metal/metal vibration and allow some (minimal) flex.
                  i'll see how it all looks at the time. i've got the ideas in the head at the
                  moment (and gee isn't that a worry).
                  Excellent idea Damonat. It will be great if you can post the pics of how you do your bracket and neoprene mod.

                  One note is still missing from the base thread... I haven't added the pic for the fuse as described by Leachy. I'll get around to that as soon as my workload eases a bit.

                  LFaR.
                  [size=1][color=#770000]29Feb12:[/color][color=#777700]12GXLTD Auto, ARB Deluxe Winch bar, WARN 9.5xp Winch, IPF 900XS, Tow, Safari snorkel, Front + Rear Recovery points, ARB OME NC Sports, ATZ-4Rib[/color][color=grey], Silver[/color]. [color=orange][b]MaxTrax[/b][/color], [color=maroon]ScanGuage II[/color], [color=blue]ARB CKMA12[/color], [color=deeppink]UHF: GME TX3440 AE4018K1 UNH047SX[/color], [color=darkgreen]Bushranger Air Jack[/color], [color=green]Staun + ARB Deflators[/color], [color=brown]WindCheetah Roof Rack[/color], [color=green]Foxwing[/color], [color=red]Super Charge MRV70, Redarc BCDC1220[/color], [color=darkblue]ARB 60L fridge[/color], [color=blue]MSA Fridge Dropdown slide[/color], [color=darkyellow]DRIFTA Drawers[/color], [color=gold]TJM Bash Plates[/color], [color=brown]TG150[/color].[/size]

                  Comment


                  • #39
                    that is easy. just cut the wire and put a female blade terminal on the wire and use a blade fuse pushed onto the terminals.
                    just finished the install late yesterday and it came up ok.
                    the idea worked out ok. sprayed the bracket a silver colour so not to draw attention to it.
                    will post some pics soon. my digital camera died on monday after taking some before and during pics.
                    what a pain in the ar$e, to say the least.
                    now have to wait for the misses to come home this arvo and get some pics using her phone.
                    mounted the switches in the centre console in front of the shifter.
                    very happy with the look. the switches look good at night up there.
                    [url=http://www.fuelly.com/driver/damonat/prado][img]http://www.fuelly.com/smallsig-metric/50578.png[/img][/url]

                    Comment


                    • #40
                      Originally posted by damonat
                      that is easy. just cut the wire and put a female blade terminal on the wire and use a blade fuse pushed onto the terminals.
                      Yep, I did similar, soon after Leachy's post and before I used it on my first trip. What I meant was that I haven't had time for posting the pic in the basenote. The work is done, just no pic in the step-by-step guide yet.

                      Originally posted by damonat
                      just finished the install late yesterday and it came up ok.
                      the idea worked out ok. sprayed the bracket a silver colour so not to draw attention to it.
                      will post some pics soon. my digital camera died on monday after taking some before and during pics.
                      what a pain in the ar$e, to say the least.
                      now have to wait for the misses to come home this arvo and get some pics using her phone.
                      mounted the switches in the centre console in front of the shifter.
                      very happy with the look. the switches look good at night up there.
                      Can't wait to see the pics mate.

                      Cheers,
                      LFaR.
                      [size=1][color=#770000]29Feb12:[/color][color=#777700]12GXLTD Auto, ARB Deluxe Winch bar, WARN 9.5xp Winch, IPF 900XS, Tow, Safari snorkel, Front + Rear Recovery points, ARB OME NC Sports, ATZ-4Rib[/color][color=grey], Silver[/color]. [color=orange][b]MaxTrax[/b][/color], [color=maroon]ScanGuage II[/color], [color=blue]ARB CKMA12[/color], [color=deeppink]UHF: GME TX3440 AE4018K1 UNH047SX[/color], [color=darkgreen]Bushranger Air Jack[/color], [color=green]Staun + ARB Deflators[/color], [color=brown]WindCheetah Roof Rack[/color], [color=green]Foxwing[/color], [color=red]Super Charge MRV70, Redarc BCDC1220[/color], [color=darkblue]ARB 60L fridge[/color], [color=blue]MSA Fridge Dropdown slide[/color], [color=darkyellow]DRIFTA Drawers[/color], [color=gold]TJM Bash Plates[/color], [color=brown]TG150[/color].[/size]

                      Comment


                      • #41
                        my digital camera that is used to take before and during photo's decided
                        to die and kept my pic's. so unfortunately i now don't have one of the shape
                        of the bracket. the size needed was 450x100. then fold to the required shape.
                        so i can only show you the after/installed pics.


                        very average pic's but you get the idea. the insulation is as follows;
                        compressor, neoprene, bracket, neoprene, base compressor plate.
                        so to allow the compressor to vibrate without transferring that through body.
                        [url=http://www.fuelly.com/driver/damonat/prado][img]http://www.fuelly.com/smallsig-metric/50578.png[/img][/url]

                        Comment


                        • #42
                          Hi all

                          I can see a few different locations (from this an other threads) on the location of the ARB compressor swtich

                          Can anyone offer reasons for chosing their location (benefits, etc)
                          Much appreciated.

                          Cheers
                          Borgy
                          Prado VX Diesel 2007 Silver
                          Lots of add-ons...
                          [url=http://autos.groups.yahoo.com/group/aussieswag/join][img]http://autos.groups.yahoo.com/group/aussieswag/[/img][/url]
                          [i]Click to join aussieswag[/i]

                          Comment


                          • #43
                            It really just comes down to personal preference.

                            Some long-legged versions say their knees bump the switch when it is located above the fuse-box. Shorties don't have that problem.

                            Also, I moved the original Toyota switches which required me to rekey the switch bank above the fuse-box (as per my instructions). Not a big deal, but something to consider.

                            You don't have to decide until you run the wiring loom and think about your preferences. Maybe just sit in the driver's seat and imagine whether you have a preference for left-hand or right-hand action .

                            A switch in the middle can be reached by the passenger as well as the driver. That could be good or bad, depending on the activity level of your grommets or whether you happen to place other things in that area.

                            Really, it doesn't matter. Then if you don't like your first choice, then moving it is not a big deal if you are so inclined.

                            Good luck,
                            LFaR.
                            [size=1][color=#770000]29Feb12:[/color][color=#777700]12GXLTD Auto, ARB Deluxe Winch bar, WARN 9.5xp Winch, IPF 900XS, Tow, Safari snorkel, Front + Rear Recovery points, ARB OME NC Sports, ATZ-4Rib[/color][color=grey], Silver[/color]. [color=orange][b]MaxTrax[/b][/color], [color=maroon]ScanGuage II[/color], [color=blue]ARB CKMA12[/color], [color=deeppink]UHF: GME TX3440 AE4018K1 UNH047SX[/color], [color=darkgreen]Bushranger Air Jack[/color], [color=green]Staun + ARB Deflators[/color], [color=brown]WindCheetah Roof Rack[/color], [color=green]Foxwing[/color], [color=red]Super Charge MRV70, Redarc BCDC1220[/color], [color=darkblue]ARB 60L fridge[/color], [color=blue]MSA Fridge Dropdown slide[/color], [color=darkyellow]DRIFTA Drawers[/color], [color=gold]TJM Bash Plates[/color], [color=brown]TG150[/color].[/size]

                            Comment


                            • #44
                              Originally posted by damonat
                              my digital camera that is used to take before and during photo's decided
                              to die and kept my pic's. so unfortunately i now don't have one of the shape
                              of the bracket. the size needed was 450x100. then fold to the required shape.
                              so i can only show you the after/installed pics.
                              Despite your camera's sudden demise, the pics you posted are great and tell the story.

                              Fantastic job and no drilling involved! Yet another option for folk to ponder. How did you bend your mounting plate? Was that a hammer job over a straight edge, or do you have other specialised equipment?

                              I hope it was only the ARB install pics that were lost... and not wedding photos or baby's first steps. You needed a new camera anyway... right?

                              LFaR.
                              [size=1][color=#770000]29Feb12:[/color][color=#777700]12GXLTD Auto, ARB Deluxe Winch bar, WARN 9.5xp Winch, IPF 900XS, Tow, Safari snorkel, Front + Rear Recovery points, ARB OME NC Sports, ATZ-4Rib[/color][color=grey], Silver[/color]. [color=orange][b]MaxTrax[/b][/color], [color=maroon]ScanGuage II[/color], [color=blue]ARB CKMA12[/color], [color=deeppink]UHF: GME TX3440 AE4018K1 UNH047SX[/color], [color=darkgreen]Bushranger Air Jack[/color], [color=green]Staun + ARB Deflators[/color], [color=brown]WindCheetah Roof Rack[/color], [color=green]Foxwing[/color], [color=red]Super Charge MRV70, Redarc BCDC1220[/color], [color=darkblue]ARB 60L fridge[/color], [color=blue]MSA Fridge Dropdown slide[/color], [color=darkyellow]DRIFTA Drawers[/color], [color=gold]TJM Bash Plates[/color], [color=brown]TG150[/color].[/size]

                              Comment


                              • #45
                                Just a note - I got this compressor with the ARB hose kit... and bugger me.. the T piece does not fit in the compressor.

                                Rang ARB and there was an email released to all ARB's stating there is an issue with a thread inconsitency with SOME of the compressors that they have sold... solution was to take it back on and they will retap (?) the thread and then all is fixed!!

                                Have yet to see it (wife took it in today) but will let you know.

                                One question...... how easy is it to disable the glowing blue light when the lights are on... I have it near the fuse box (over 6ft with long legs) and have never bumped it......

                                Thanks!

                                Nick

                                Comment

                                canli bahis siteleri bahis siteleri ecebet.net
                                mencisport.com
                                antalya escort
                                tsyd.org deneme bonusu veren siteler
                                deneme bonusu veren siteler
                                gaziantep escort
                                gaziantep escort
                                asyabahis maltcasino olabahis olabahis
                                erotik film izle Rus escort gaziantep rus escort
                                atasehir escort tuzla escort
                                sikis sex hatti
                                en iyi casino siteleri
                                deneme bonusu veren siteler
                                casibom
                                deneme bonusu veren siteler
                                deneme bonusu veren siteler
                                betticket istanbulbahis
                                Working...
                                X