 Tweet
Tweet
Re: Home made drawers under $110. Basic measurments added
I decided on something a little different. I did not need drawers as such, just a fridge frame and shelf. I have never played with wood, so I thought I would go for steel. Sorry for the lack of photos and the quality of the photos. I had to quickly use my phone because I only had access to the welder for a day.
I have a 40l Engel and a black widow fridge slide - I wanted a frame for the fridge similar to MickL's and a shelf for a drifta camp kitchen to slide underneath (thanks Whitey1).
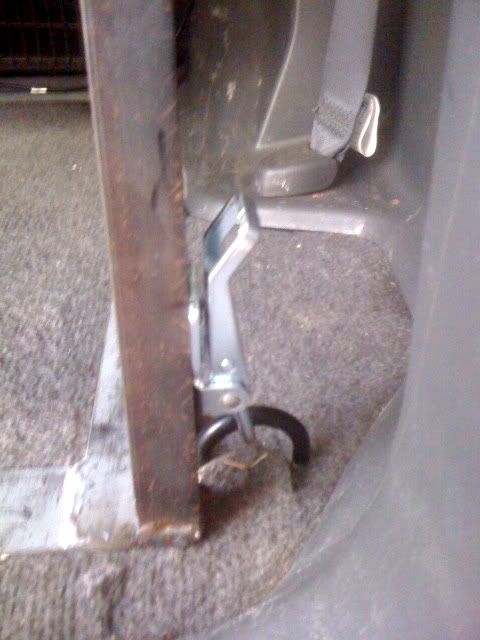
I toyed with the idea of clamping the frame down where the rear mounted seats clamp each side. The frame is solid and unable to be taken apart and it takes the width of the rear of the Prado, and I realised that I would be unable to tilt the whole frame to get it to fit in the back, the poles that would clamp into the rear seat mounts would have to be able to hinge up out of the way so i could fit it into the back. I still may have a look at this but for the time being I cheated and now use 2 over centre latches for the front and a turnbuckle for the rear. I knew I wanted to be able to take the frame in and out quickly and this suits.
I first made a frame up for the floor of the Prado. I wanted the fridge frame to be pulled as far forward as possible so I could store my handwinch in between the fridge frame and the cargo barrier. There is just enough space for the rear door table when the door is closed.
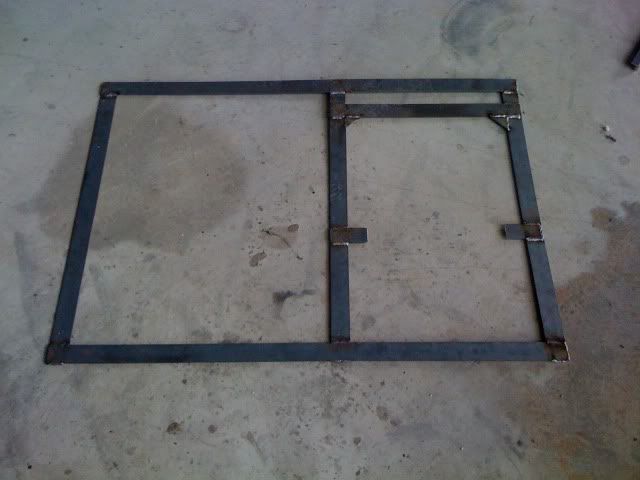
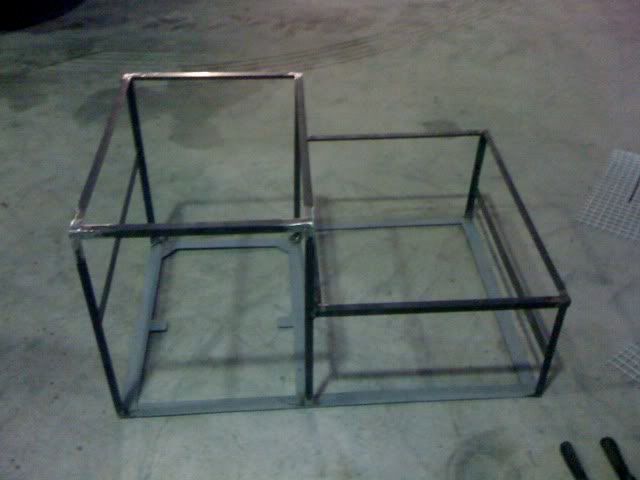
You can see the frame here, the RHS side is for the fridge slide (This is the LHS, it is upside down here). The rear of the frame goes back to the factory ties downs, so if nothing else worked I could simply bolt it to the floor using the standard bolts. On the photo where I show the turnbuckle you can see the hole were I have done just that. This is 40mm x 3 flat bar. I had to weld corners and the lips for where the fridge slide bolts. The angle I used for the frame is 25 x 25 x 3 so I had to leave room on the frame for this each side.
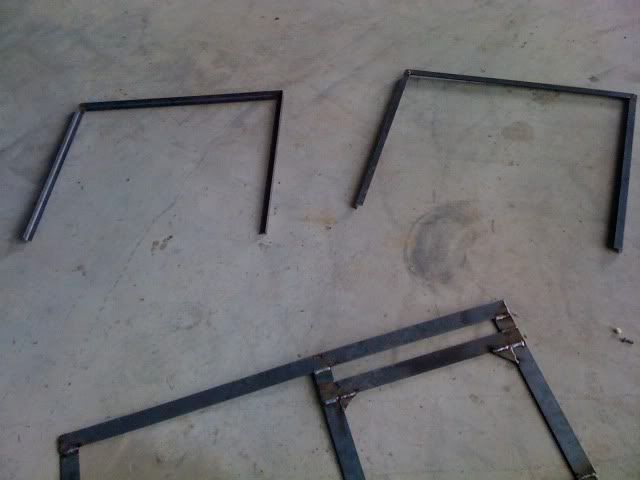
I measure the angle iron and cut 45 degree wedges out of one side to make the bends, then butt welded where the cut meets. These are the two frame uprights.
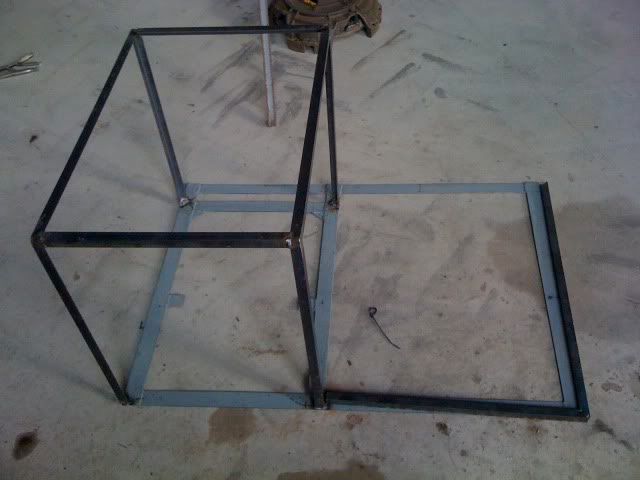
This is where the fridge frame is welded to the bottom flat frame. Also with cross bars added. Also I have begun to make the shelf, this is lying on the flat frame.
This was interesting because the way I had cut wedges out of the angle and bent the right angles on the fridge frame uprights, it created nice clean round right angle corners, but the cross bar at the front had a sharp edge so I had to try weld the cross bar in and then grind a sorter edge on it.

Here is the shelf welded in. It is a bit hard to see here but the shelf goes back further that the fridge frame. The shelf goes back almost to the cargo barrier.
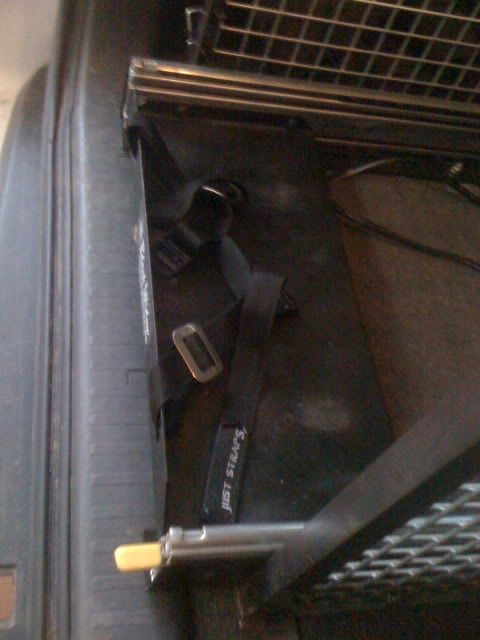
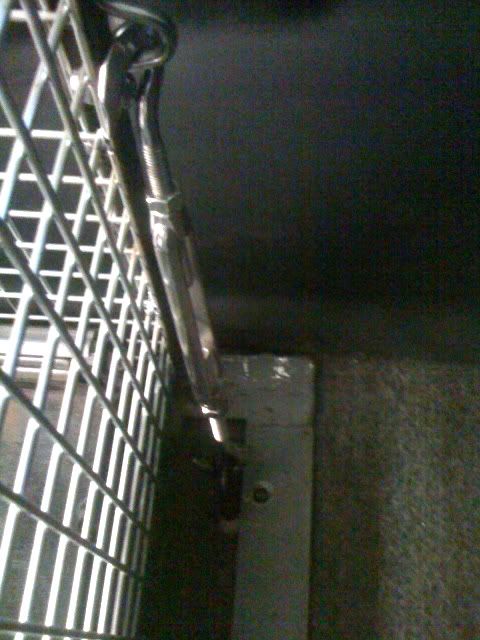
These are the over-centre latches on the front and the turnbuckle on the back.
You will note the space behind the rear of the fridge for the handwinch. I also thought that if I started getting cracks under my dual battery, there should be enough room here for a drycell as others have done. You can see the hole here where I bolted it to the floor using the original tiedown.
I bought 8 metres of both 25 x 25 x 3 angle and 40 x 3 flat and a sheet (2400x2400) of 25 x 25 galv mesh from Senturiun Steel on Cavan Rd (SA) - (No affiliation, they have always been good to deal with and then always an opportunity to go next door to Paramount Browns to find stuff I never knew I needed.) I had remainer of the flat bar but bugger all angle iron left. I only used half of the mesh.
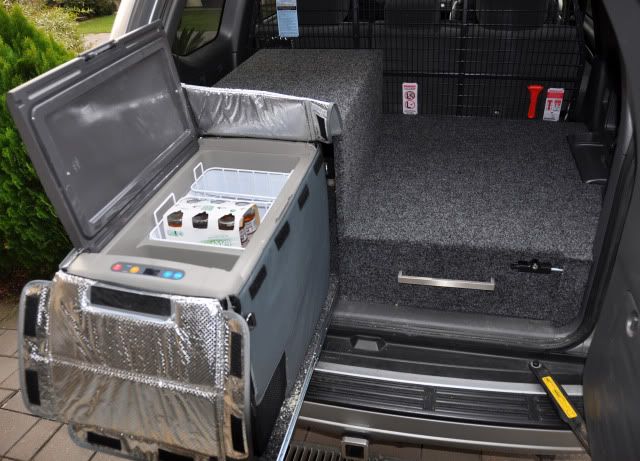
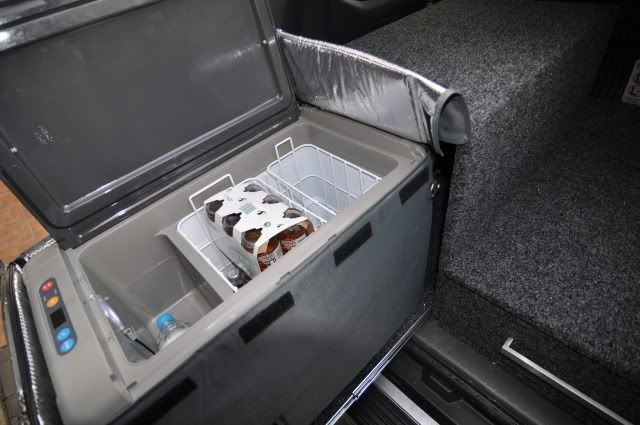
There is my set up. It works for me. The room at the sides are perfect for carrying my TJM recovery kit (it is only about half the width of the ARB one), my air compressor, speedy seal kit, first aid kit, thermos etc. The shelf is a great fit for the drifta kitchen and my double burner cook top. It weighs about 25 kilos, and I can put it in and out myself, it takes less than 5 minutes to put it in and clamp it down.

Thanks
Bev
I decided on something a little different. I did not need drawers as such, just a fridge frame and shelf. I have never played with wood, so I thought I would go for steel. Sorry for the lack of photos and the quality of the photos. I had to quickly use my phone because I only had access to the welder for a day.
I have a 40l Engel and a black widow fridge slide - I wanted a frame for the fridge similar to MickL's and a shelf for a drifta camp kitchen to slide underneath (thanks Whitey1).
I toyed with the idea of clamping the frame down where the rear mounted seats clamp each side. The frame is solid and unable to be taken apart and it takes the width of the rear of the Prado, and I realised that I would be unable to tilt the whole frame to get it to fit in the back, the poles that would clamp into the rear seat mounts would have to be able to hinge up out of the way so i could fit it into the back. I still may have a look at this but for the time being I cheated and now use 2 over centre latches for the front and a turnbuckle for the rear. I knew I wanted to be able to take the frame in and out quickly and this suits.
I first made a frame up for the floor of the Prado. I wanted the fridge frame to be pulled as far forward as possible so I could store my handwinch in between the fridge frame and the cargo barrier. There is just enough space for the rear door table when the door is closed.
You can see the frame here, the RHS side is for the fridge slide (This is the LHS, it is upside down here). The rear of the frame goes back to the factory ties downs, so if nothing else worked I could simply bolt it to the floor using the standard bolts. On the photo where I show the turnbuckle you can see the hole were I have done just that. This is 40mm x 3 flat bar. I had to weld corners and the lips for where the fridge slide bolts. The angle I used for the frame is 25 x 25 x 3 so I had to leave room on the frame for this each side.
I measure the angle iron and cut 45 degree wedges out of one side to make the bends, then butt welded where the cut meets. These are the two frame uprights.
This is where the fridge frame is welded to the bottom flat frame. Also with cross bars added. Also I have begun to make the shelf, this is lying on the flat frame.
This was interesting because the way I had cut wedges out of the angle and bent the right angles on the fridge frame uprights, it created nice clean round right angle corners, but the cross bar at the front had a sharp edge so I had to try weld the cross bar in and then grind a sorter edge on it.
Here is the shelf welded in. It is a bit hard to see here but the shelf goes back further that the fridge frame. The shelf goes back almost to the cargo barrier.
These are the over-centre latches on the front and the turnbuckle on the back.
You will note the space behind the rear of the fridge for the handwinch. I also thought that if I started getting cracks under my dual battery, there should be enough room here for a drycell as others have done. You can see the hole here where I bolted it to the floor using the original tiedown.
I bought 8 metres of both 25 x 25 x 3 angle and 40 x 3 flat and a sheet (2400x2400) of 25 x 25 galv mesh from Senturiun Steel on Cavan Rd (SA) - (No affiliation, they have always been good to deal with and then always an opportunity to go next door to Paramount Browns to find stuff I never knew I needed.) I had remainer of the flat bar but bugger all angle iron left. I only used half of the mesh.
There is my set up. It works for me. The room at the sides are perfect for carrying my TJM recovery kit (it is only about half the width of the ARB one), my air compressor, speedy seal kit, first aid kit, thermos etc. The shelf is a great fit for the drifta kitchen and my double burner cook top. It weighs about 25 kilos, and I can put it in and out myself, it takes less than 5 minutes to put it in and clamp it down.
Thanks
Bev


Comment