 Tweet
Tweet
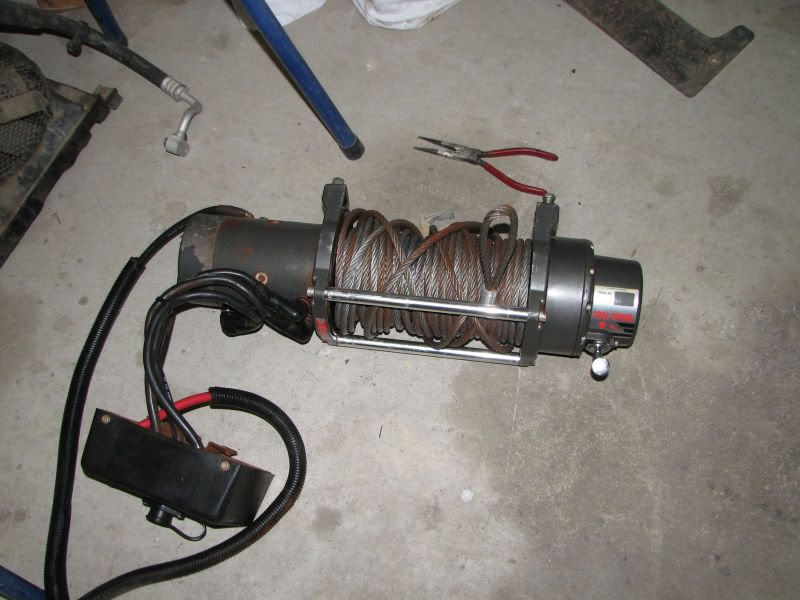
I had a bit of luck recently when I inherited a second hand Warn XD9000 winch ... well, it was actually a large block of dried out North West mud ... but there was mention of there being a winch inside there somewhere :shock: :? ... and there was.
It took a lot of cleaning but, eventually, there emerged a winch. Wired up to a battery it would spool out but not in ... so it was time to learn how to rebuid a winch. A search on Google (for "Warn XD9000 Service Manual") revealed a 35 page PDF file Here. If that is unavailable you can always go to the Warn web site and leave an email request for the manual. They usually follow up within a couple of days.
Cleaned out the gearbox and repacked it. Pulled apart the motor and found that, while it had been immersed it hadn't really suffered any damage except for some external corrosion which cleaned up quite well. There had been water trapped inside one of the horizontal fairlead rollers but they cleaned up OK and were greased up and put back together. The top layer of the rope cleaned up OK and the layers underneath were bright and shiny gal - like they had never seen daylight.
I had to pull apart the control box and have a look at the solenoids to see which one, or more, was sticking. Thanks also to Leachy for giving me a hand to pick which one was which. Once everything was cleaned up, and all the contacts properly cleaned, the winch decided to work properly - IN and OUT.

Then I needed a winch cradle for the Sovereign bar .. $145 + GST from Toyota. When I told Bek how much I had money I had saved towards new curtains .. by not buying a winch ... she whipped out the money straight away and I had a brand new winch cradle. :lol: :lol:

Sovereign Bullbar Winch Cradle. Accessory part No:PZQ29 601WC
Components list
1. Winch Cradle Qty: 1 PZQ29 601WC
2. Shim Qty: 2 PZQ29 601WCSH
3. Stay bracket Qty: 2 PZQ29 601WCMB
4. Top stay Qty: 2 PZQ29 601WCTS
5. Bottom stay Qty: 2 PZQ29 601WCBS
6. Plug bracket Qty: 1 PZQ29 601WCPB
7. Fitting kit (lots of bolts) Qty: 1 PZQ29 601WCFK
(Note: The plug bracket is for the Toyota superwinch ... so its still siting in its plastic wrap in my spare parts bin)
Drew's post - above - was a godsend. The winch cradle fitting instructions claim that the install takes approx 40 minutes (40 minutes my arse - more like 4 hours ... and then add some if you run into any dramas or want to do a really neat job of it ... getting the bar to line up properly afterwards can take an hour or more just by itself) and mention nothing about needing 4 burly mates to help lift the bar, cradle and winch into place while you try to line up the bolts. The kit is also designed for the Toyota Superwinch so, while the Warn is a perfect fit, the supplied bolts are too short and mounting the control box creates a whole new set of challenges.
First - Remove the 4 bolts on each side .. and the nut plates, box packers and shims. Keep all the bits handy in a bucket as a lot of the washers get re-used even if the bolts don't.
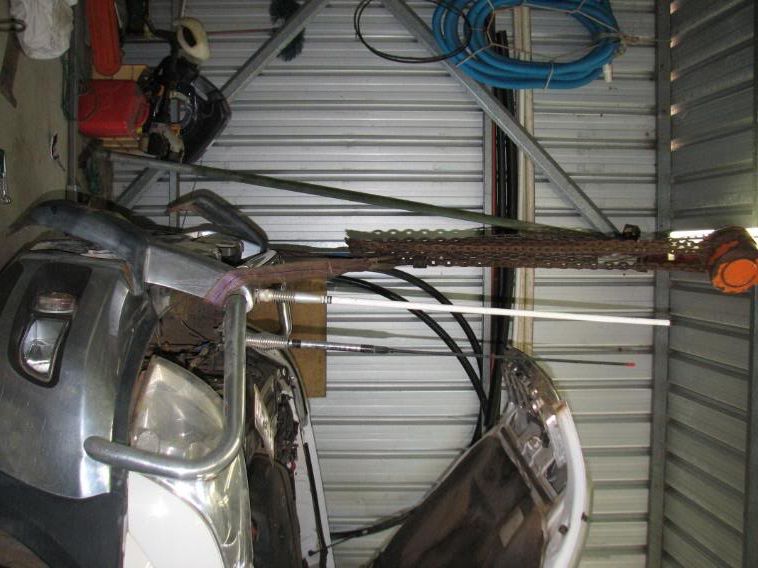
Its a really good idea to hang everything off a sling. I used a block and tackle.
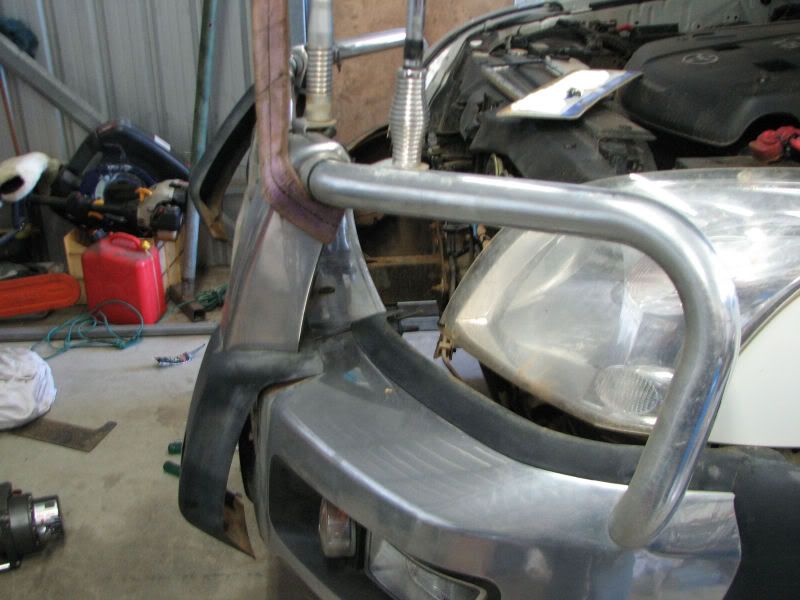

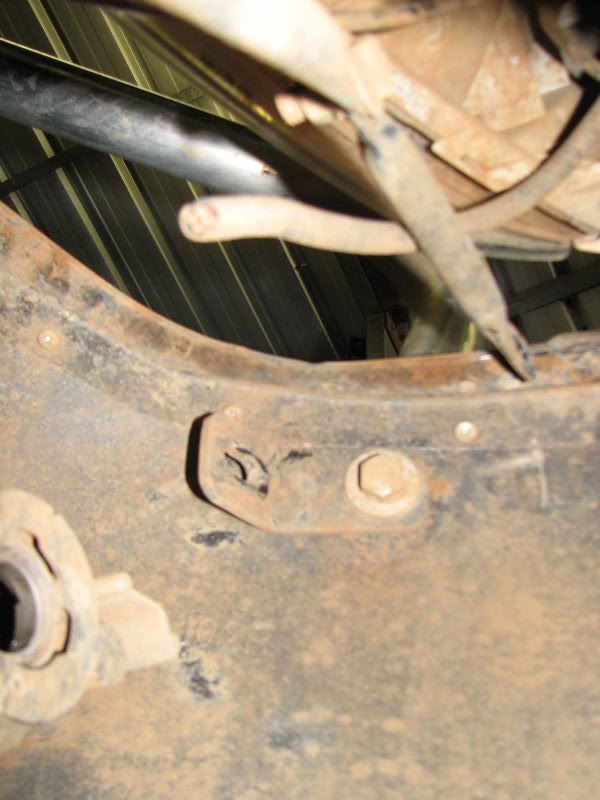
The support struts need to be disconnected, on each side, so that the bar can swing far enough away from the from of the car ... and give you some much needed space.

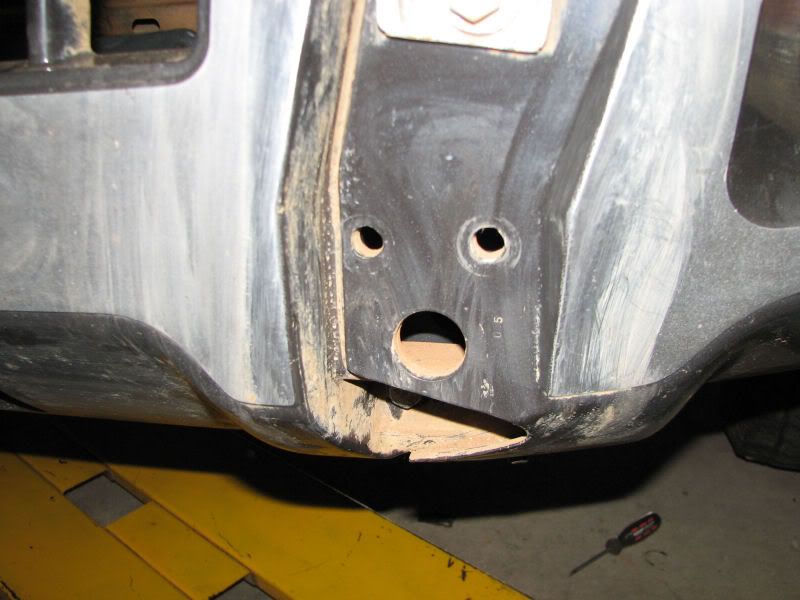
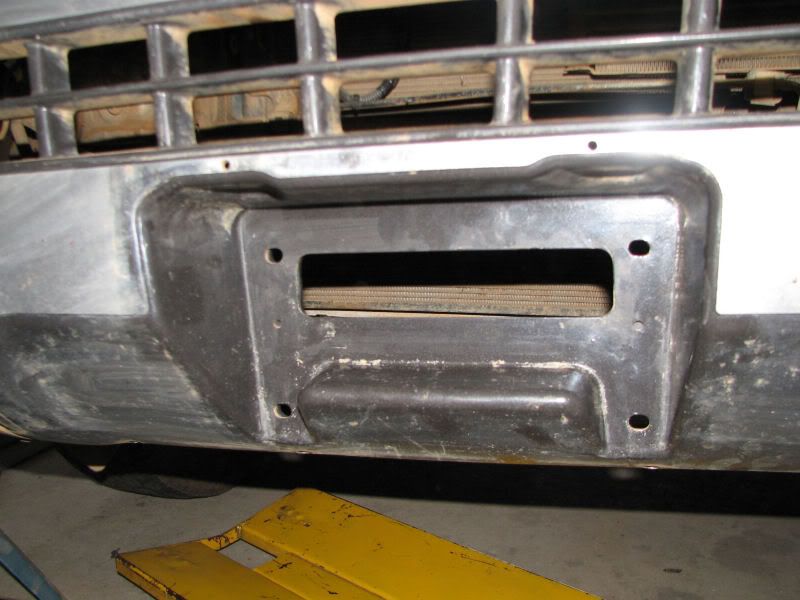
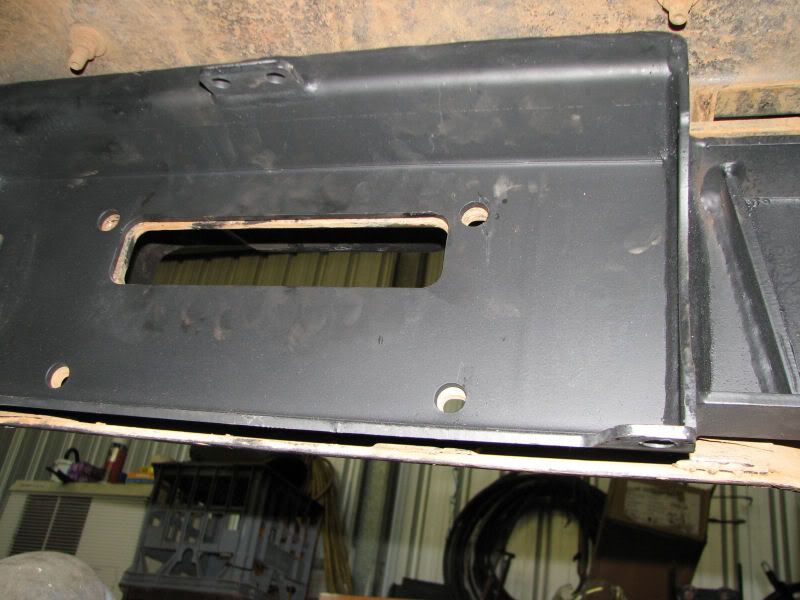
Also need to remove the number plate and the cover from the fairlead opening.
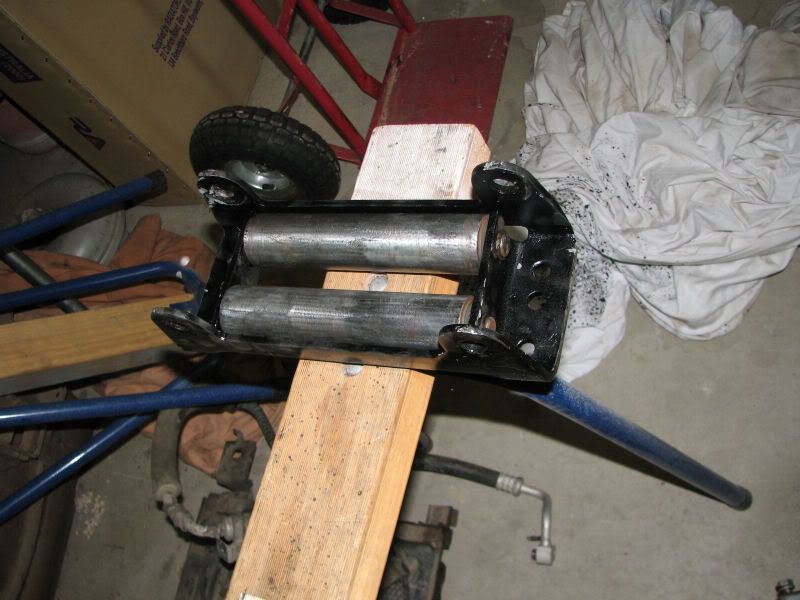
The winch was laid out on the floor.
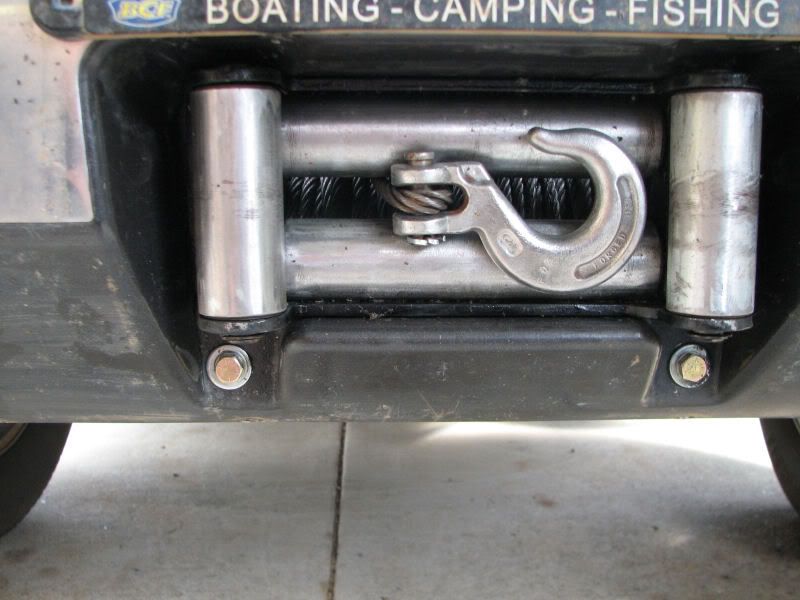
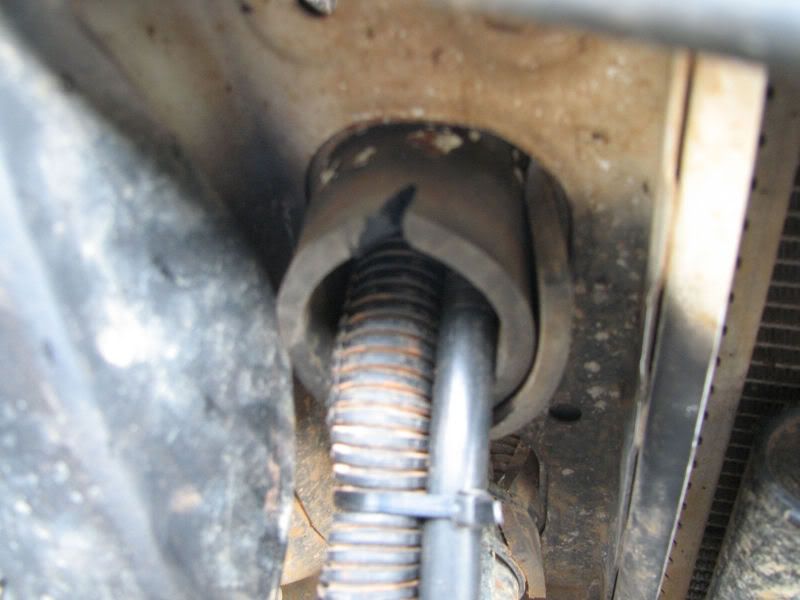
... and the fairlead needed some adjusting. The Superwinch fairlead is constructed to fit the Art Decore space in the Sovereign bar. A non - Toyota fairlead will need a little grinder customizing to fit in the gap.
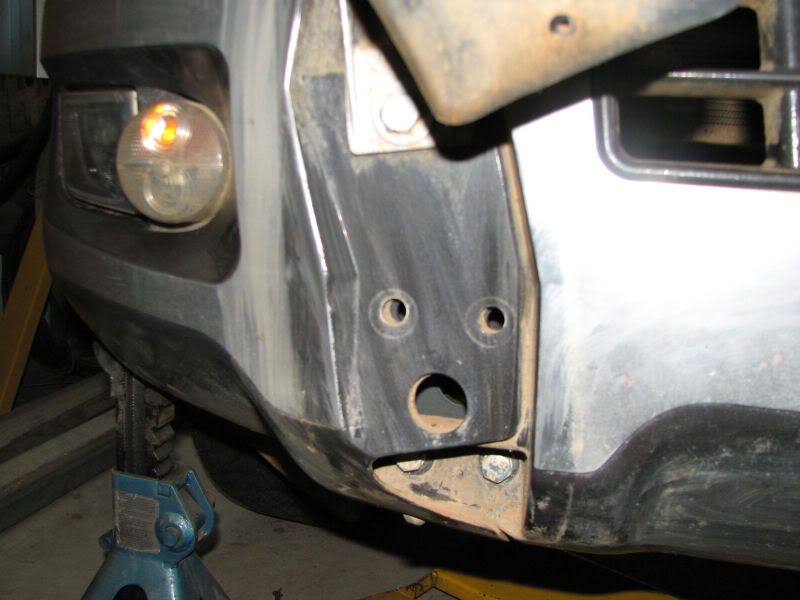
Next - the winch cradle is lifted in behind the bumper. Fit the two shims on each side (2 new ones are supplied and you reuse your 2 old ones). Fit your old 35mm bolts to the bottom holes with Whizlock nuts and tighten - to temporarilly hold the cradle in place while the winch and fairlead are fitted.
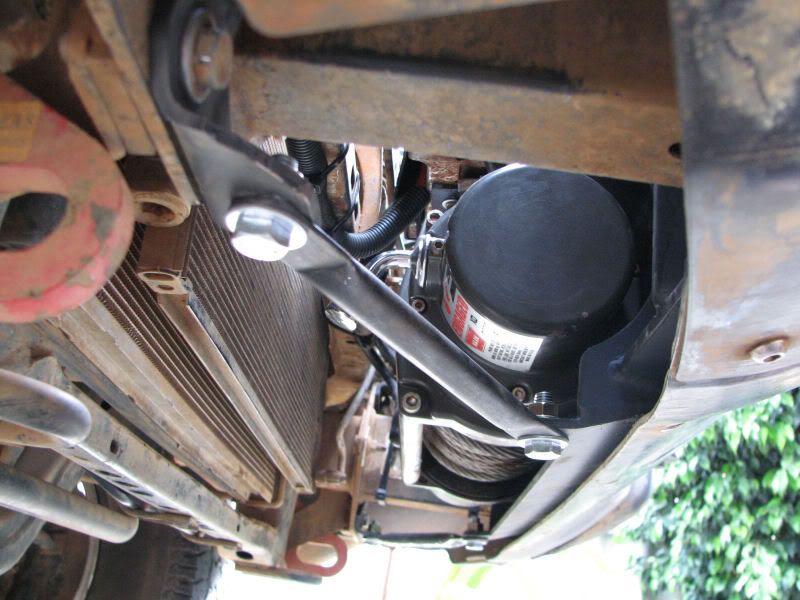
Fit the winch ... with the motor on the left and the wire feeding off the top of the drum. Fit bolts into the 2 bottom holes.
Remove the 2 vertical rollers and one horizontal roller from the fairlead and feed the cable through. Refit the horizontal roller. Fit the 2 bolts through the fairlead and into the top holes on the winch. Then have fun trying to fit the vertical rollers. Make sure you have some decent sirclip pliers as this can get very frustrating :evil:
At this point I fitted the bar back on the car. In hinsight I would have had more space to play with fitting the control box ... but "Oh Well" - S%#T happens.
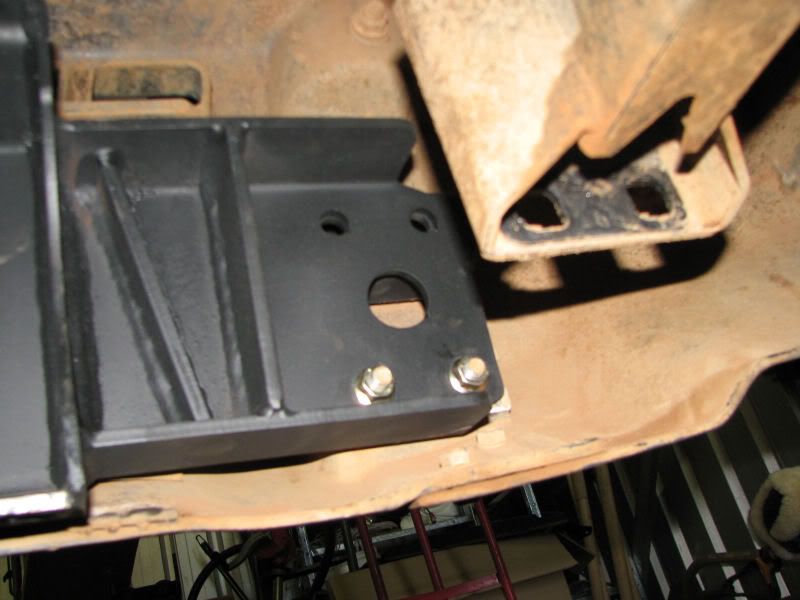
Position the nut plates, remove the temporary bolts hold the cradle to the bullbar, and lift the whole assembly back into position. Fit 40 mm bolts into the bottom holes and 100 mm bolts into the top holes. Align bullbar and tighten. Remember to refit the top bolts from the side suport struts.
Fit the stay brackets and top and bottom support stays.
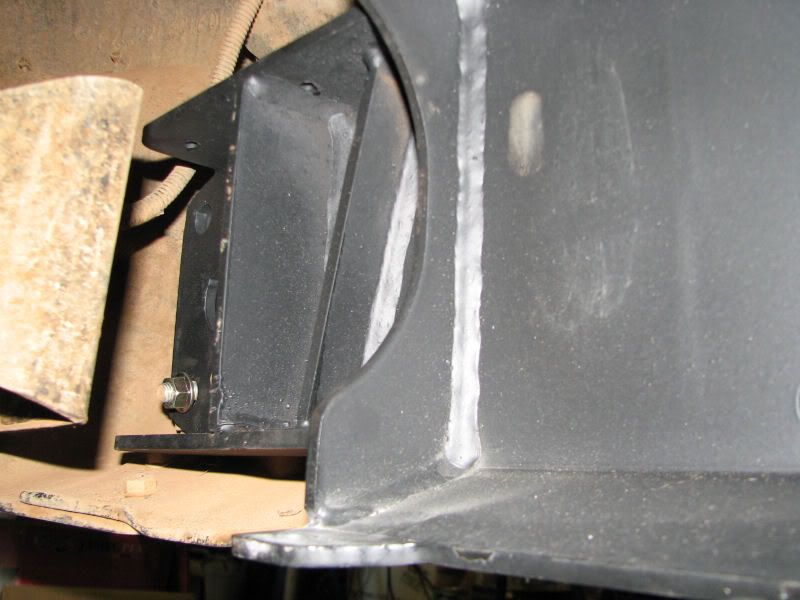
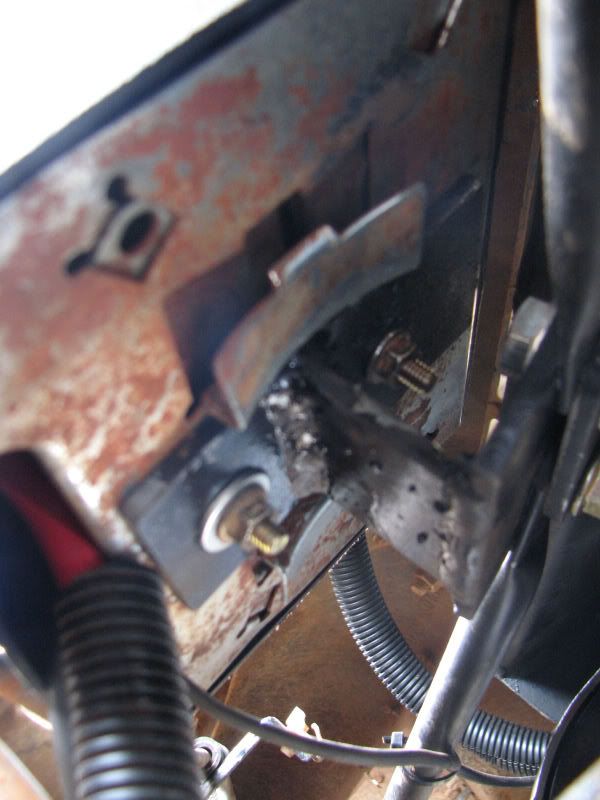
There was a bit of 50x 5 mm flat bar floating around so I made up a bracket that picked up the 2 top stay holes and provided a flat stable support for the control box to bolt to. Pardon the really amateur drawing ...
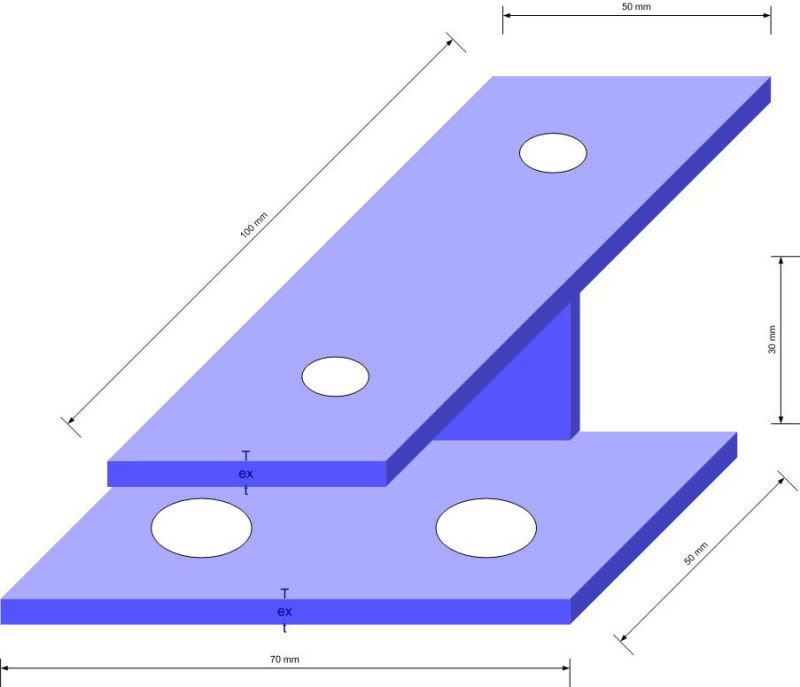
... but it works a treat ...
In the end it all seemed to fit quite nicely and cabled up quite easily.
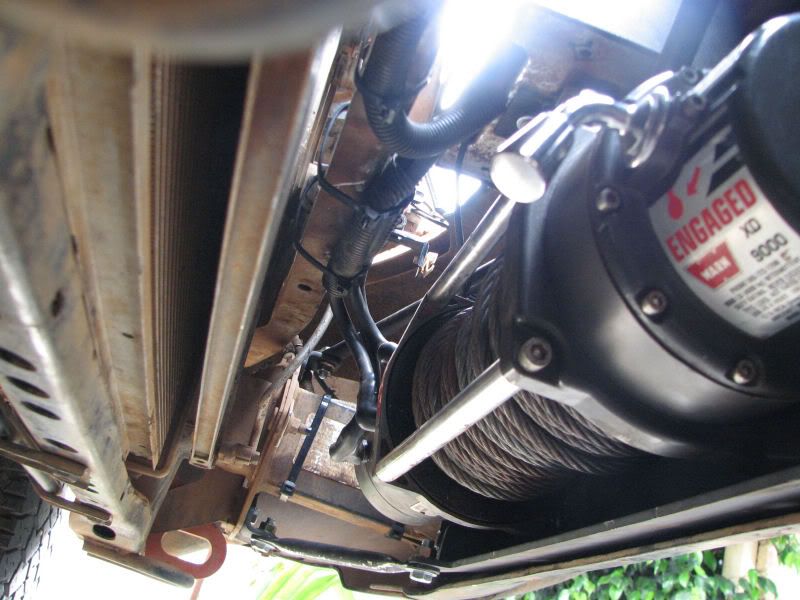
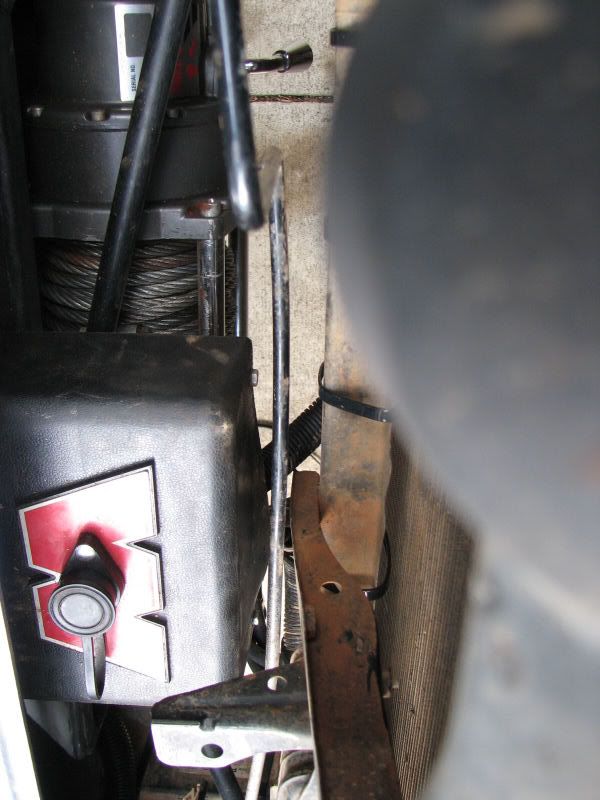

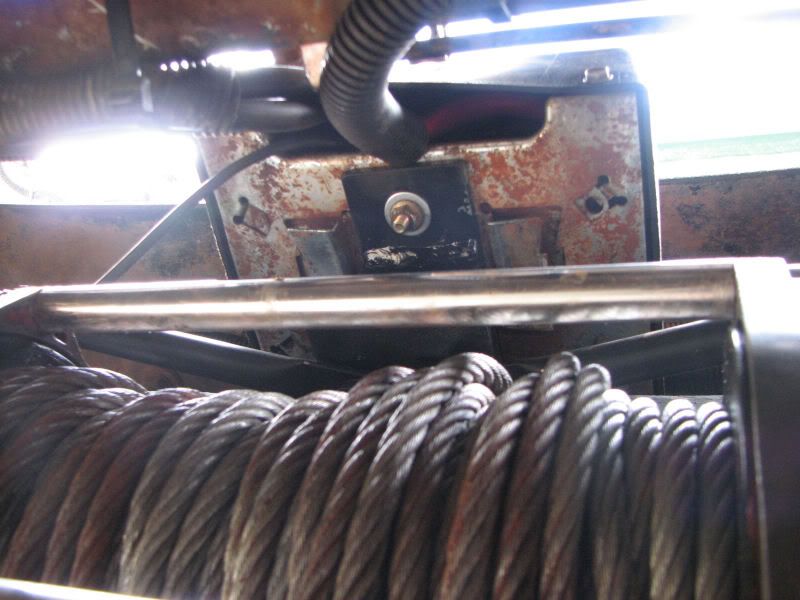
Not wanting to experiment with the effects of nearly 1000 Amps arcing out through a chaffed cable ... and seeing how easy it is to fry every electrical component in the car ... I did my usual over-paranoid cable wrapping .... including some heavy duty rubber where the cables pass through the holes in the body work. That and about 20 Kg of cable ties. :lol: :lol:

I then had a bit of fun winching the car across Marty's back yard :lol: :lol:
Future thoughts include ...
... wiring the Redarc isolator into a relay so that activating the winch remote trips in the solenoid and allows the winch to use both batteries.
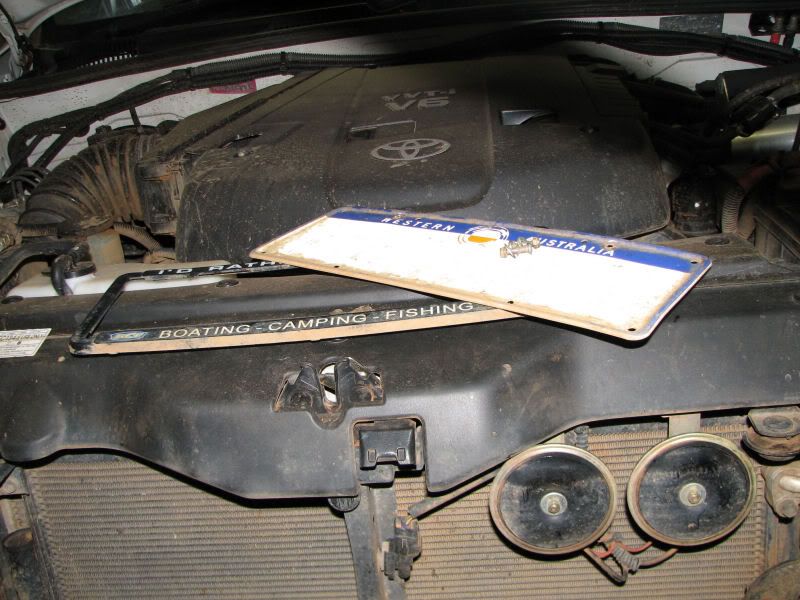
... possibly locating the control box up into the engine bay and running some extension wiring down to the bullbar for the remote plug.
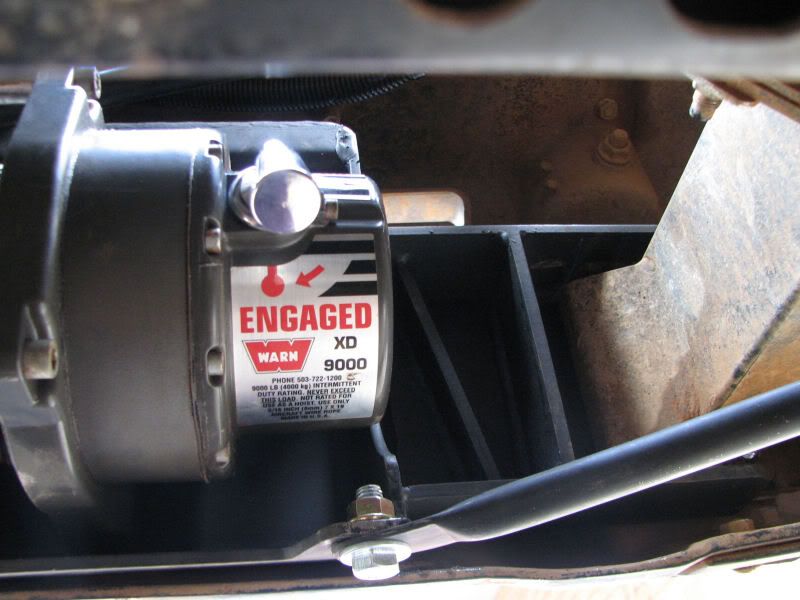
I have heard a lot of rumour lately ... maybe urban myth .. I don't know .. about yahoos running out your winch cable over the car's roof and back around the diff ... then either using their own controller of shorting out the contacts in the remote plug ... and cutting your car in half with your own winch. So, I figured .. for now at least ... that I would keep the control box and remote plug out of sight and it can only be accessed by opening the bonnet. When the radiator protection plate is in place the clutch lever can only be reached by opening the bonnet.
The only other thing I have to think about is the front suspension. I only recently put in an OME lift with a set of 884 springs in the front ... there was no possibility of a winch arriving so soon :? So now I will need to upgrade the front springs to a set of 885's. When I first put the 884's in the height went from 690 (super sagged) to 810 mm. Over the last few weeks both sides had settled nicely to 790 and 795 mm. With all the additional weight they now sit at 780 mm (passenger) and 785 mm (driver) .... and I reckon I'd like 20 mm of that lift back 8) :lol:
Thank you for listening to my news :lol: :lol:
Cheers
Chippy
It took a lot of cleaning but, eventually, there emerged a winch. Wired up to a battery it would spool out but not in ... so it was time to learn how to rebuid a winch. A search on Google (for "Warn XD9000 Service Manual") revealed a 35 page PDF file Here. If that is unavailable you can always go to the Warn web site and leave an email request for the manual. They usually follow up within a couple of days.
Cleaned out the gearbox and repacked it. Pulled apart the motor and found that, while it had been immersed it hadn't really suffered any damage except for some external corrosion which cleaned up quite well. There had been water trapped inside one of the horizontal fairlead rollers but they cleaned up OK and were greased up and put back together. The top layer of the rope cleaned up OK and the layers underneath were bright and shiny gal - like they had never seen daylight.
I had to pull apart the control box and have a look at the solenoids to see which one, or more, was sticking. Thanks also to Leachy for giving me a hand to pick which one was which. Once everything was cleaned up, and all the contacts properly cleaned, the winch decided to work properly - IN and OUT.
Then I needed a winch cradle for the Sovereign bar .. $145 + GST from Toyota. When I told Bek how much I had money I had saved towards new curtains .. by not buying a winch ... she whipped out the money straight away and I had a brand new winch cradle. :lol: :lol:
Sovereign Bullbar Winch Cradle. Accessory part No:PZQ29 601WC
Components list
1. Winch Cradle Qty: 1 PZQ29 601WC
2. Shim Qty: 2 PZQ29 601WCSH
3. Stay bracket Qty: 2 PZQ29 601WCMB
4. Top stay Qty: 2 PZQ29 601WCTS
5. Bottom stay Qty: 2 PZQ29 601WCBS
6. Plug bracket Qty: 1 PZQ29 601WCPB
7. Fitting kit (lots of bolts) Qty: 1 PZQ29 601WCFK
(Note: The plug bracket is for the Toyota superwinch ... so its still siting in its plastic wrap in my spare parts bin)
Drew's post - above - was a godsend. The winch cradle fitting instructions claim that the install takes approx 40 minutes (40 minutes my arse - more like 4 hours ... and then add some if you run into any dramas or want to do a really neat job of it ... getting the bar to line up properly afterwards can take an hour or more just by itself) and mention nothing about needing 4 burly mates to help lift the bar, cradle and winch into place while you try to line up the bolts. The kit is also designed for the Toyota Superwinch so, while the Warn is a perfect fit, the supplied bolts are too short and mounting the control box creates a whole new set of challenges.
First - Remove the 4 bolts on each side .. and the nut plates, box packers and shims. Keep all the bits handy in a bucket as a lot of the washers get re-used even if the bolts don't.
Its a really good idea to hang everything off a sling. I used a block and tackle.
The support struts need to be disconnected, on each side, so that the bar can swing far enough away from the from of the car ... and give you some much needed space.
Also need to remove the number plate and the cover from the fairlead opening.
The winch was laid out on the floor.
... and the fairlead needed some adjusting. The Superwinch fairlead is constructed to fit the Art Decore space in the Sovereign bar. A non - Toyota fairlead will need a little grinder customizing to fit in the gap.
Next - the winch cradle is lifted in behind the bumper. Fit the two shims on each side (2 new ones are supplied and you reuse your 2 old ones). Fit your old 35mm bolts to the bottom holes with Whizlock nuts and tighten - to temporarilly hold the cradle in place while the winch and fairlead are fitted.
Fit the winch ... with the motor on the left and the wire feeding off the top of the drum. Fit bolts into the 2 bottom holes.
Remove the 2 vertical rollers and one horizontal roller from the fairlead and feed the cable through. Refit the horizontal roller. Fit the 2 bolts through the fairlead and into the top holes on the winch. Then have fun trying to fit the vertical rollers. Make sure you have some decent sirclip pliers as this can get very frustrating :evil:
At this point I fitted the bar back on the car. In hinsight I would have had more space to play with fitting the control box ... but "Oh Well" - S%#T happens.
Position the nut plates, remove the temporary bolts hold the cradle to the bullbar, and lift the whole assembly back into position. Fit 40 mm bolts into the bottom holes and 100 mm bolts into the top holes. Align bullbar and tighten. Remember to refit the top bolts from the side suport struts.
Fit the stay brackets and top and bottom support stays.
There was a bit of 50x 5 mm flat bar floating around so I made up a bracket that picked up the 2 top stay holes and provided a flat stable support for the control box to bolt to. Pardon the really amateur drawing ...
... but it works a treat ...
In the end it all seemed to fit quite nicely and cabled up quite easily.
Not wanting to experiment with the effects of nearly 1000 Amps arcing out through a chaffed cable ... and seeing how easy it is to fry every electrical component in the car ... I did my usual over-paranoid cable wrapping .... including some heavy duty rubber where the cables pass through the holes in the body work. That and about 20 Kg of cable ties. :lol: :lol:
I then had a bit of fun winching the car across Marty's back yard :lol: :lol:
Future thoughts include ...
... wiring the Redarc isolator into a relay so that activating the winch remote trips in the solenoid and allows the winch to use both batteries.
... possibly locating the control box up into the engine bay and running some extension wiring down to the bullbar for the remote plug.
I have heard a lot of rumour lately ... maybe urban myth .. I don't know .. about yahoos running out your winch cable over the car's roof and back around the diff ... then either using their own controller of shorting out the contacts in the remote plug ... and cutting your car in half with your own winch. So, I figured .. for now at least ... that I would keep the control box and remote plug out of sight and it can only be accessed by opening the bonnet. When the radiator protection plate is in place the clutch lever can only be reached by opening the bonnet.
The only other thing I have to think about is the front suspension. I only recently put in an OME lift with a set of 884 springs in the front ... there was no possibility of a winch arriving so soon :?
Thank you for listening to my news :lol: :lol:
Cheers
Chippy
Comment