 Tweet
Tweet
I wanted a roof rack that I could fit in 10 or 15 minutes so that it wasn't on the roof the whole time. Carpark heights are an issue as is the added wind drag. We don't use the roof rack other than camping trips or taking kayaks away so it was important that the system be simple. We also don't carry much weight so a dedicated roof mounted system to use the full 100kg capacity wasn't needed.
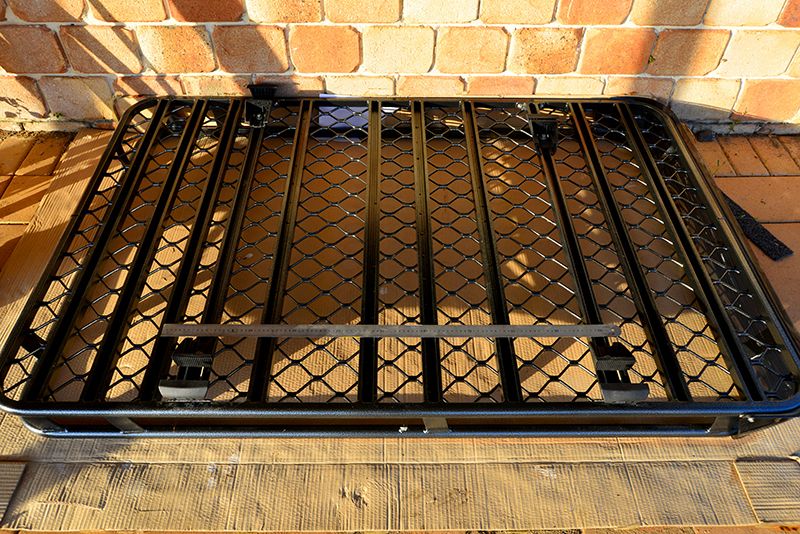
I finished off fitting the 1800 x 1200 Jaram Tracklander to the factory rails today. I was going to try and fit 3 sets of feet on the rails but the spacing just isn't right, there is of course no need so in the end I gave in.
The Tracklander is made for either direct fitment to the roof with Rhino feet or fitting to the factory NS rails with Rhino CXB feet. Rhino have not tested the CXB feet to the 150 and do not recommend them however Jaram are happy and a few PPers have used them. The 150 rails are larger and at an angle compared with the 120 but having fitted the rack a few times now I am confident the CXB feet will work well.
The first problem I encountered was that the rails welded into the bottom of the Tracklander weren't in the correct position to mount the rack to the factory rails. You could mount it but the feet were barely 600 apart which left huge overhangs at each end. I contacted Jaram and arranged for another couple of rails to be welded with end plates and then sent to me for fitting. Jaram were very good and if you can wait they will custom make the set up with welded rails. I don't know what extra cost will be involved but powder coat to match, freight and two rails was a couple of hundred.
After careful measuring I decided the absolute maximum centre distance would be a little over 900 apart. So I settled on the magic number of 890. It actually came out a little longer than that but close enough. I had a problem initially because the new additional rails had been made by cutting off the width of the end plates and then welding these together so when they arrived the rails didn't fit. A combination of a few mm of heavy powder coat and shrinkage on the rack base that wasn't allowed for. Another call to Jaram and I was ok to grind a couple of mm of each end plate to suit. This was quite frustrating because I had the materials and gear to make these myself but decided to keep Jaram in the loop for anyone who wanted to do this with factory bits. Anyway no problem, rails marked and fitted. To fit the rails I drilled and tapped M8 into the bottom frame of the roof rack which is a D section in aluminium and 3mm thick. Loctite and lock washers fitted with allen key head screws and the extra rails were installed. Not much leeway for fitting with the end plates being predrilled and only 0.5mm tolerance on position. Anyway all fitted without having to go larger on the endplate holes.
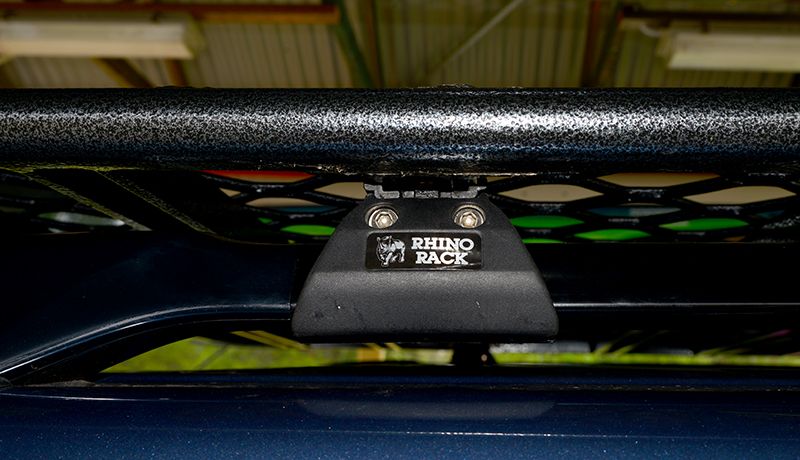
These rails take the place of the conventional crossbars and are integral to the roof rack itself keeping height down. The CXB feet have a design to allows the feet to slide into the cross bar extrusion but the little wings need to be cut off to let the feet fit up into the Jaram rails. There is no downside to this as the feet are securely bolted to the rails with an M8 bolt and captive nut.
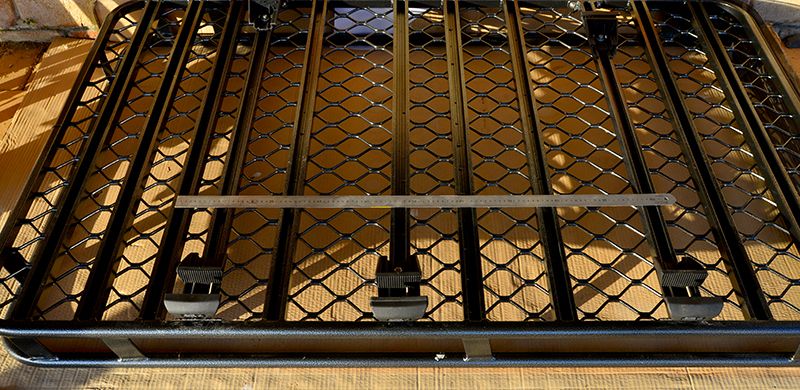
I trial fitted this to the car last weekend and found that space under the rack to get to and tighten the crossbar attachment bolts was very tight. The camber (arch) in the factory rails also meant I could fit a 3rd foot along the way so I decided to buy some spacers and space the front and rear feet 6mm. This would compensate for the rail camber and let me mount the extra feet as well as giving me more room to swing a spanner.
It became pretty clear that I could not mount the roof rack centrally (or a little to the rear as I have done) and still fit the 3rd set of CXB feet as below so that idea went.
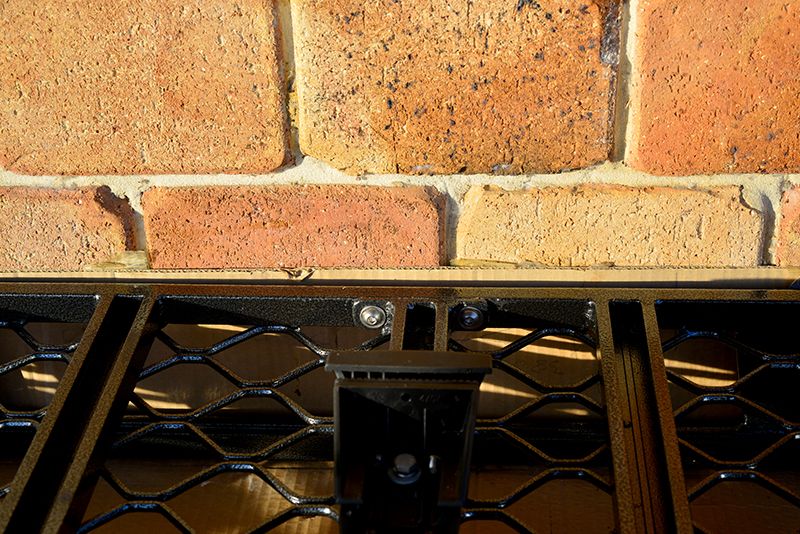
The 6mm spacer is easily seen here.
The spacers are held in with M6 screws and form a solid addition to the CXB feet.
I finished off fitting the 1800 x 1200 Jaram Tracklander to the factory rails today. I was going to try and fit 3 sets of feet on the rails but the spacing just isn't right, there is of course no need so in the end I gave in.
The Tracklander is made for either direct fitment to the roof with Rhino feet or fitting to the factory NS rails with Rhino CXB feet. Rhino have not tested the CXB feet to the 150 and do not recommend them however Jaram are happy and a few PPers have used them. The 150 rails are larger and at an angle compared with the 120 but having fitted the rack a few times now I am confident the CXB feet will work well.
The first problem I encountered was that the rails welded into the bottom of the Tracklander weren't in the correct position to mount the rack to the factory rails. You could mount it but the feet were barely 600 apart which left huge overhangs at each end. I contacted Jaram and arranged for another couple of rails to be welded with end plates and then sent to me for fitting. Jaram were very good and if you can wait they will custom make the set up with welded rails. I don't know what extra cost will be involved but powder coat to match, freight and two rails was a couple of hundred.
After careful measuring I decided the absolute maximum centre distance would be a little over 900 apart. So I settled on the magic number of 890. It actually came out a little longer than that but close enough. I had a problem initially because the new additional rails had been made by cutting off the width of the end plates and then welding these together so when they arrived the rails didn't fit. A combination of a few mm of heavy powder coat and shrinkage on the rack base that wasn't allowed for. Another call to Jaram and I was ok to grind a couple of mm of each end plate to suit. This was quite frustrating because I had the materials and gear to make these myself but decided to keep Jaram in the loop for anyone who wanted to do this with factory bits. Anyway no problem, rails marked and fitted. To fit the rails I drilled and tapped M8 into the bottom frame of the roof rack which is a D section in aluminium and 3mm thick. Loctite and lock washers fitted with allen key head screws and the extra rails were installed. Not much leeway for fitting with the end plates being predrilled and only 0.5mm tolerance on position. Anyway all fitted without having to go larger on the endplate holes.

These rails take the place of the conventional crossbars and are integral to the roof rack itself keeping height down. The CXB feet have a design to allows the feet to slide into the cross bar extrusion but the little wings need to be cut off to let the feet fit up into the Jaram rails. There is no downside to this as the feet are securely bolted to the rails with an M8 bolt and captive nut.

I trial fitted this to the car last weekend and found that space under the rack to get to and tighten the crossbar attachment bolts was very tight. The camber (arch) in the factory rails also meant I could fit a 3rd foot along the way so I decided to buy some spacers and space the front and rear feet 6mm. This would compensate for the rail camber and let me mount the extra feet as well as giving me more room to swing a spanner.
It became pretty clear that I could not mount the roof rack centrally (or a little to the rear as I have done) and still fit the 3rd set of CXB feet as below so that idea went.

The 6mm spacer is easily seen here.

The spacers are held in with M6 screws and form a solid addition to the CXB feet.


Comment