 Tweet
Tweet
Heres a little mod to turn your Prado`s reversing camera into a rear view camera on demand.
The Rear Vision Camera is standard in GXL, VX and SX models. However it is only activated when selecting reverse, wouldn`t it be nice to see what`s behind you at other times, like when offroad or keeping an eye on your trailer?
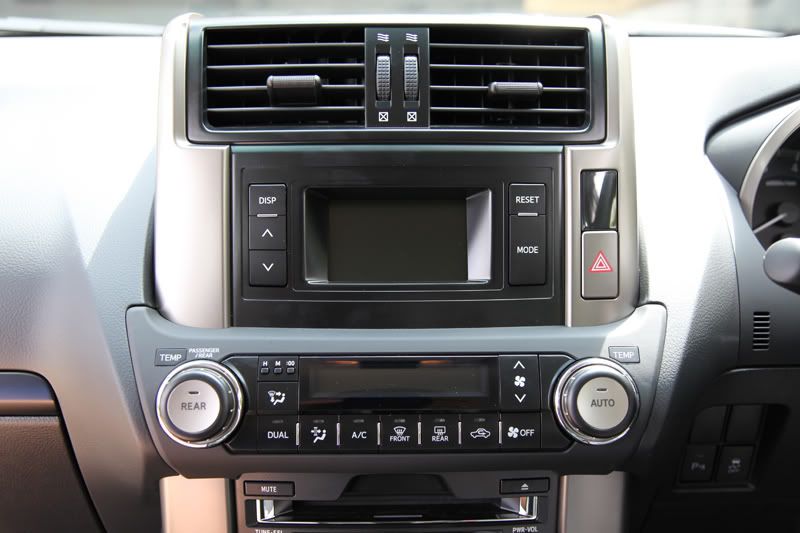
Your display needs to look like this; a 4.2" screen as found in the GXL, VX and SX models. - NOT the Kakadu or ZR Models.
1) To begin, ensure ignition power if OFF, then remove the clock panel - firmly grip and pull outward.

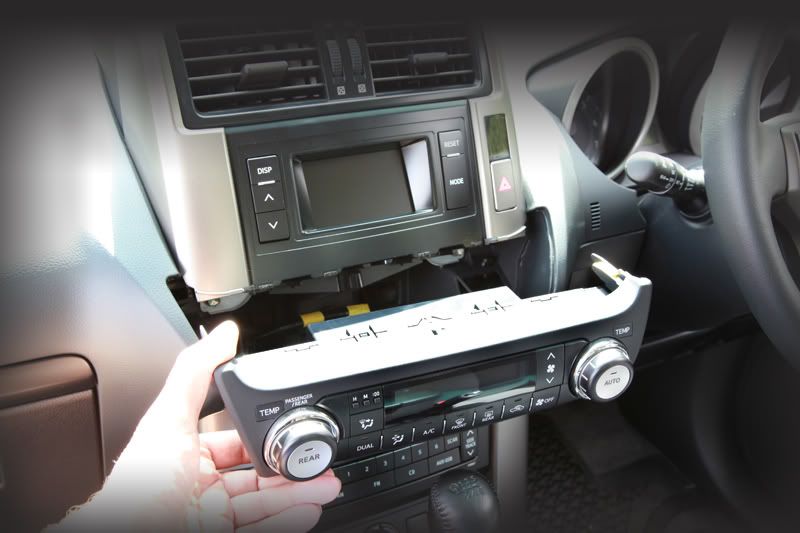
2) Now you can see two bolts, these are securing the screen unit into place, remove these using a 10mm socket.
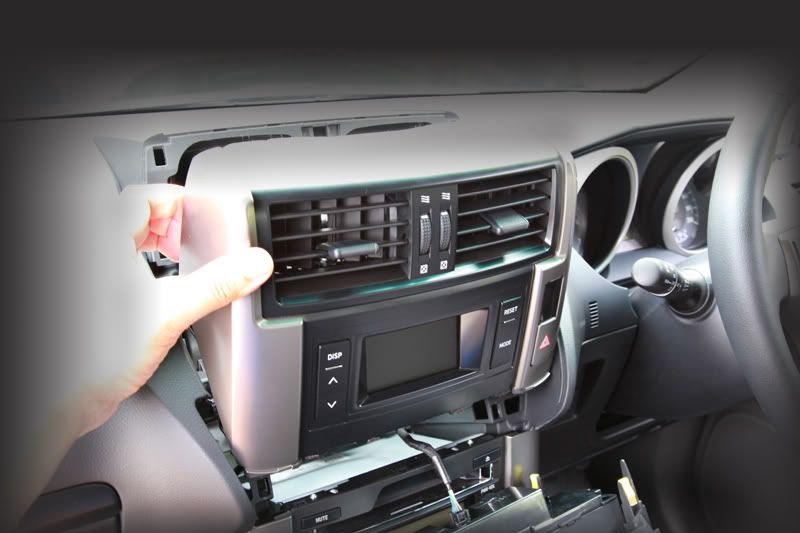
3) Firmly but gently, grip and pull the entire screen and vent pod outwards.
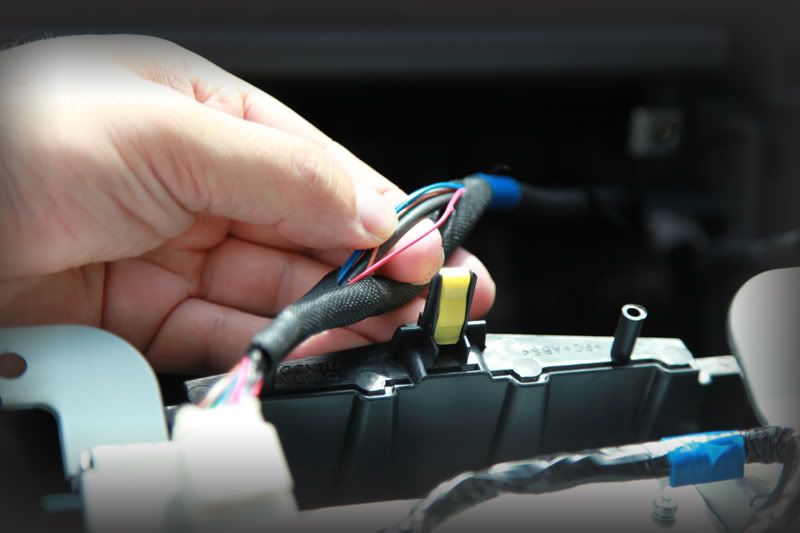
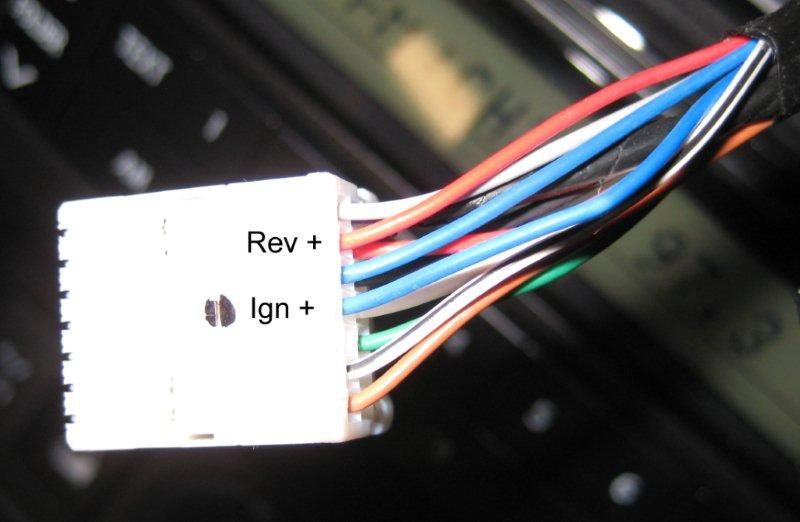
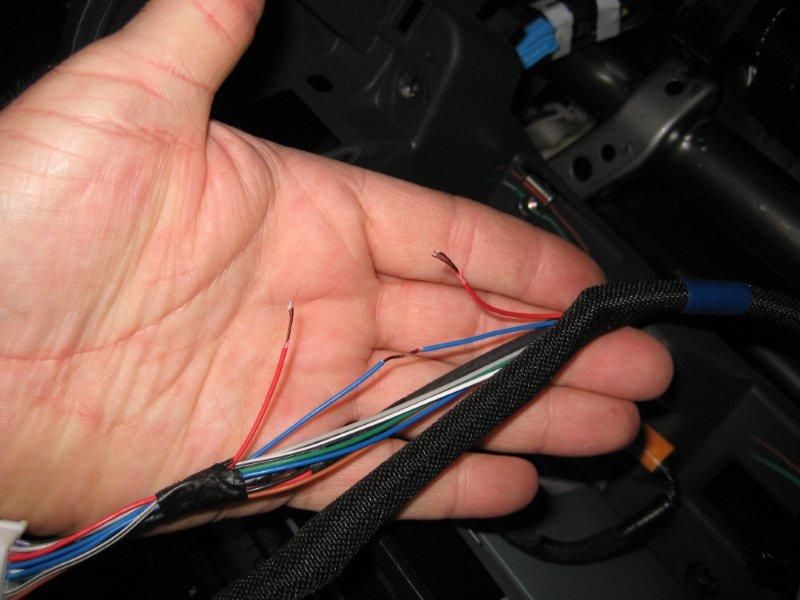
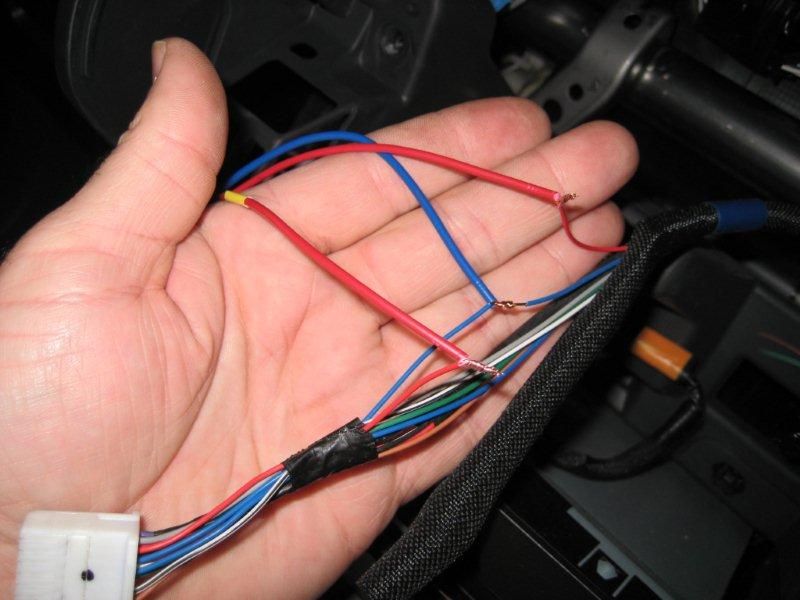
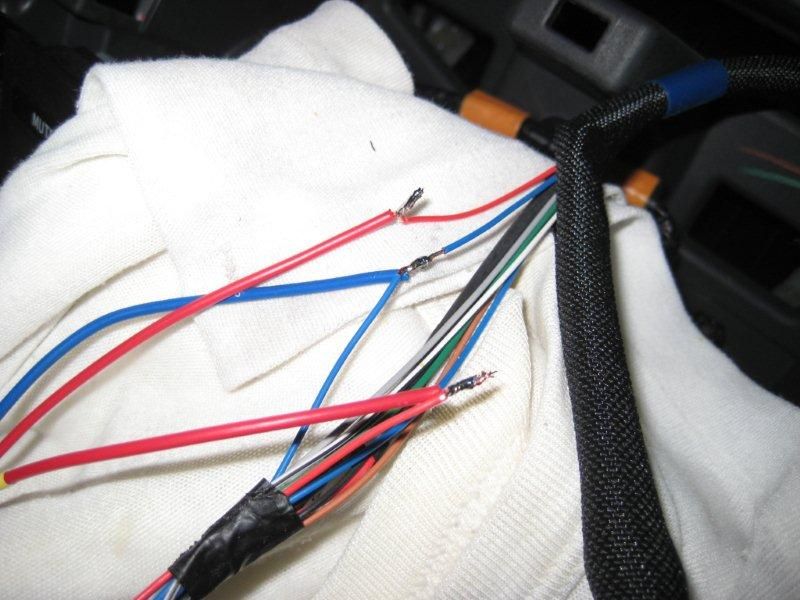
4) From the main entry loom, locate the single red wire (Reverse light wire) - This is the wire which becomes powered when you select reverse which in turn activates the camera.
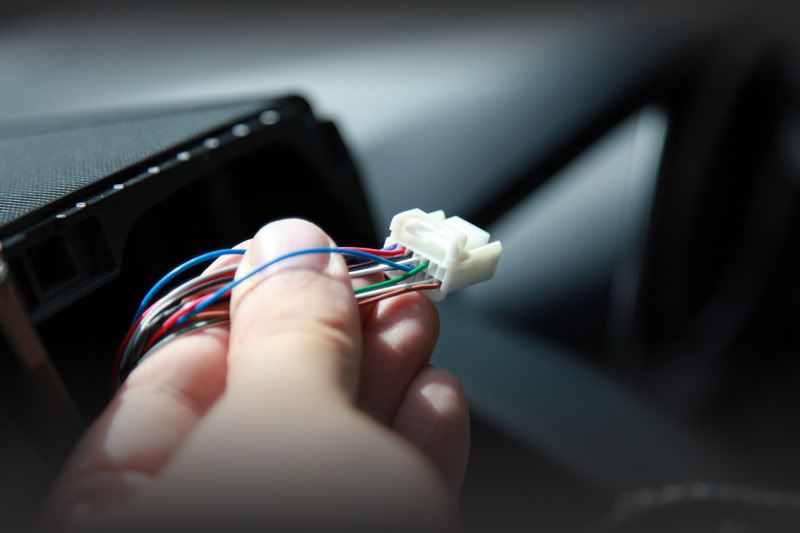
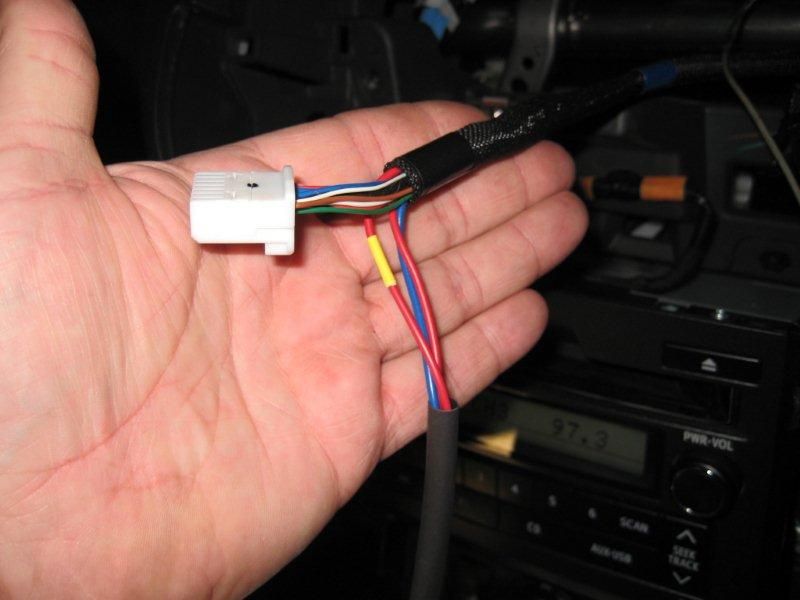
5) Now, locate the blue wire in the same loom (Constant power from ignition). be sure to select the correct blue wire, as shown. (Blue wire in the centre of the plug).
Essentially, the idea behind this project is to bridge the blue ignition powered wire, to the red reverse activating wire via a switch.
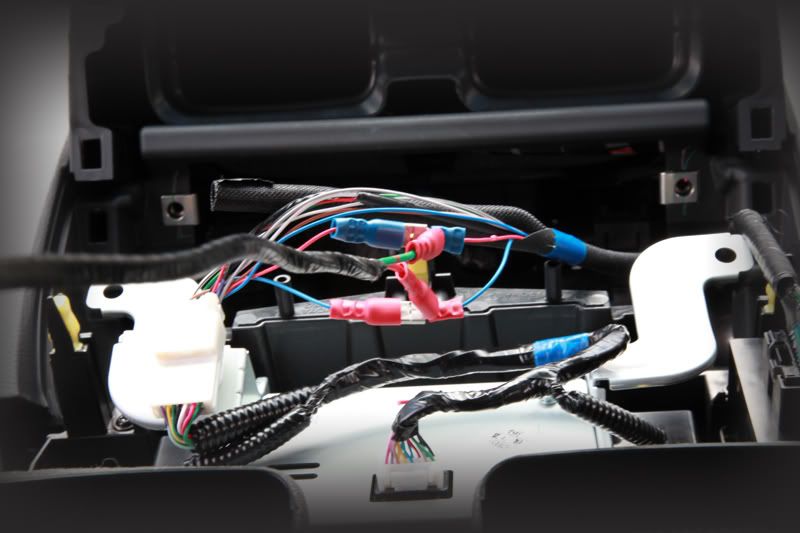
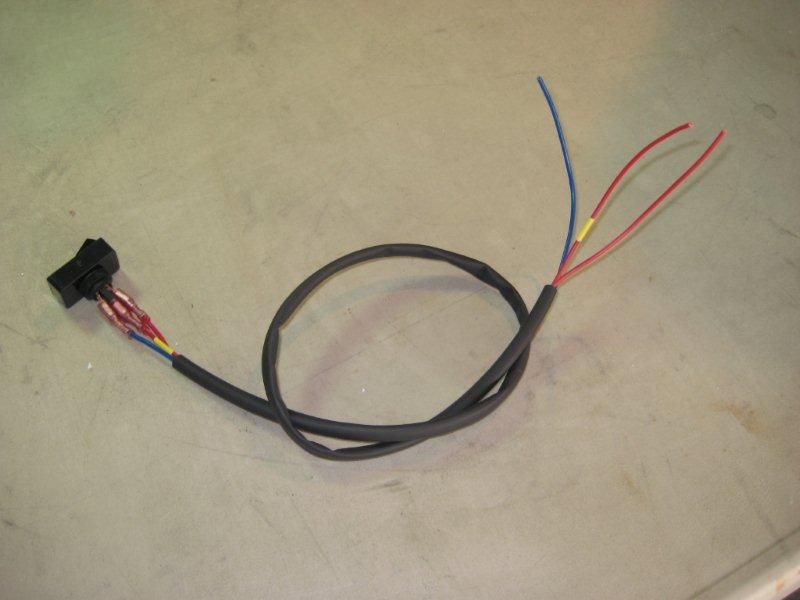
6) How you connect the wires is up to you, I found 3 way junction connectors easy for me.
6a) You need to add a switch to the bridge wire, in order to activate or deactivate upon demand.
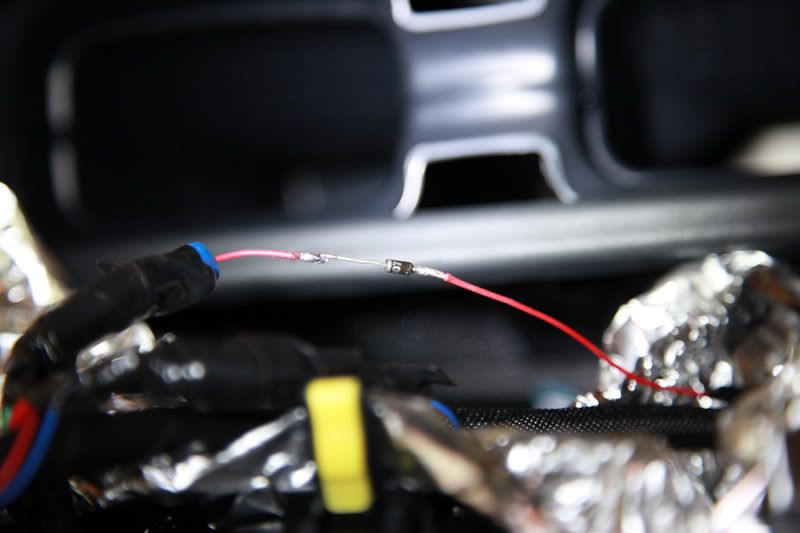
7) Now, this is really important: you need to install a common semiconductor diode onto the red reverse wire before the junction point.
A diode is a one way electrical check valve, which only allows current to travel in one direction. If you dont install one the reverse lights will always be on when you have the camera switched on as the entire
circuit will be live.
You can easily get an inexpensive diode from Jaycar or any similar outlet which sells specialised electrical components. It may well be worth getting a couple extra in case you overheat one in the soldering
process.
A common inline diode such as Part#: 1N4001 - 1N4007 will be fine.
This can be a bit tricky, but you need to solder the diode into place. The banded end must be positioned downstream (toward screen) of the entering current. This will block the current from the remainer of
the reverse light circuit. Be sure to protect the surrounding area when soldering by placing a sheet of foil underneath when you solder, of coarse be so careful with the hot iron around the upholstery..
8 ) Tidy and wrap all wires and joins with heat shrink or electrical tape, being sure to protect all live wires from shorting out.
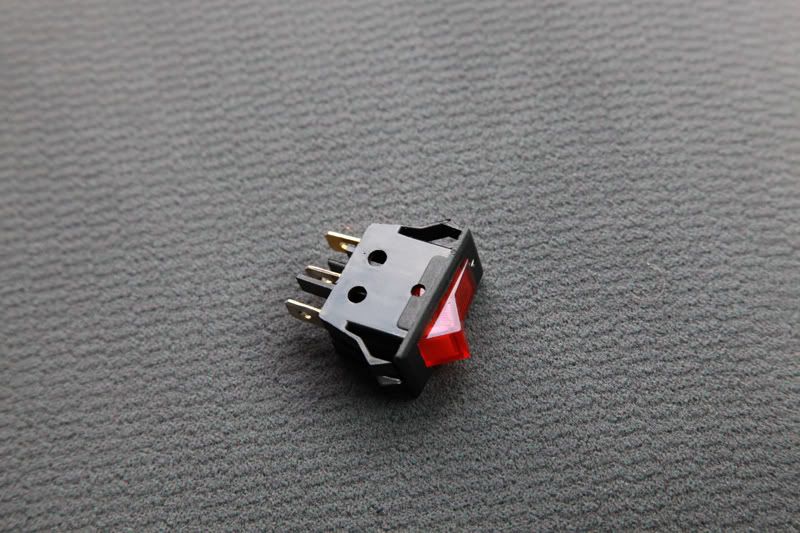
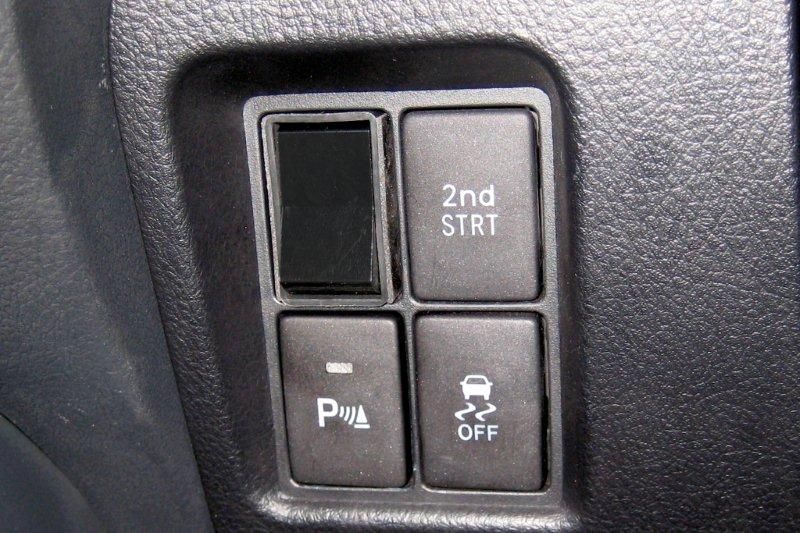
9) Re-fit screen pod and clock panel, then mount your switch to a location of your choice.
Press the switch to OFF, to read the fuel / temp / range information screens. (Reverts to factory setup, including reversing camera only when reverse is selected)
Press the switch to ON, to activate the camera full time.
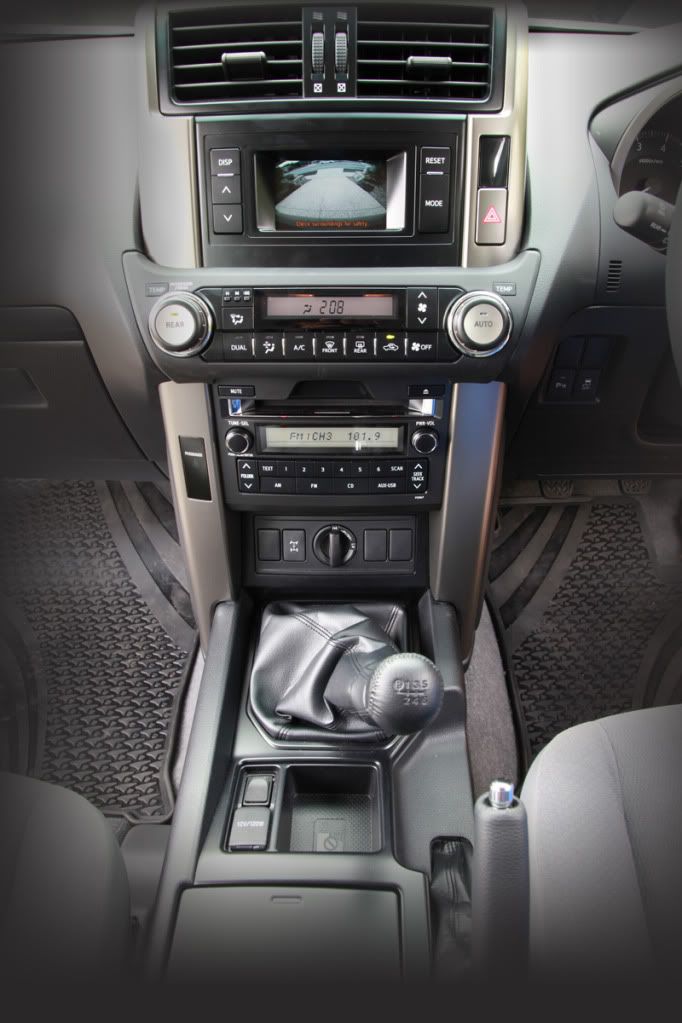
COMPLETE. It works, notice the gear lever in the forward gear, with rear view camera active.
Please note: This may void your warranty, I accept no resposibility for any damage caused.
Don`t become distracted whilst driving.
The Rear Vision Camera is standard in GXL, VX and SX models. However it is only activated when selecting reverse, wouldn`t it be nice to see what`s behind you at other times, like when offroad or keeping an eye on your trailer?
Your display needs to look like this; a 4.2" screen as found in the GXL, VX and SX models. - NOT the Kakadu or ZR Models.
1) To begin, ensure ignition power if OFF, then remove the clock panel - firmly grip and pull outward.
2) Now you can see two bolts, these are securing the screen unit into place, remove these using a 10mm socket.
3) Firmly but gently, grip and pull the entire screen and vent pod outwards.
4) From the main entry loom, locate the single red wire (Reverse light wire) - This is the wire which becomes powered when you select reverse which in turn activates the camera.
5) Now, locate the blue wire in the same loom (Constant power from ignition). be sure to select the correct blue wire, as shown. (Blue wire in the centre of the plug).
Essentially, the idea behind this project is to bridge the blue ignition powered wire, to the red reverse activating wire via a switch.
6) How you connect the wires is up to you, I found 3 way junction connectors easy for me.
6a) You need to add a switch to the bridge wire, in order to activate or deactivate upon demand.
7) Now, this is really important: you need to install a common semiconductor diode onto the red reverse wire before the junction point.
A diode is a one way electrical check valve, which only allows current to travel in one direction. If you dont install one the reverse lights will always be on when you have the camera switched on as the entire
circuit will be live.
You can easily get an inexpensive diode from Jaycar or any similar outlet which sells specialised electrical components. It may well be worth getting a couple extra in case you overheat one in the soldering
process.
A common inline diode such as Part#: 1N4001 - 1N4007 will be fine.
This can be a bit tricky, but you need to solder the diode into place. The banded end must be positioned downstream (toward screen) of the entering current. This will block the current from the remainer of
the reverse light circuit. Be sure to protect the surrounding area when soldering by placing a sheet of foil underneath when you solder, of coarse be so careful with the hot iron around the upholstery..
8 ) Tidy and wrap all wires and joins with heat shrink or electrical tape, being sure to protect all live wires from shorting out.
9) Re-fit screen pod and clock panel, then mount your switch to a location of your choice.
Press the switch to OFF, to read the fuel / temp / range information screens. (Reverts to factory setup, including reversing camera only when reverse is selected)
Press the switch to ON, to activate the camera full time.
COMPLETE. It works, notice the gear lever in the forward gear, with rear view camera active.
Please note: This may void your warranty, I accept no resposibility for any damage caused.
Don`t become distracted whilst driving.
 photoprado

Comment