 Tweet
Tweet
Where do i start, having never attempted a DB install in any of my Vehicles purely because i have never needed one, i was pretty annoyed at the vague instructions that came in the box, now before you say anything i realize that there are topics on this but again, its hard for some people to get their heads around it with out pictures.
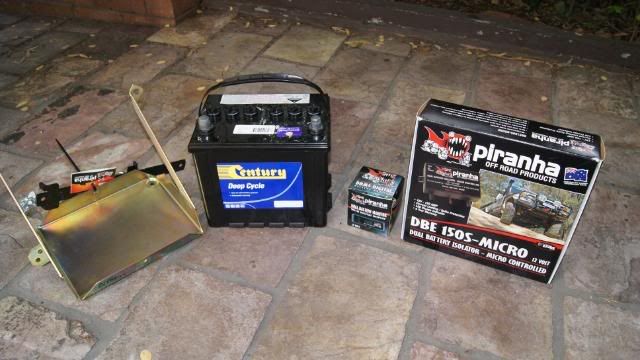
The Gear im using is all from Piranha
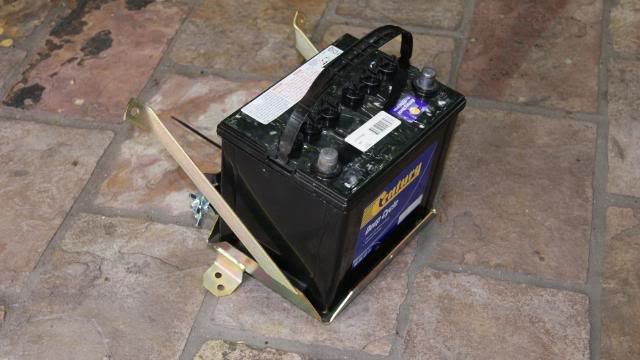
-Battery tray
-DBE 150s Micro controlled dual battery isolator
-Dual Battery monitor
-And a Century 50ah deepcycle battery
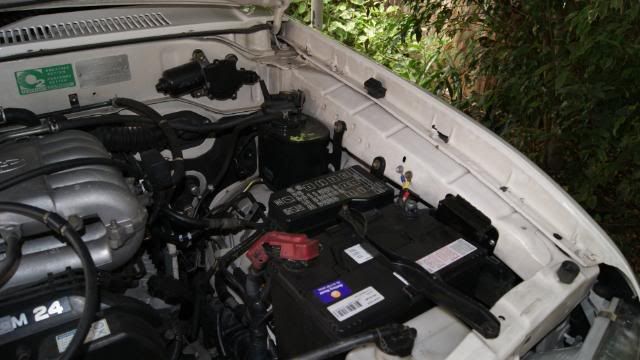
Ok My Vehicle is a 1998 Grande 3.4 v6 with ABS and Cruise control, now Piranha don't recommend a Battery tray for this specific configuration i obviously found out why later, however where this a will there's a way.
So i thought i would take the time to take some snaps of my DB install as i go so no one ever has to look at the woeful instructions you get, in my case anyway with the Piranha gear
Right first up the removal of the charcoal canister pretty straight forward just remember where all the hoses go and don't for get to unbolt the drain hose on the bottom before you yank it out :roll:
Take note when you have the area cleared, of dare i say it, crap, the bolt holes on the tray
The main two on the tangs to the guard and the one on the left hand bottom line up perfectly with factory bolts on the Vehicle.
Note not all the bolt hole's are used as this tray is for two other Toyota models so don't stress if you haven't used all the bolts supplied also note there is provision for another countersunk bolt under the battery but this requires drilling and taping if you plan on using it.
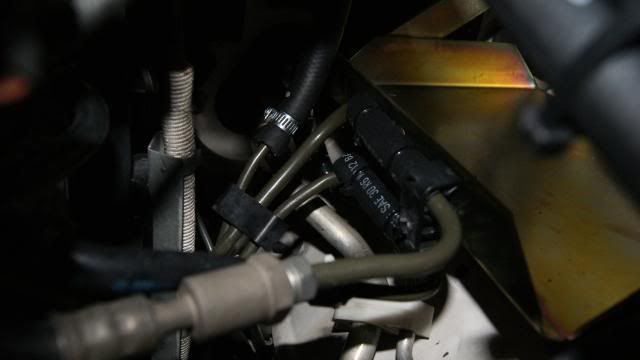
Next up comes the fiddly part the ABS lines are in the way and require a "GENTLE" tweek, I found by removing the lines from all the plastic clips that retain them to the chassis makes it easier, here's and idea of how close they are
Notice i have sleeved them in left over fuel hose from the charcoal canister relocation just to stop any metal on metal if they ever decided to touch, dot be scared though the tray does not move at all its just a precaution, after the line are sorted DON'T forget to replace the bottom and top plastic clips, the bottom retains it to the chassis still but the top i used to keep the hard lines spaced apart so they don't touch, if you have any line touching sleeve it in left over hose and cable tie it so they don't rattle
Next up relocate the Charcoal canister, I must have spent the better half of the day finding a spot to put it, the only place with space was the Rad Shroud(i think this may work for me as i don't do a lot of corrugations) However i may source a smaller canister from another vehicle and go from there
I have three bolts holding it in place and plan on attaching it to the reservoir at a later stage via a meta bracket maybe
Rerun all the hoses, you will need to buy some from "ripco' i just use fuel line as it has fuel vapors running in the lines
Cut,extend,and reconnect the two wires that run the purge pump on the charcoal canister
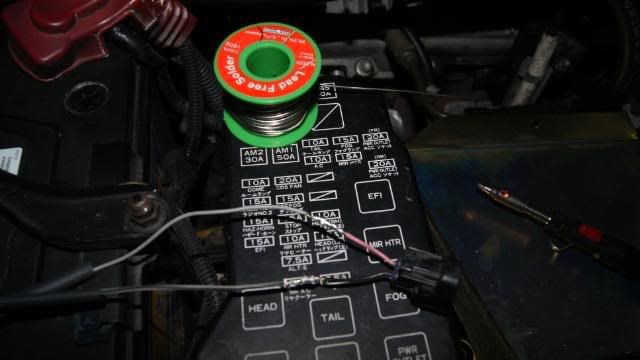
Soldering the connections is advised then heat shrink them and in my case i sleeved them to keep it Smick
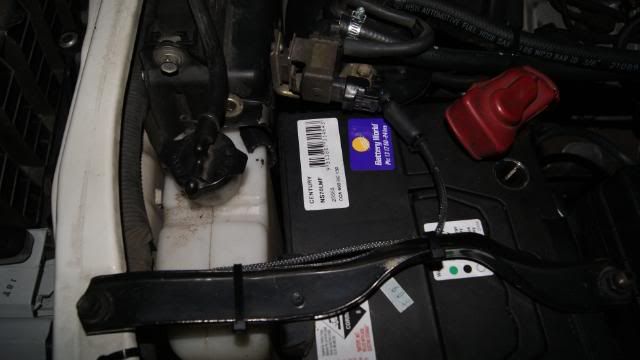
Install the Battery, NOTE: make sure you get the right orientation of the posts when you buy your battery for me the positive is closest to the firewall as that where the isolator is going
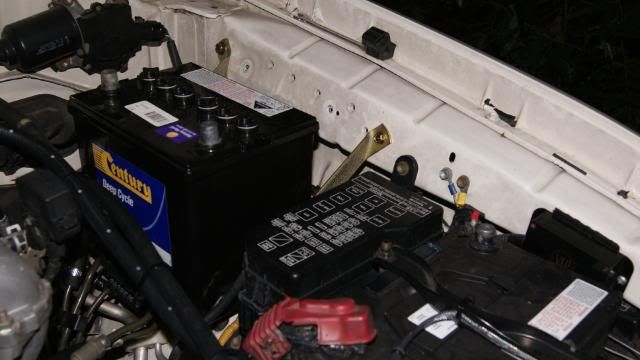
Install the clamp
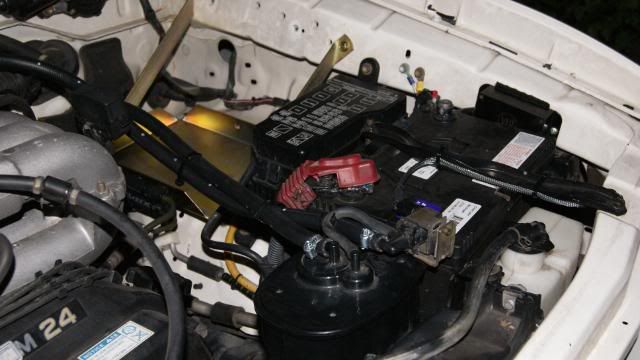
And the first part is done, battery tray, charcoal canister relocation and battery installed
Stay tuned for the electrical side tomorrow when i put the battery isolator and monitor in!
Part two:
Ok so the first part is done and dusted next up is the Electrical side of the install, I know some people cringe when they have to hack into their factory wiring loom but done correctly the integrity of it is not compromised.
First up a basic wiring diagram
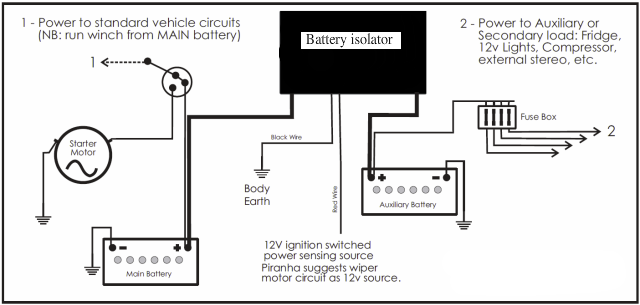
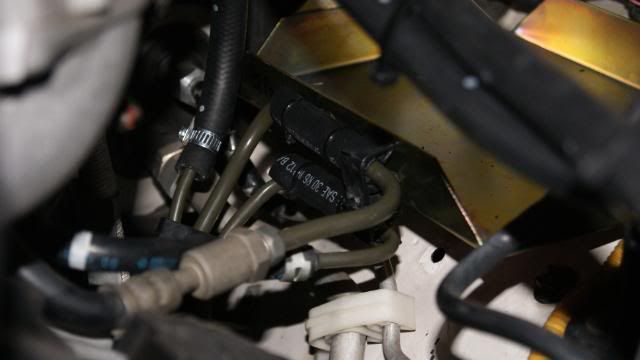
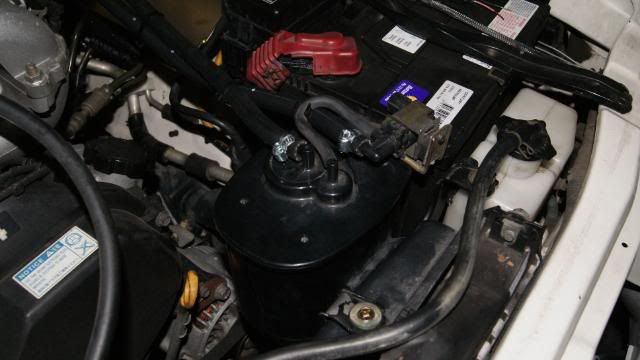
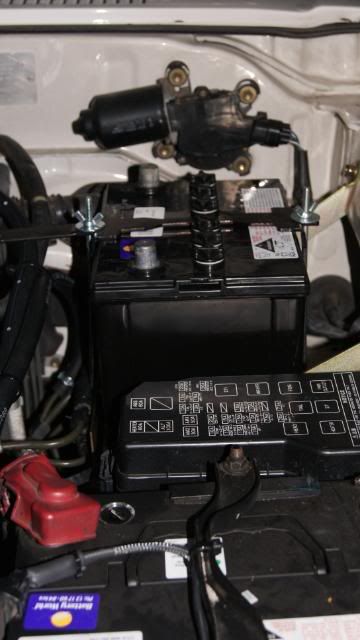
Right lets start off by finding a suitable place for the isolator, i had originally planned to mount it on the fire wall but decide against the idea as the only viable place was right above the engine, however there was space behind the Aux battery which works out great as the cable run is kept to a minimum, which in turn equals a nice tidy install
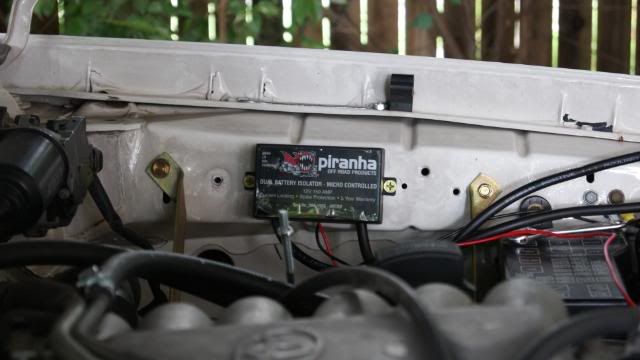
This is where i found all the extra bolts that came with the tray started to come in handy note the two countersunk Phillips m6 bolts holding the isolator to the inner guard. there are so many factory holes in the Prado you can pretty much take your pick where to install it, i lined up one bolt hole then drilled the other off.
Now we can begin the wiring, its recommended to disconnect the negative terminal on the main before you start to eliminate any risk of damaging the isolator.
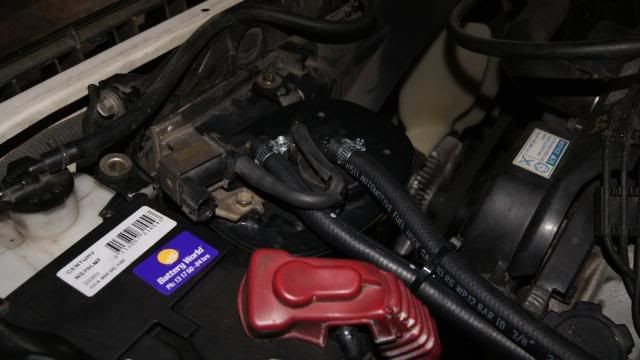
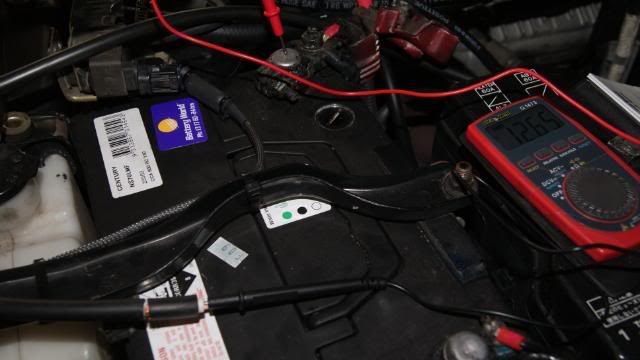
First start off by Connecting the earth wire(usually black) to the chassis, note in the picture above there is a bolt hole beside the isolator on the left this was what i used for my earth, quick easy way to check your earth is working is with the multimeter by probing your negative (the one you just connected to the chassis) then putting you positive to the battery, you should get 12.X volts, if not your terminal is to insulated and may require another bolt hole with more exposed metal, or a quick sand of the paint under the bolt.
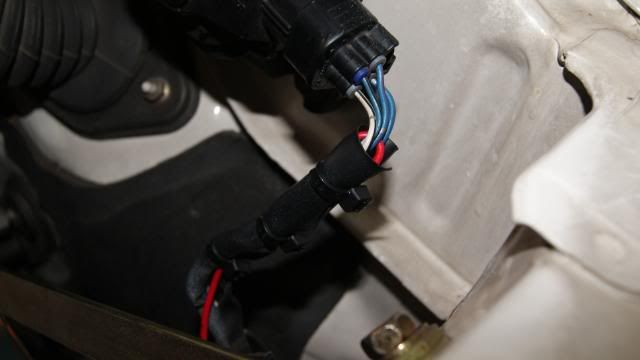
Next connect the Sense wire(usually red) to a switch ignition power source, again its recommended that you use the wiper circuit or the cigarette lighter circuit. I went with the wiper motor nice and close to the isolator and easy to access.
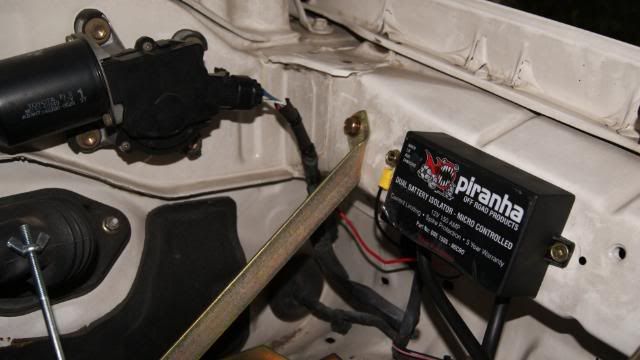
Note how close the wiper motor is to the isolator. ok easiest way to bell out the Switched power supply is with a multimeter, readily available form almost anywhere that deal in electrical products. Switch the ignition till the dash light come on, then earth your negative pin on your multimeter to the negative battery terminal, next disconnect the plug from the wiper motor and poke the positive end into the terminals till you find the 12v source, then switch the ignition off and check that it drops to zero, if it does you have your switched power source
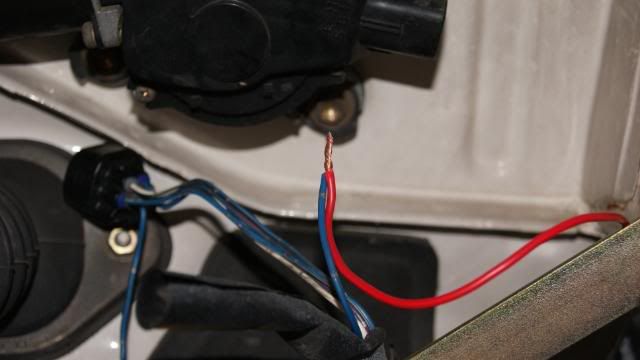
Cut the source wire about 80mm from the plug, cut your isolator sense wire (the red one) to the appropriate length and twist the wiring loom side source wire and you sense wire together
Solder the loom source to the sense wire then solder them both to the other end on the plug, i cant stress the importance that this connection is soldered cause there is less chance of it failing when four wheeling, don't forget to slide your heat shrink on first before joining the plug or you will be spiting tacks having to redo it, when that's done slide it back in the factory sleeving and cable tie it all up neatly.
Now we deal with the battery cable coming from the isolator, the recommended way to connect them is in this order, positive main battery, positive aux battery then negatives on both batteries.
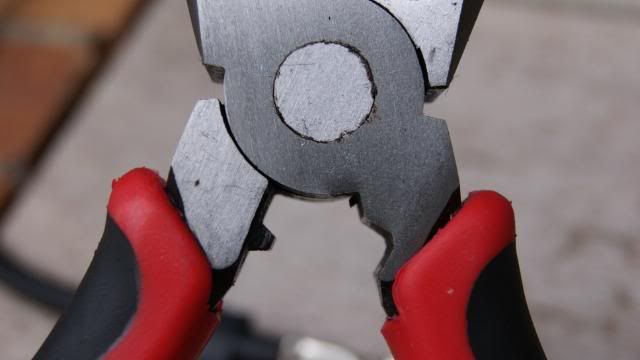
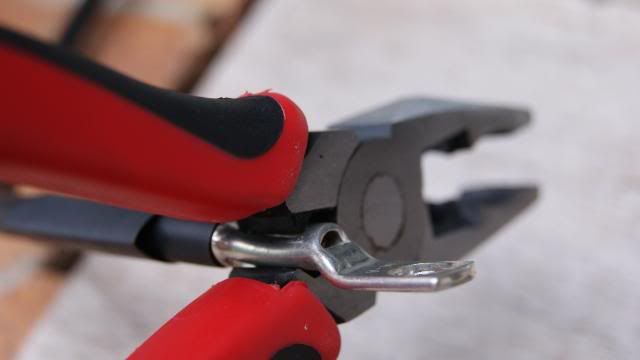
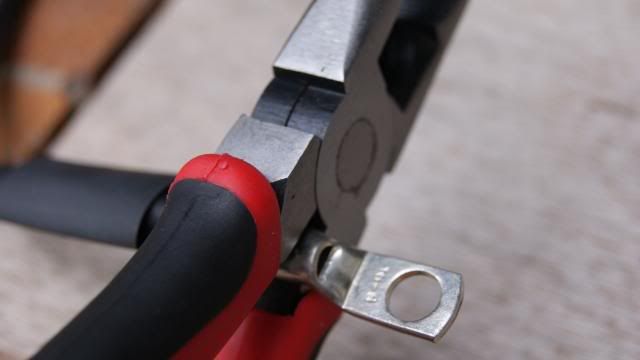
First a lesson in cable termination, there are a few ways you can do this figure out the lengths then take the unit to your local battery store and get them to terminate it, Have a mate that's a sparky that owns one of the super expensive hydraulic battery terminal crimp, or go and get your self a decent set of proper linesmen pliers, the third option is usually the easiest however make sure you get the real deal not knock offs they have to have the terminal crimp on the but of them got mine for $12 from supercheap.
determine your lengths of your cables then cut them, strip the end to the battery back enough to just go all the way into the terminal
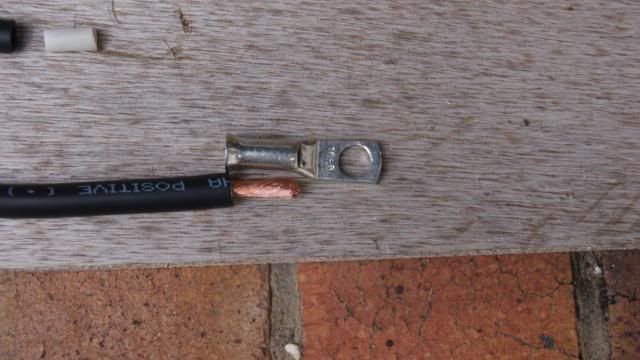
Slide you heat shrink on then crimp the terminal
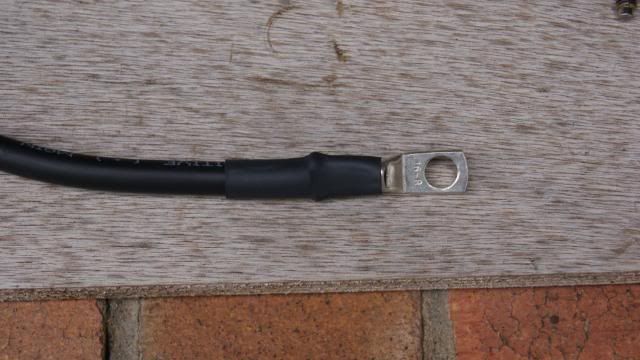
Finished product
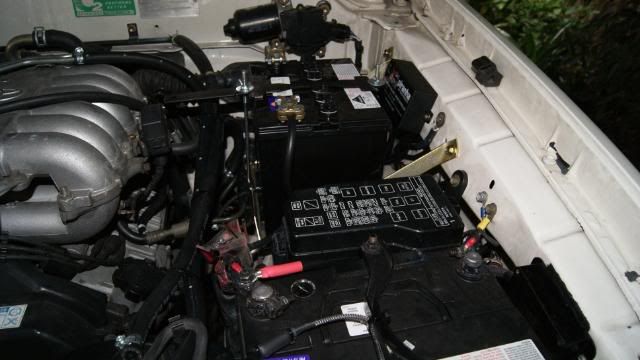
Attach your positive to the main the cables are usually labeled in some way or another, then proceed to connect the brass battery terminals that come with your isolator kit to the remaining cables, ie : positive and negative Aux battery.
you should get something like this
make sure to remove ALL tools before starting the vehicle :twisted:
Start your vehicle and run a multimeter across your start to check charging voltage should reach about 14v then run the multimeter across you aux battery to check that the isolator has switched again you should see between 13.8 -14 v
so now stand back give yourself and pat on the back cause you my friend have just installed a DB system
In the next installment ill go over installing a battery monitor so you can keep an eye on your voltages.
 Snaga
Snaga")
Comment