Originally posted by brogers
View Post
-
And if you haven't bought that rear LED for the door, Springers at Lawnton have them for about $47 -
Ah, ha, I knew there would be a good reason for using the top compartmet for the plugs and wiring, but anyway, for those who still have access to the bottom compartment...another option to consider perhaps,....its all about having options and alternatives I guess,a s we all have different configurations...well doneOriginally posted by Brains View Post
Leave a comment:
-
Brogers,
I've got the drawers in the back of mine and that access is under the side wings. We never used the cavity for anything so for me was a good spot to put the fuse box etc.
PaulLeave a comment:
-
Good job, well done.
Just something to consider as a suggestion to others thinking of the same sort of install. I mounted my anderson plug and 12v socket through the plastic hatch directly below the hatch used by Brains, its not used much, and it means you can keep the little upper storage compartment free to store odds and ends....I just peeled the sticker off the lower hatch cover and restuck it on the hatch above, and otehrwise, the install is very similar...just worth thinking about, because every little storage compartment can come in useful when travelling.Last edited by brogers; 31-03-2013, 09:46 PM.Leave a comment:
-
Very neat! Anderson plugs are good value. For the smaller loads (up to 30A) i use their powerpoles. you can you buy from 2 to 8 gang outlets that are flush mount, i used a 6 gang on the back of my battery box. Where did you get the volt meter from? Do you have a link?Leave a comment:
-
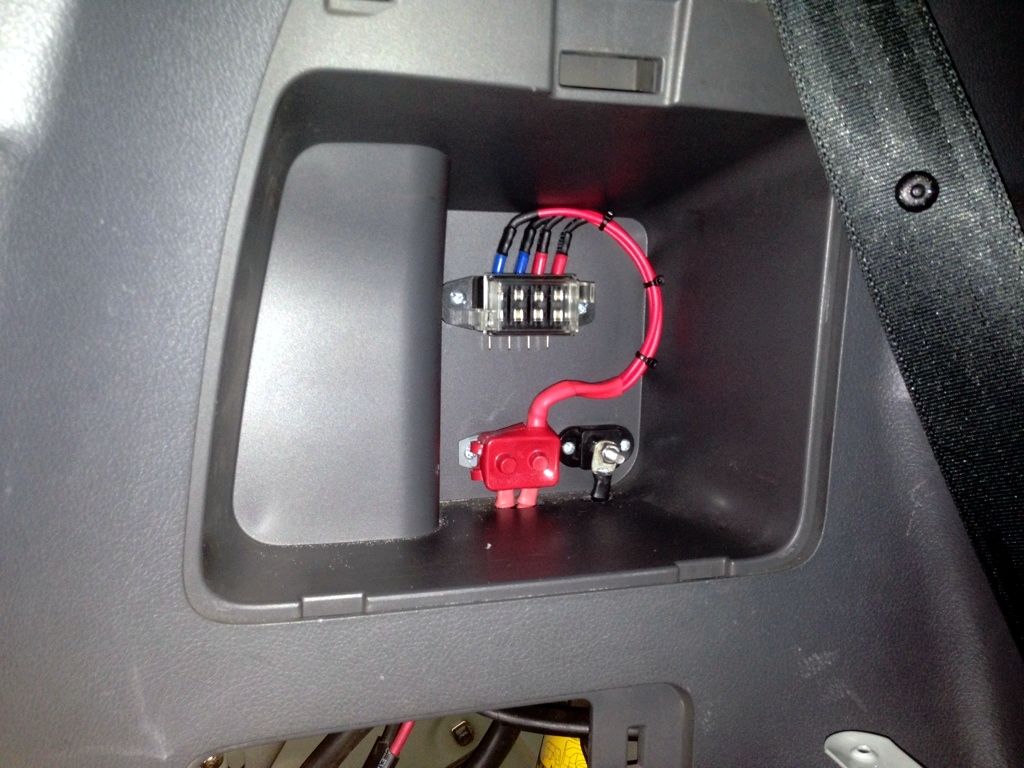
And then connected up all the positive cables to the small fuse box and the negatives to the negative stud.
I then put the associated fuses in the small fuse box and turned the power on, on the manual circuit breaker under the bonnet. And everything tested and works well.
Leave a comment:
-
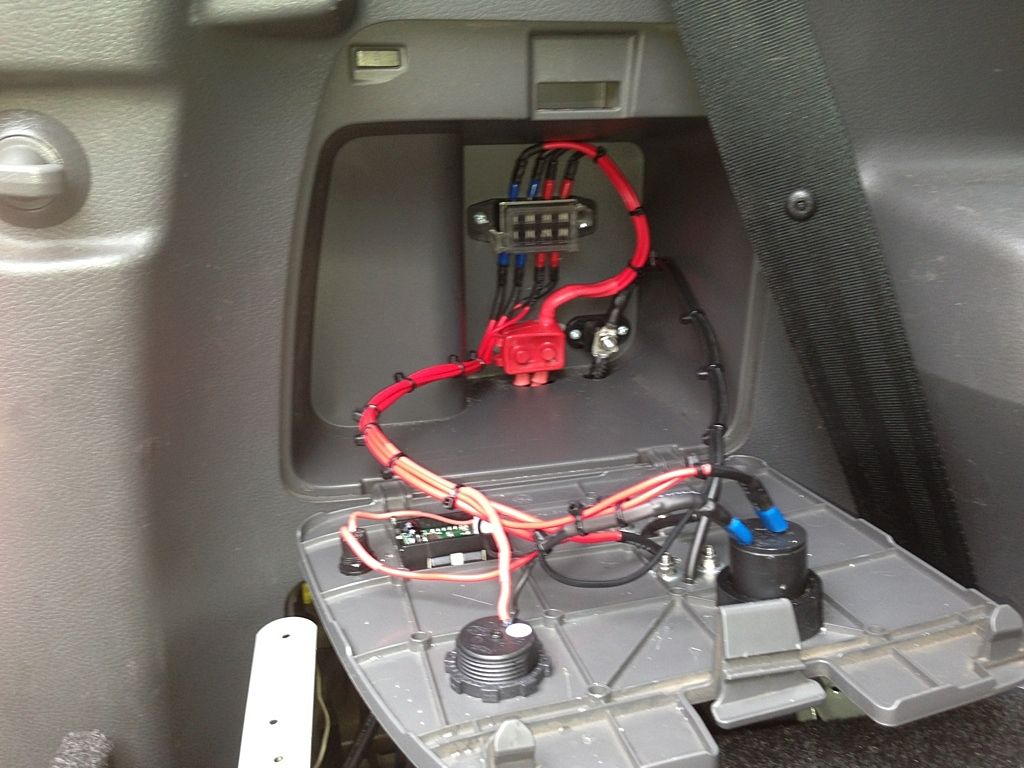
Got stuck in and did some more work on my Dual battery poer distribution in the rear cargo area.
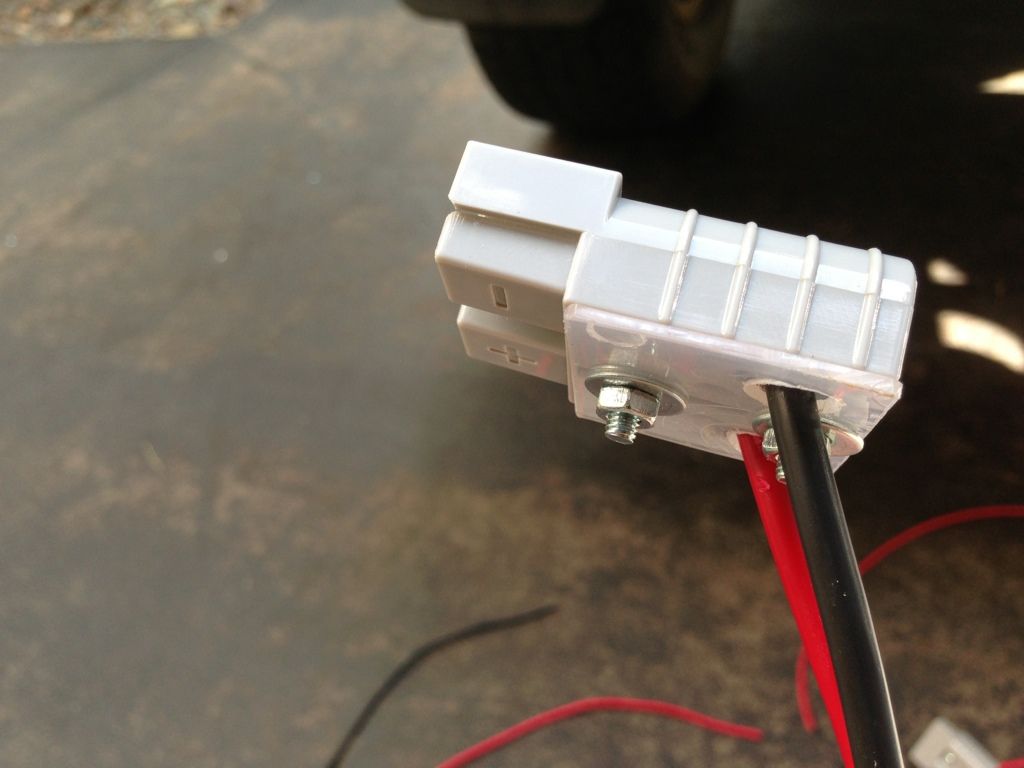
I made up some Anderson Plugs that can be mounted flush on the side of the cargo area. I like the positive locking of the Anderson plugs and have also made some Anderson to other small cables so that it is a fairly Universal way of connecting just about anything.
I had already run a circuit breaker and a small fuse box in the cavity on the left side of the cargo area.
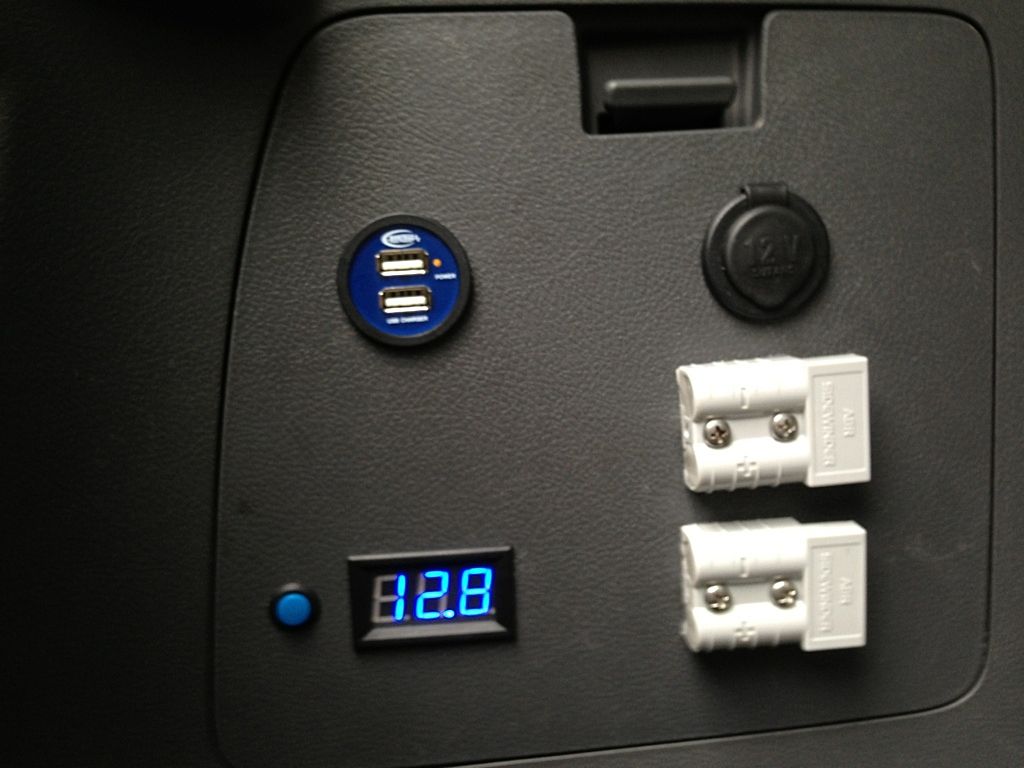
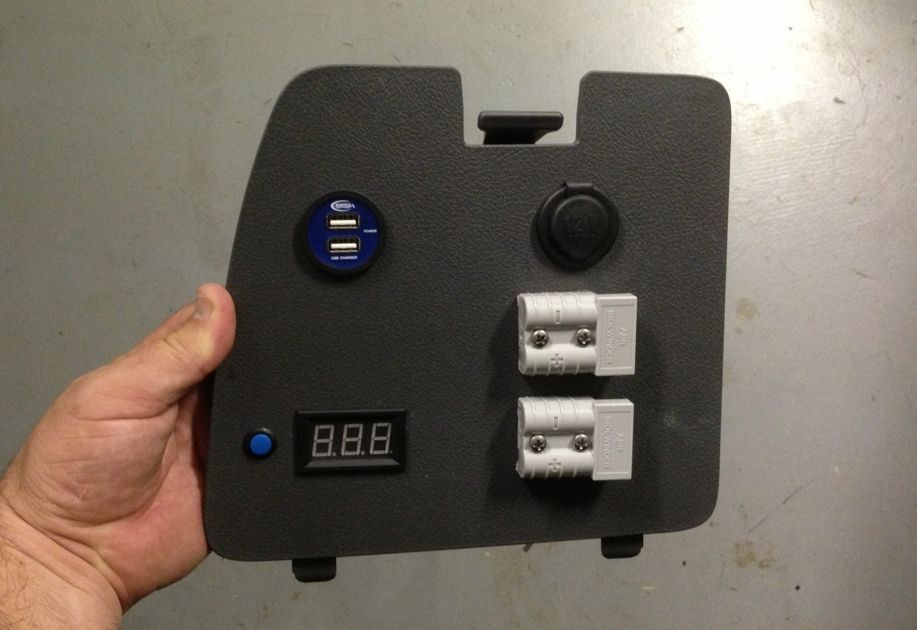
On the cover I had installed 2 of my Anderson Plugs, a 12V cigarette socket, Baintech dual USB socket and a Voltmeter with a push on/push off switch.
I did all the wiring in behind the panel ready to fit.

Leave a comment:
-
Looks like there is a bit going on in there so I guess I just have to test fit the meter. Ta.Leave a comment:
-
Michael,Originally posted by mjrandom View Post
If you check out the last photo in the post http://www.pradopoint.com/showthread...l=1#post400151 you can see that the 4WD selector goes back a bit, from memory it protrudes about 50mm into the cavity so there should be well and truelly enough room.
PaulLeave a comment:
-
Awesome Paul. I need to pull the 4wd selector panel out to fit the volt/volt meter. Do you remember how much space there is behind the fascia? I am looking to fit the Baintech gauge and it is quite deep about 50mm for the full 47mm diameter.Leave a comment:
-
Also check out our Straddie Video
http://youtu.be/MvVrqS0G9dc
To watch it on iPhone/ iPad or mobile device you can do it by going to this page.
http://www.4x4review.com.au/snaps.php?album_id=4 (this link is not working at the moment trying to get it fixed. If you copy and paste the address in your web browser it works)
Please share it with your friendsLast edited by Brains; 01-04-2013, 09:37 AM.Leave a comment:
-
Now grab thesilver shroud at the base of the gear stick and pull it down (there is a clip holding it in position.
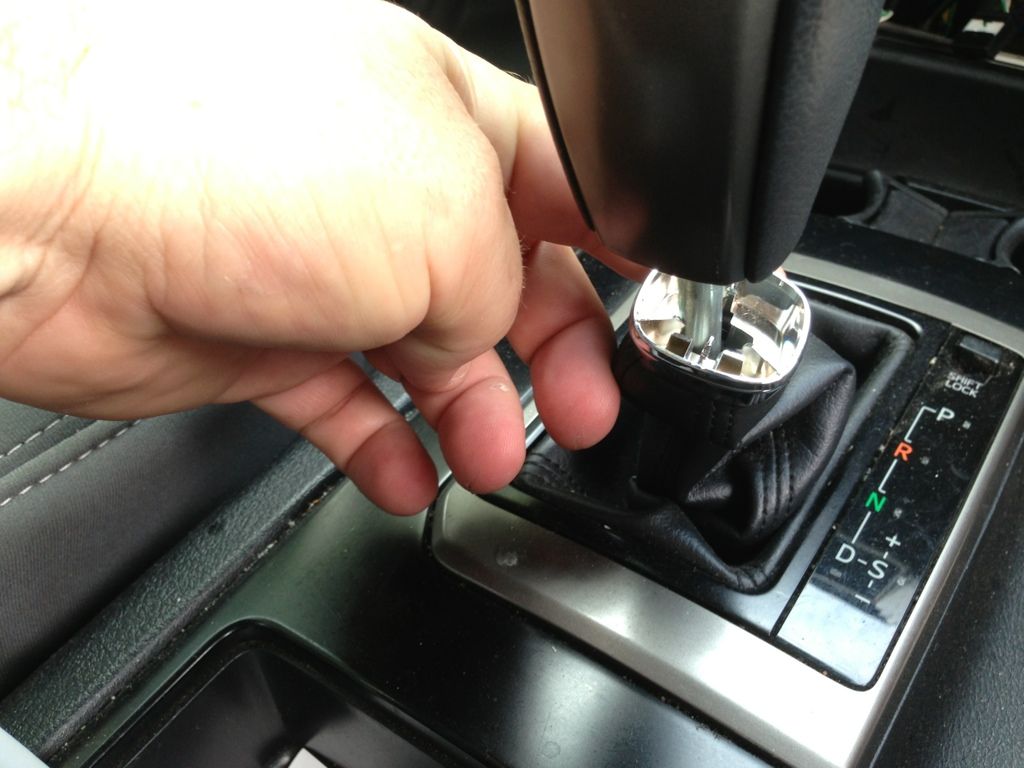
Unscrew the gear change knob. (you may wish to move the gear stick further back by pressing the shift lock and moving gear stick. MAKE SURE HAND BREAK IS ON)

Now grab the front of the lower console and pull up.
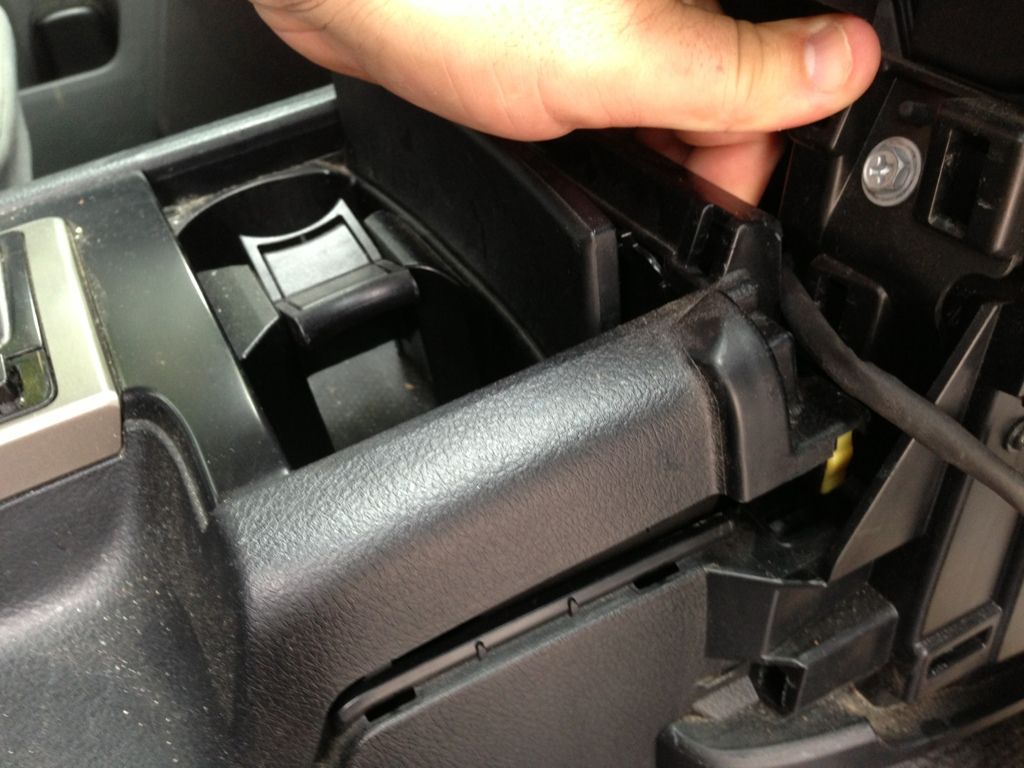
Now keep moving back towards the centre storage compartment popping the clips until it comes loose.
Once you get to here you can either manoeuvre the top of the console to gain access or unplug the wiring looms to gain further access.Last edited by Brains; 31-03-2013, 03:05 PM.Leave a comment:
-
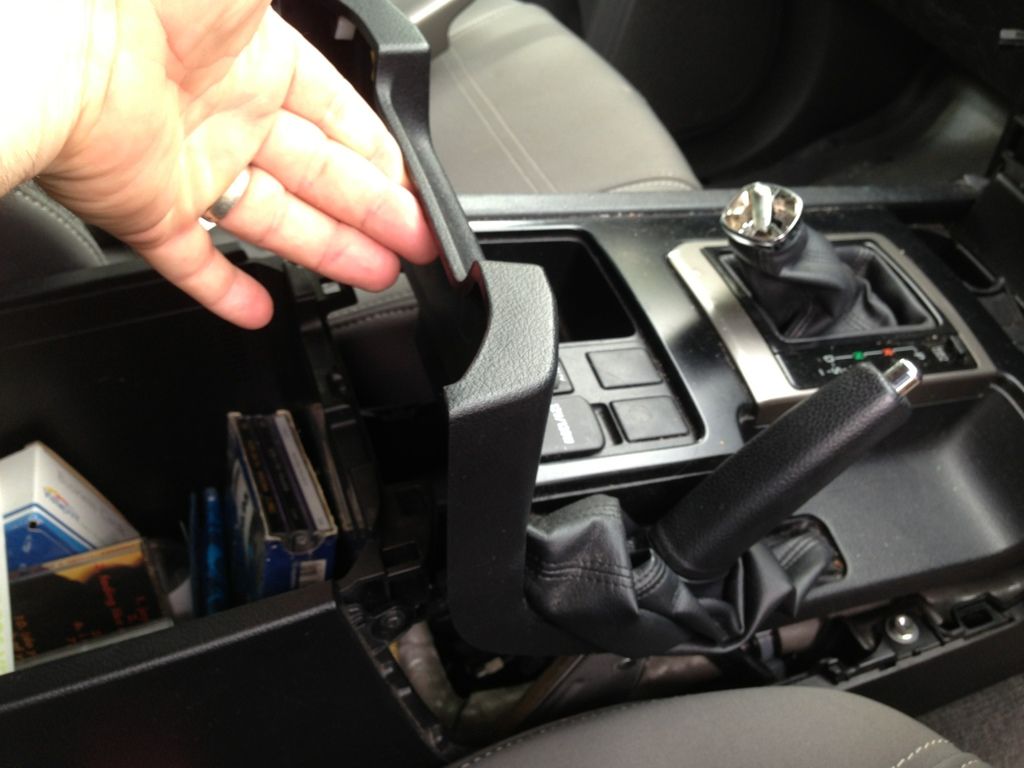
Now grab the left hand side silver panel with the seatbelt warning light from the top and pull this out towards you, unplug the wiring loom.
And do the same to the right hand side but there is no wiring to unplug.
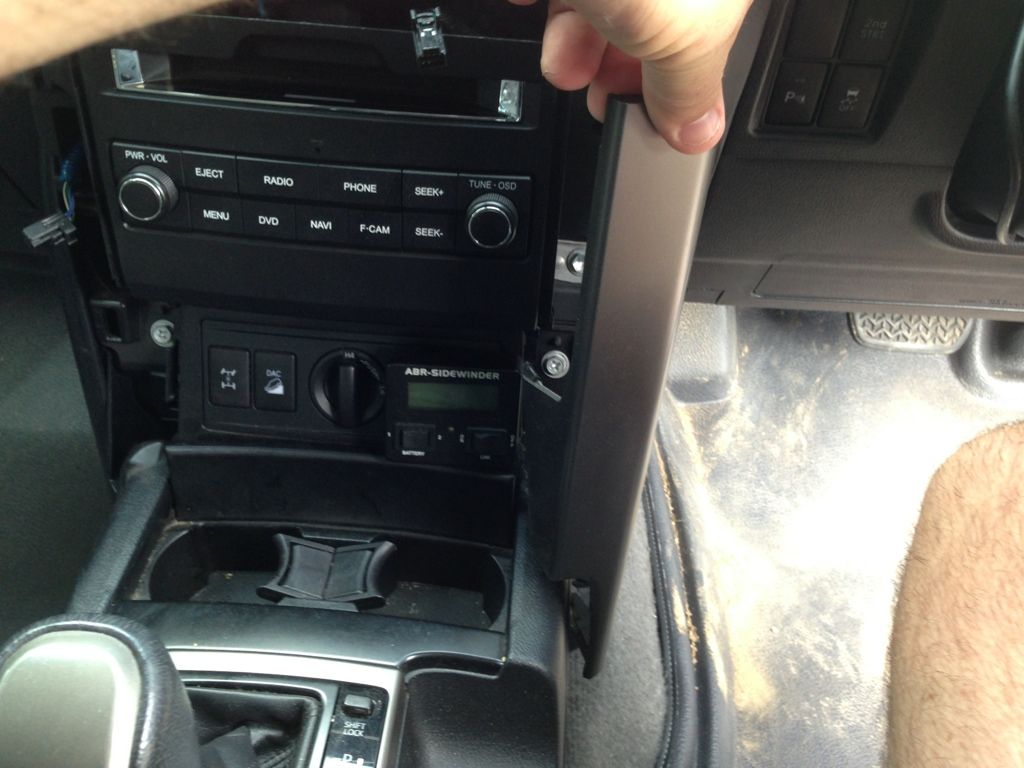
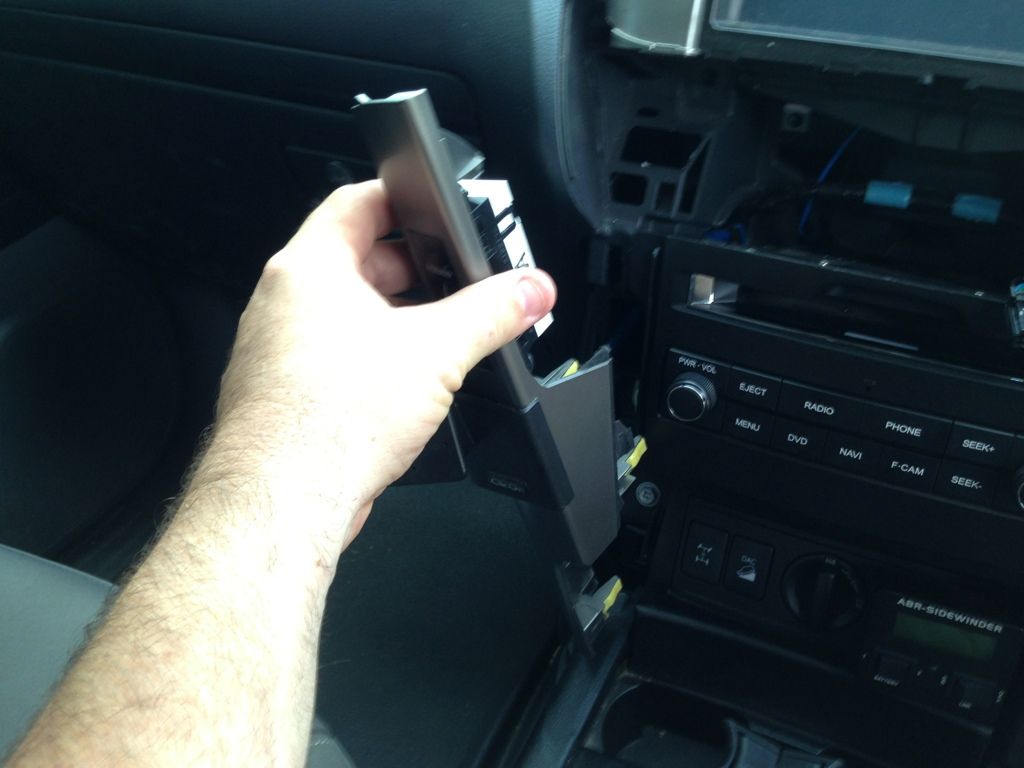
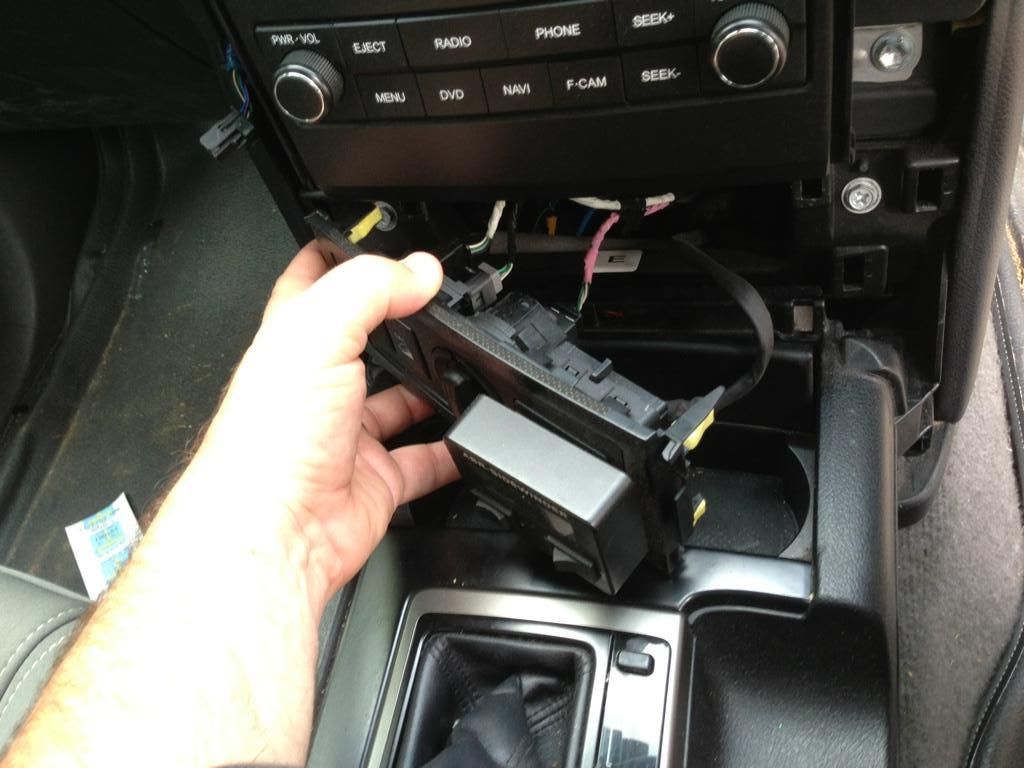
Grab the lower panel with the 4WD selector and tractions control, diff lock and pull it out towards you.
 Last edited by Brains; 31-03-2013, 03:00 PM.
Leave a comment:
Leave a comment: