Announcement

Collapse
No announcement yet.

Jamie's 2004 120 Build UP

Collapse
X
 
  • Filter
  • Time
  • Show
Clear All
new posts

  • #16
    Rear cargo shelf
    Inspired by Prado point and members rear cargo shelves I decided to have a go myself. With a new baby and the joys of the pram taking up room in the back I felt I need to make a shelf to accommodate it. As I also have a waeco/dobinson 50L fridge this needed to be considered. So what I come up with is basically a half shelf. This is what I used
    - Custom bracket
    - 19mm ply
    - 15mm screws
    - 90 degree bracket
    - Marine grey carpet
    - 3M spray on adhesive

    I cut up the marine ply for 2 pieces, one for the shelf and one for the support before using a router to chamfer the edges for the carpet. I then made a bracket to clip into the rear seat bracket. Next I glued the carpet to the boards and then screwed the brackets in place.

    I made it sit high enough to fit the pram under near, narrow enough to fit the fridge in and the good thing is the pram can be easily taken in and out without having bags on top of it. It looks the part and the wife and bub love it too.


    Last edited by J Janke; 17-02-2015, 03:29 PM.

    Comment


    • #17
      Thanks to Pradopoint and the Back door table thread I Also made a table. I went for Marine carpet on both sides with a rubber D-mold edge.


      Last edited by J Janke; 17-02-2015, 03:38 PM.

      Comment


      • #18
        Boot 12V and usb sockets and Fuse panel
        Wanting to run a fridge and an Eco Pot with 12v power I turned to Pradopoint again for ideas to run a decent power supply to the back to distribute to some addition sockets. This is what I did
        • Custom made bracket
        • 6B&S
        • 50amp waterproof manual reset circuit breaker
        • 2x Narva DUAL USB & CIGARETTE LIGHTER SOCKET 12V ADAPTER 81144BL
        • Baintech 6 way fuse panel - http://www.baintech.com.au/fuse-bloc...ade-fuse-block
        • 6mm twin core
        • Fuses
        • Cable lugs
        • 3mm twin core
        • Female insulated spade connectors
        • Heat shrink (black and red Dual wall adhesive)
        • M6 x 15mm bolt
        • M6 alloy rivnut
        I decided to put my 6 way fuse panel behind the RH interior panel. I went for this mainly thinking in the future with young kids possibly playing in the back probably less to go wrong and keep’s it out of sight. It isn’t too big of a drama to unclip then panel I the event of a fuse blowing. I made a bracket and gave painted it when I was painting dual battery brackets. A rivnut was added to the inner body to be able to bolt the bracket in without hitting interior and 12v socket. I also put foam tape behind bracket to cushion again body panel and stop vibration.

        I drilled out the holes for the narva sockets and decided to install the square plate with it which was simply screw on. So one on the left and one on the right.

        I used a 50amp waterproof manual reset circuit breaker in series with the dual battery circuit breakers and then using 6B&S; I run in across the engine bay, through firewall grommet, across to the RHS under dash and then under kick panels on the floor to the rear.

        I used 6mm to supply the 2 narva and 1 factory 12v sockets from the fuse panel as I couldn’t find a female spade big enough to fit 6B&S. 3mm twin was used to supply both USB sockets.


        Last edited by J Janke; 17-02-2015, 03:34 PM.

        Comment


        • #19
          I decided to add some more chrome to the Prado to go along with the chrome loops on the bulbar and the chrome mirrors. I got a handle kit from Ebay and installed them. As the instructions suggested not using the handles for 24hrs I used zipties an some paper towel to give the handles the best chance to grip. Its pretty straight forward and iv added some before after and during pictures.


          Last edited by J Janke; 17-02-2015, 03:46 PM.

          Comment


          • #20
            After looking around for quite some time for suitable rims to fit the near new treads I found these 17x7.5 Prado 150 wheels that were powder coated satin black. Here are some pics finally


            Last edited by J Janke; 17-02-2015, 03:49 PM.

            Comment


            • #21
              reserved 21

              Comment


              • #22
                reserved 22

                Comment


                • #23
                  reserved 23

                  Comment


                  • #24
                    reserved 24

                    Comment


                    • #25
                      reserved 25

                      Comment


                      • #26
                        Great build Jamie. Some time spent there in wiring thats for sure.
                        [B][2007 GXL 120 3.0L D4[COLOR="#FF0000"]D[/COLOR] Auto][/B] [I]Mods:[/I] [COLOR="#DAA520"]Bilstein [/COLOR][COLOR="#0000FF"]Shocks [/COLOR]& [COLOR="#DAA520"]King [/COLOR]2" Lift Springs - 265/70/17 [COLOR="#3366ff"]Cooper [/COLOR]AT/3s Tyres - [COLOR="#FF0000"]ARB [/COLOR]Deluxe bullbar - LED Spotlights & Worklights - Snorkel - [COLOR="#008000"]BushSkinz [/COLOR]bash plates - 2.2m Alloy Overlander Full Rack - 2.5m [COLOR="#8B4513"]Wanderer [/COLOR]Awning - [COLOR="#FF0000"]GME [/COLOR]TX3120S UHF & [COLOR="#FF0000"]GME [/COLOR]AE4703 6.6dBi - [COLOR="#FF8C00"]Milford [/COLOR]Cargo Barrier - [COLOR="#FF0000"]JVC [/COLOR]indash DVD - [COLOR="#FF8C00"]Maxtrax [/COLOR]- Pulling a heavily modified [COLOR="#3366ff"]Jayco [/COLOR]Dove Pop Top Camper

                        Comment


                        • #27
                          Nice build, you've given me some inspiration and ideas for what I want to do...

                          Comment


                          • #28
                            very nice build
                            2012 4dr JK wrangler, 3.5" AEV lift, AEV mags, 35" muddies, front/rear arb bars, tjm sliders, pioneer platform and some other goodies

                            Comment


                            • #29
                              Thanks guys. Quite a fit of time spent planning and then installing. Iv got wiring already for hopefully future mods like winch, awning light and rear lockers.

                              Comment


                              • #30
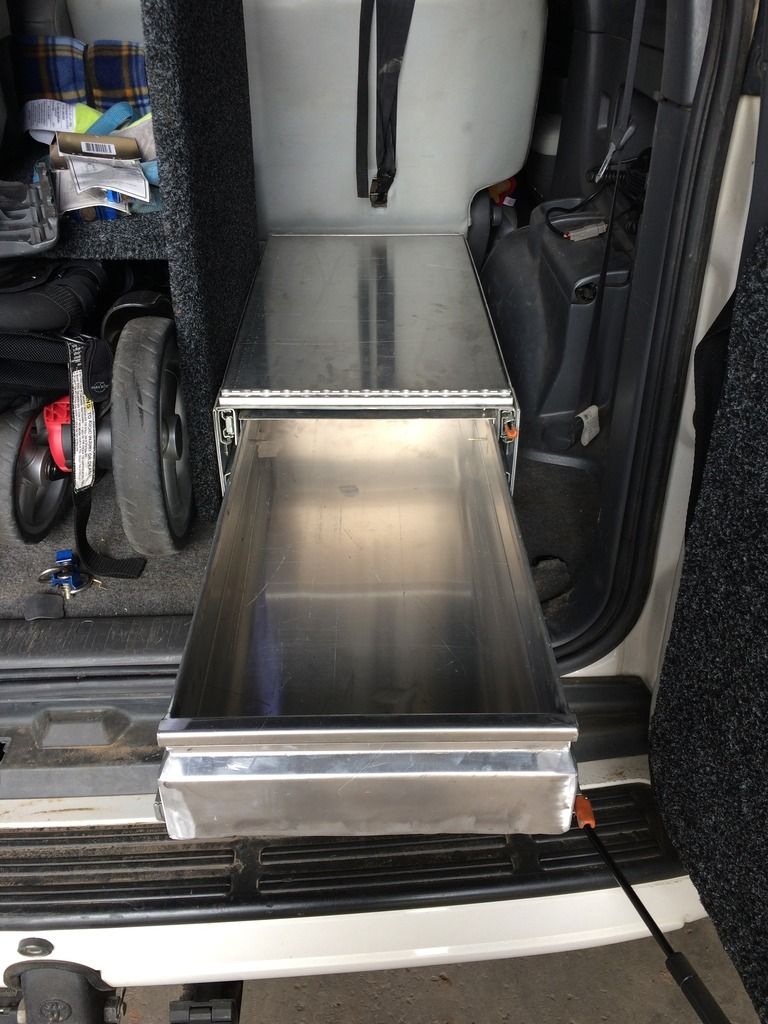
                                Finally got around to making a draw and fridge slide the last few days. Draw for tools and recovery gear and then the fridge slides out and then tilts down for easier access.


                                Comment

                                canli bahis siteleri bahis siteleri ecebet.net
                                mencisport.com
                                antalya escort
                                tsyd.org deneme bonusu veren siteler
                                deneme bonusu veren siteler
                                gaziantep escort
                                gaziantep escort
                                asyabahis maltcasino olabahis olabahis
                                erotik film izle Rus escort gaziantep rus escort
                                atasehir escort tuzla escort
                                sikis sex hatti
                                en iyi casino siteleri
                                deneme bonusu veren siteler
                                casibom
                                deneme bonusu veren siteler
                                deneme bonusu veren siteler
                                betticket istanbulbahis
                                Working...
                                X