-
Hi All, Just had my Transfer Case Guard fitted last night, it was so easy to fit, looks very professional and sturdy, and fit perfectly. Totally recommend it. Thanks Paul ! -
Paul have paid for mine tonight. PM'd you my delivery details also.
Thanks again !Leave a comment:
-
Awesome work Paul...can't wait to pick mine up and install, once I get back to town.Leave a comment:
-
Have just sent a PM, is there anybody in the Townsville area who is getting a guard?
Maybe we can get them shipped together?? Let me know if there is please?
Cheers
LawrieLeave a comment:
-
Finished.
View from driver’s side rear.
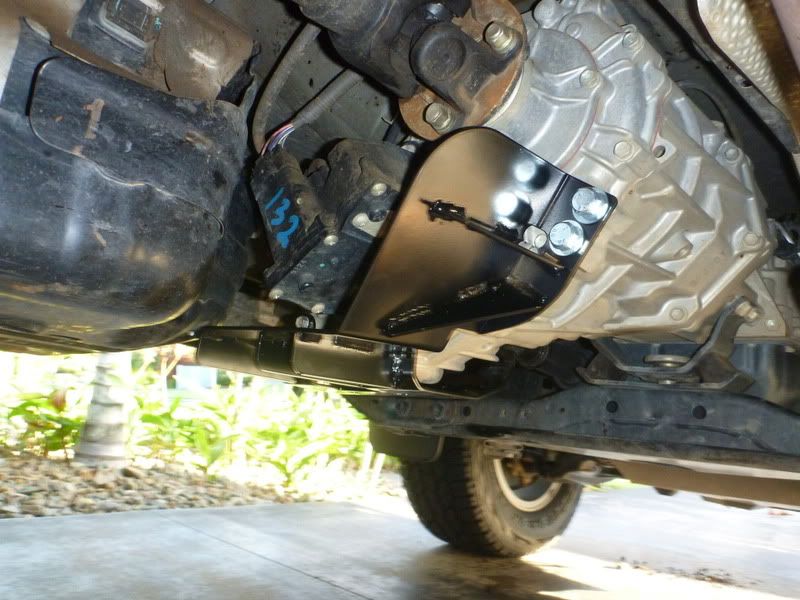
View from drivers side.

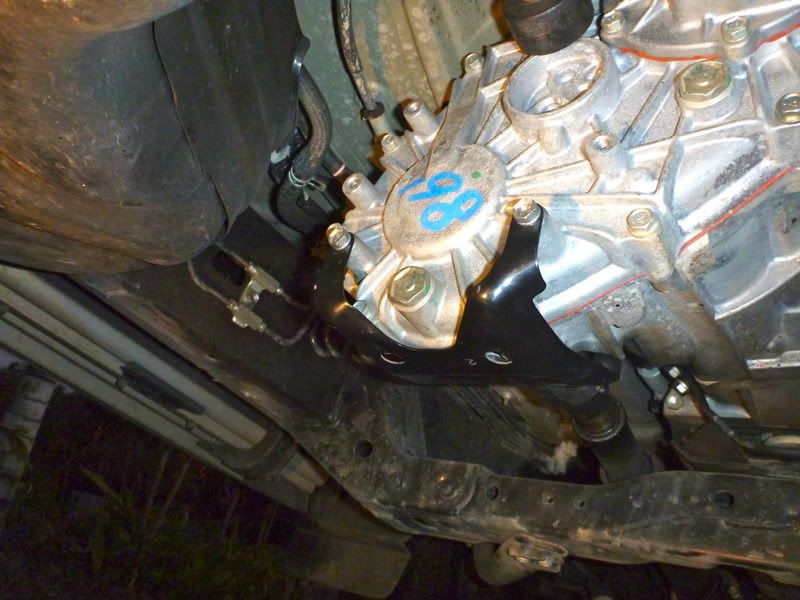
View from underneath, access to Transfer Case drainage bolt still accessible.

Sorry but in these times I have to include this.
Disclaimer: The purchase and installation of the TG150 and the TG120 Traction Control guard is at the sole responsibility of the purchaser/owner.
We are not to be held liable for any damage to your vehicle as a result of impact or any off road driving.Last edited by Brains; 29-04-2012, 09:26 PM.Leave a comment:
-
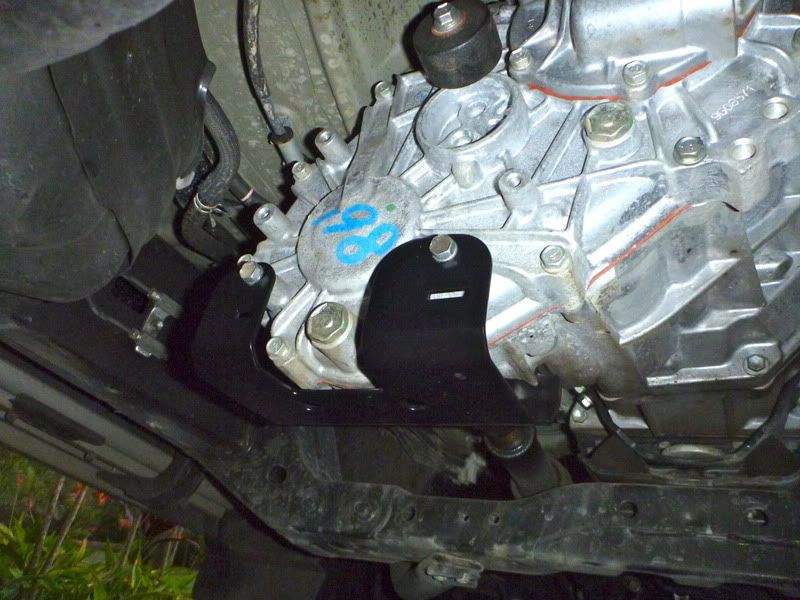
9.
Tighten the passenger side rear bolt.
Tools required - 12mm ratchet spanner, or 12mm spanner, or 12mm socket spanner

10.
Tighten the driver’s side front bolt.
Tools required - 12mm ratchet spanner, or 12mm spanner, or 12mm socket spanner

11.
Tighten the passenger side front bolt.
Tools required - 12mm ratchet spanner, or 12mm spanner, or 12mm socket spanner

Cont...Leave a comment:
-
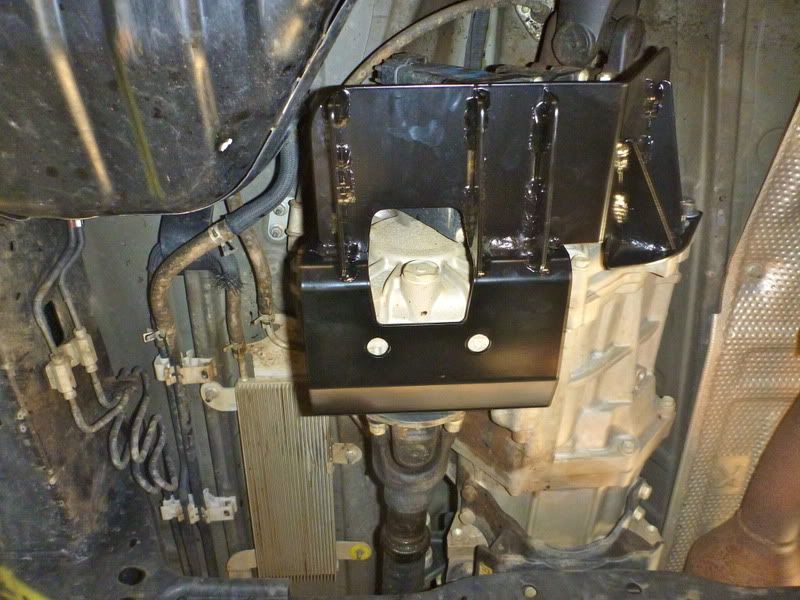
5.
Prepare the top High Tensile bolt, spring washer and washer with spacer washer. Place the spacer washer in between the guard and transfer and start the top bolt. You will have to move the guard into position to allow the holes to line up.

6.
Tighten the lower High Tensile bolt.
Tools required - 19mm ratchet spanner, or 19mm spanner or 19mm socket spanner.

7.
Tighten the top High Tensile bolt.
Tools required - 19mm ratchet spanner, or 19mm spanner, or 19mm socket spanner

8.
Tighten the driver’s side rear bolt.
Tools required - 12mm socket spanner with extension.

Cont...Leave a comment:
-
3.
Using the 4 bolts that were holding the OEM guard on in step 1, start the 4 x bolts with the now supplied 4 x M8 washers by turning a few turns to hold guard in position but allowing the guard movement. Put the front two bolts in first and then the rear two.
(Note-Use a 12mm socket and extension to get the drivers side rear bolt placed.)


4.
Prepare the lower High Tensile bolt, spring washer and washer with spacer washer. Place the spacer washer in between the guard and transfer and start the lower bolt. You will have to move the TG150 to get the holes to line up. Start to tighten.


Cont...Last edited by Brains; 22-08-2012, 10:46 PM.Leave a comment:
-
TG150 Install
The contents include the TG150 guard plus the following hardware;
TG150 Guard
2 x Spacer Washers (black)
2 x M12 Washers
2 x Spring washers
2 x High Tensile bolts
4 x M8 washers
You will utilise the original 4 bolts from the
OEM Transfer Case guard. Use the M8 washers on these bolts.
(Note: 4 x M8 washers have been supplied for these bolts)

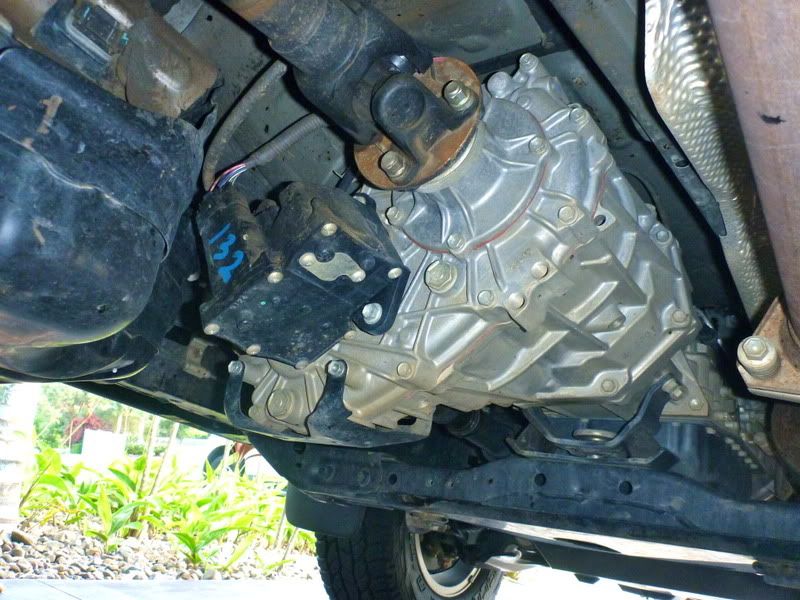
The OEM Transfer Case guard in place which offers no protection to the actuator box (black plastic box)
This box is present on the 150 Prado and the 120 Prado VX, Grande and GXL with Option Pack 2.
1.
Undo the 4 bolts holding the OEM Transfer Case Guard and remove the OEM Transfer Case Guard.
Tools required - 12mm ratchet spanner, or 12mm ring spanner, or 12mm socket, and Socket set extension.

2.
Place the TG150 in position.

Cont...Last edited by Brains; 22-08-2012, 10:45 PM.Leave a comment:
-
The finished Product
Sorry but in these times I have to include this.
Disclaimer: The purchase and installation of the TG150 and the TG120 Traction Control guard is at the sole responsibility of the purchaser/owner.
We are not to be held liable for any damage to your vehicle as a result of impact or any off road driving.Last edited by Brains; 27-03-2012, 11:44 PM.Leave a comment:
-
TG 120 Install
The 120 Prado with standard OEM Transfer Case Guard.
Remove the 4 Bolts holding the OEM Transfer Guard on the bottom of the Transfer Case.
Using these bolts attach the TG120 to the bottom of the Transfer Case.


Cont...Leave a comment:
- Please update your email address to ensure you receive our emails.
- Welcome to the updated Pradopoint. The private message system has been enabled.
Leave a comment: