Pre- Feb '07 Redarc units were set to kick in at 13.6 - so it was rare that they would ever kick over and start charging the aux battery ... if at all.
The newer Redarcs have been set to kick in at 13.2 ... and work perfectly.
This diesel / voltage thing is common to 'Cruisers, 'Lux's and Prado's.
Do a double check ... you may well have bought a brand spanking new Redarc that had been on the shelf for a while and is still at the old 13.6 setting.
{Just a thought .... hope it helps}
Looking forward to seeing the next bits
Cheers
Chippy
Hey Chippy, thanks for the kind comments! It's definately an ongoing project, there will be plenty more to come no doubt.
Mate you'll have to apply to use the patented idea... There's a small one off joining fee of $49.95 + $99.95 per fuse/cb and redarc used. haha Go for it!
I put one self drilling screw through one of the panels to mount my spotlight relay and thought there's no way I'll be mounting anything else to the body work using that method. The panels are very thin. I wanted to keep things as tidy as I could around the battery terminal hence it's all nicely tucked away in the passenger corner. I put a bit a rounded edge on the bracket so it would follow the existing loom around. You could probably tuck the loom in behind the bracket or relocate the loom, but I thought I'd leave it as intended, I didn't realy need the extra room on the plate anyhow.
As for the redarc, it's working as it should, it's more that the output voltage from the alternator is fairly low. To charge the battery I'll need around the 14.8v mark to get it to 100%. I measured the voltage today and it was on 13.2 at idle. For all the driving we did yesterday I assumed that the battery would be well and truly charged, but after running the fridge over night I measured the battery voltage today and there was only 12.1 volts open circuit. That's around 50% charged.
I'll have to do some more tests and see how the system goes for a couple of weeks. I've got this crazy idea that I might disconnect the redarc and run my CTEK off an inverter and see how that goes. 8)
Originally posted by D4D-GXL
Looks like you've changed the colour to the beloved "WHITE". Welcome to the club Crammy.
Either way - great looking rig Crammy!
Gordon
Hey Gordon,
Thanks for the welcome!
Not exactly sure what you mean about changing the colour? Are you refering to the front section of the car? It does look weird, it's the reflection of a white building opposite the car.
I bet you're hanging out for your beast! Good luck with it and look forward to seeing soome photos of it when it arrives. 8)
Crammy
Be careful of where you have put your second battery, as you can get cracking under the battery and on the side guard if you haven't strengthened it.
Crammy - although your Prado is silver, it looks pretty close to white in that particular Picture.
I'm taking a day off work the day the Prado arrives to ensure I can get all the pics.
Good luck with the nicely equipment Prado Crammy.
Yeah mate I know what you're saying, the car was pretty much surrounded by white buildings, you can see the reflection of the house from the drivers side door right up to the front gaurd.
Originally posted by blkmav90
I use a CTEK to keep my aux battery topped up. I have the fly lead permanently attached to the battery and connect it overnight once a week or so.
I also have a Torjan aux battery and it's outlasted 2 cranking batteries.
I've got the 7000 model and ran it on the battery overnight, they're a great charger, just set and forget.
I didn't know much about the Trojan battery until after I bought it ops: One of my mates knows a bloke from where I got it from, he gave me a good price so I bought it. I did some research on them when I got home and found that they are reputed to be one of the best aux batteries on the market! woohoo
Originally posted by craig
Crammy
Be careful of where you have put your second battery, as you can get cracking under the battery and on the side guard if you haven't strengthened it.
It all looks great
Go those silver Prado's
I've done heaps of reading on the battery placement issues. I won't be constantly on corragated roads and chose a stronger battery tray that mounts up high in a stronger part of the gaurd as well as the bottom section of the tray. I also wanted a bigger battery.
By looking at the gaurd where ARB fit their batteries on the passenger side, there doesn't seem to be as much strength in the mounting points as there is where I've put mine. I've put rubber under all the mounting points underneath the tray and also under the battery.
There doesn't appear to be too many instances of gaurd damage, it's probably up there with the ARB bar and the gaurds cracking.
I think if you pick a decent tray and a battery that doesn't weigh a tonne, you should be pretty right.
Yeah mate she's scrubbed up alright hey! Gotta love fresh paint!
Even the engine bay came up alright! Remember what it was like Friday? The underside of the boonet looks a bit average though... I missed that bit ops:
t;] Crammy
Be careful of where you have put your second battery, as you can get cracking under the battery and on the side guard if you haven't strengthened it.
It all looks great
Go those silver Prado's
I've done heaps of reading on the battery placement issues. I won't be constantly on corragated roads and chose a stronger battery tray that mounts up high in a stronger part of the gaurd as well as the bottom section of the tray. I also wanted a bigger battery.
By looking at the gaurd where ARB fit their batteries on the passenger side, there doesn't seem to be as much strength in the mounting points as there is where I've put mine. I've put rubber under all the mounting points underneath the tray and also under the battery.
There doesn't appear to be too many instances of gaurd damage, it's probably up there with the ARB bar and the gaurds cracking.
I think if you pick a decent tray and a battery that doesn't weigh a tonne, you should be pretty right.
My 2c
Cheers,
Steve[/quote]
Steve
I haven't done much driving on corrogated roads and have my second battery mounted where yours is and I have had the cracking in the guards
In the past when I�ve mounted accessories that cause vibration or be susceptible to vibration i.e. compressors, battery trays, I�ve used flexible isolators. I get them from Blackwoods but I�m sure you can get them from any bolt shop.
Is there room under the dual battery tray to fit these?
Steve
I haven't done much driving on corrogated roads and have my second battery mounted where yours is and I have had the cracking in the guards
When you say cracking in the guards do you mean where the battery tray pulls out of the guard or is it in the spot where the ARB bar has apparently caused some grief?
Originally posted by blkmav90
In the past when I�ve mounted accessories that cause vibration or be susceptible to vibration i.e. compressors, battery trays, I�ve used flexible isolators. I get them from Blackwoods but I�m sure you can get them from any bolt shop.
Great idea blkmav90, it would be well worth looking into using these. With the particular tray I'm using it could be possible to use these, would just have to trim up the bracket that mounts to the side of the gaurd and re drill the mounting holes.
The only problem I think you may have is the battery sitting up too high. My battery now just fits under the bonnet with the extra rubber I've put under it. I rekon you would probably get away with if you cut the threaded posts off and used a standard battery terminal clamp.
Yep the country side is looking great. A few of us did a trip about the place last Friday and saw some great stuff. You should come with us on the next one.
The redarc/fuse idea keeps it all nice and tidy up the back of the engine bay hopefully far enough away to stop it getting engulfed with water. It also keeps the connections relatively out of site and keeps the battery terminals looking tidy.
It was a pretty easy task, just use some card board or similar and cut it out till it fits and use it as a template. Same thing goes with the compressor bracket.
If I get a chance I might put together a how to on my install.
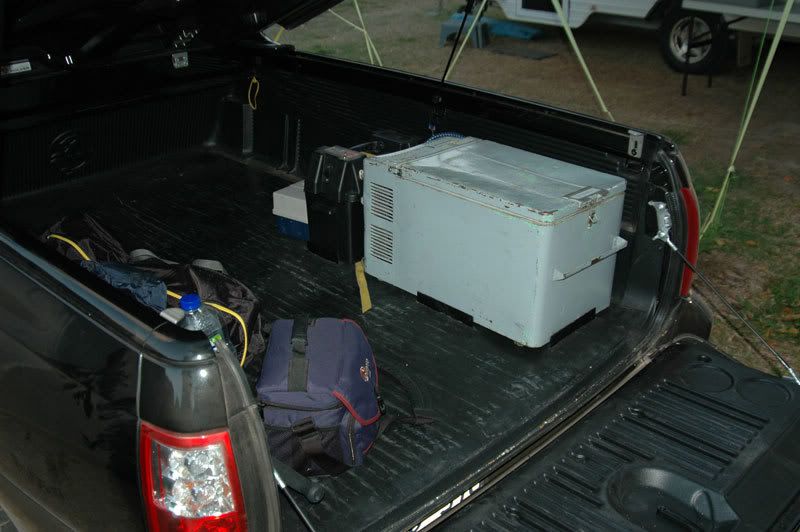
The old engel... She's a little beauty, I inherited it from my grandfather, I rekon it would just about have to be one of the first ones ever made! It's still going strong, only problem is it's not the most efficient to run on 12v. It's had a few paint jobs in its time. It just goes to show that they're built to last forever! :wink:
Ok there's been some more additions to the money pit.
Joey and I installed the ATS premium kit on saturday which consists of the ridepro springs and bilstein shocks. Thanks to the DIY suspension install thread and specifically to Chippy and the boys for their detailed guide and not to mention Darren from ATS with his awesome service and guidance, it made the job so much easier. Having only done suspension once before, the DIY thread was our bible! If we can do it anyone can!
We have some photo's taken on the day but Joey is missing in action at the moment(Cooktown). But I took these few today and 2 before shots from a couple of weeks back.
Before no bar:
Before with bar and dual battery system:
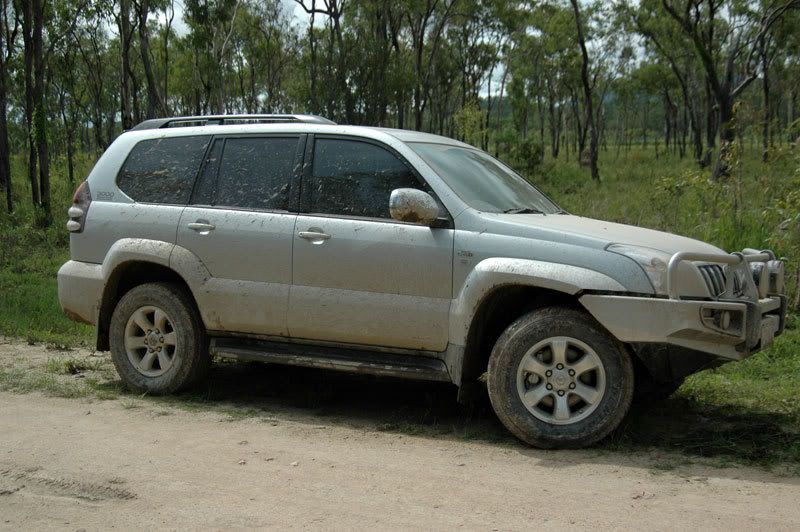
After with ATS kit
The back end is sitting up a bit at the moment but she's unladen and just about out of juice so 180L of fuel should drop it down a touch.
I must say the ride is awesome, there's absolutely no loss of ride comfort, infact it absorbs the bumps a whole lot better and best of all it doesn't feel like it's going to tip over when you go around a roundabout!
I'm very impressed with the difference it's made and it's absolutely well worth the money. Anyone want some original shocks and springs with 2000kms on them! There's no way they'll be going back in!
Wheel alignment this Friday then off to test it all out on Saturday at Mt Carbine.
 Tweet
Tweet

.jpg)


Comment