Really nice job. Looks like I have a new weekend job. Any tips on attaching the marine carpet (your corners look very neat) and also removing the tie downs and installing the bolts?
Jaysea
The tie downs are easy to take out, I only removed 3, leaving the one on the back of the seat I still use. You just open up the clip to reveal the bolt. I just got longer versions of the same bolts to replace to screw down through the false floor. M6 bolts, about 40mm long I think.
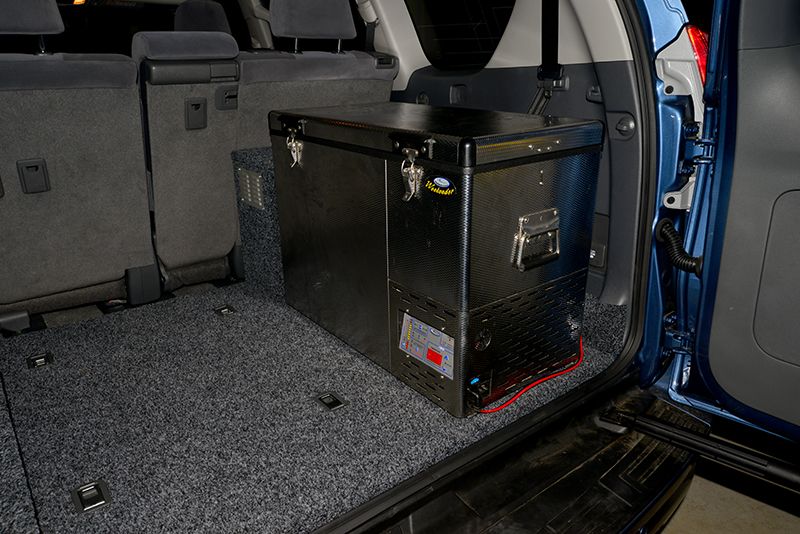
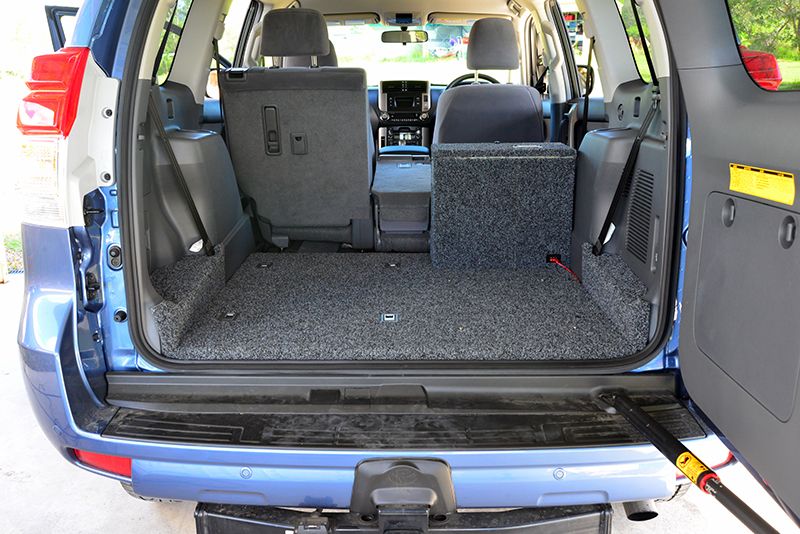
Some pics of my rear floor on our recent trip to West of Alice Springs. I got an ARB 78L fridge as it was the only one that would fit in that space. The false floor worked well. Didnt move over some serious corrugations.
Really nice job. Looks like I have a new weekend job. Any tips on attaching the marine carpet (your corners look very neat) and also removing the tie downs and installing the bolts?
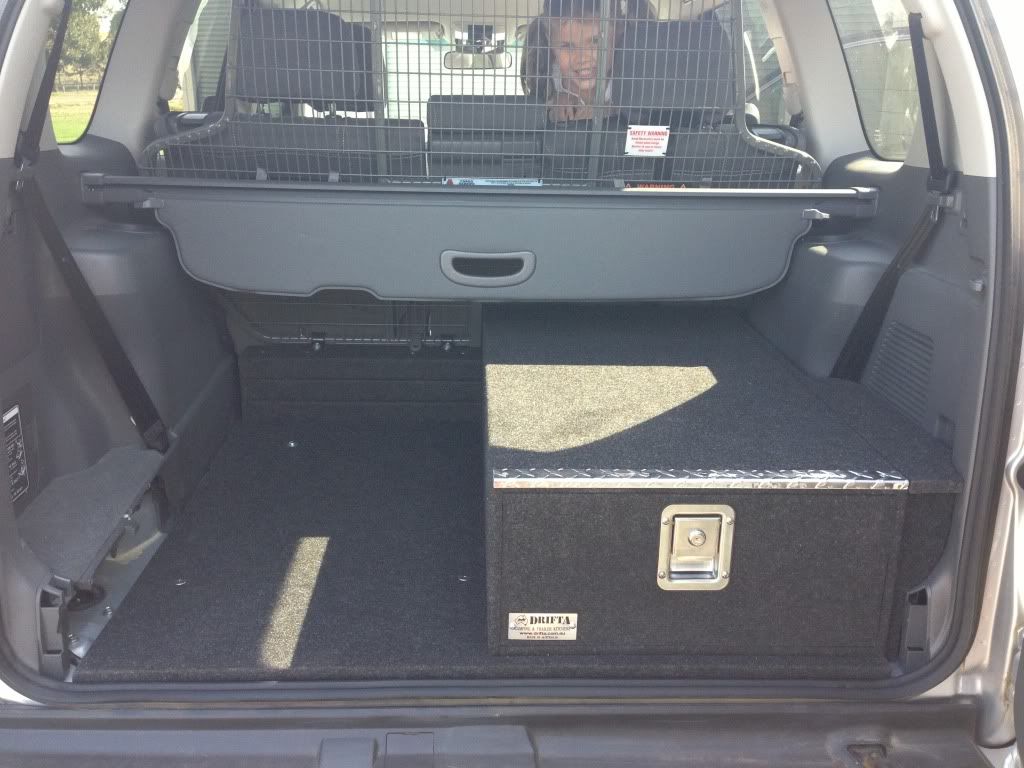
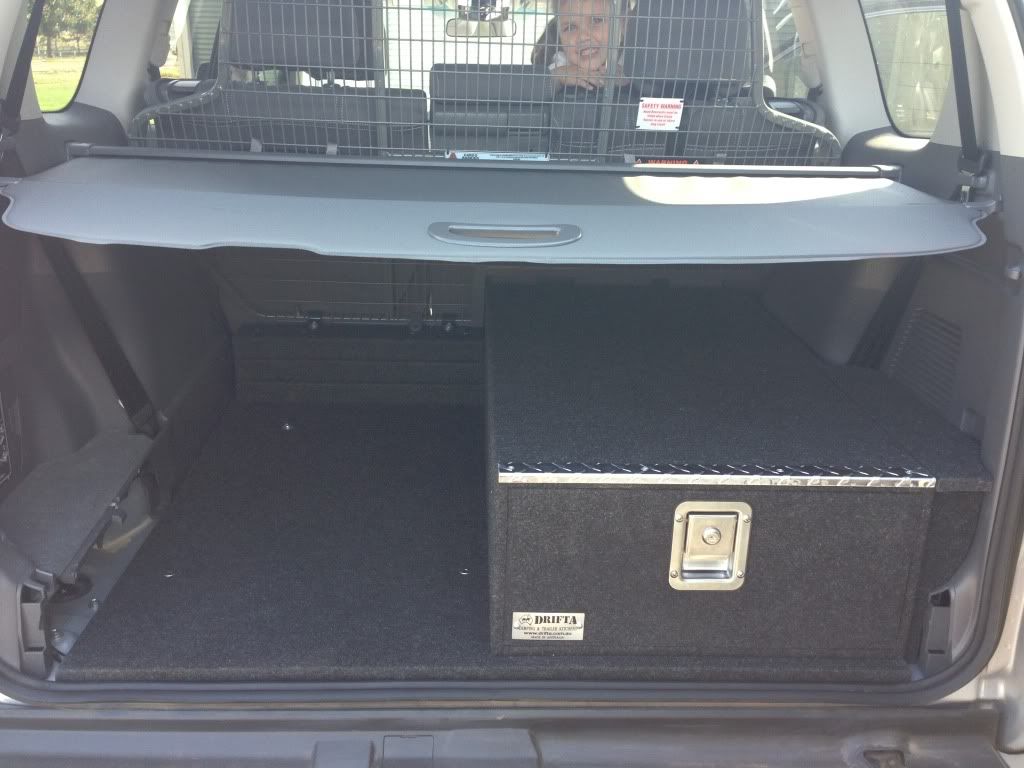
Here is my 150 set up. Pretty basic, the fridge will sit on the passenger side in a slide. I use the privacy cover as well, due to the lowlife dogs around town that like to peak into the back of 4WD's looking for stuff to pinch.
Still scratching my head working out what to do so look forward to seeing what you come up with.
Finally did it. Cut out some ply using the cargo mat as a template, then used the original bolt holes for the tie down hooks to secure it. With the seat cut out, I used three M6 bolts to hold it down. Bit of marine carpet and done. Later I'll add an extra piece that I can attached to fill in the gap with both seats down.
Thank for the reply anf run down. That set up looks awesome.
I still haven't sat down and looked at what I'm going to do yet. I need to sell my Disco to fund further mods.
I finished my fridge base / battery box / charger arrangement last weekend.
Making a single sided base is definately doable but the space left will be quite small. Especially when you consider that the back of the folded seat is the same level as the side trims so the fridge will be sitting down 100mm or so in a hole. Few options I know if you have to have the extra seat but to be honest I am not sure it is worth all that trouble given (I believe) there are some proprietary mounts that sit on top of the other seat. That does mean limited height to open the fridge but weigh up the advantages before you go out and buy ply and carpet and bolts and nuts.
Building this set up, which includes the battery/charger box, probably took about 50 hours all up. Probably cost just under $200 excluding the battery box and innards. Sadly I didn't need to buy any new tools (have to plan that better next time). To build the board I used the usual cordless drill, jig saw, circular saw, belt sander and also a rivnut tool and a 1/4" router to take the corners off the ply. In that total was 1.5m of marine carpet and 3L of adhesive, the plus side being I have no need to use an aeroplane to fly anywhere for the next week or so.
The 8 bolts that hold the 3rd row seats in are M10 with a 1.25mm pitch. I struggled to get countersunk screws in this size that were long enough and ended up with socket head screws 65mm long which were fine because I refitted the factory tie downs (drilled out to suit the M10 bolts) and left one exposed under the fridge. I used M8 rivnuts in the top hat section at the front (where the seat frames bolt in at about 45 degrees) and countersunk screws, again using the factory tie downs and one bolt under the battery tray in the battery box.
Also when you remove the trims be aware that some of the pop in connectors are open under the floor so seal all the holes you don't use, I used a thread sealant as well on the bolts. I also had to seal two M6 holes where the factory trims sit as the heads of the bolts lifted the base board. There are some pre carpet shots in my rig build if you want to see all the words and lines on the bare board, including the phone number of one of our Directors in Japan! Please feel free to call him.
Let us know what you decide. I am also looking at how best to install my engel but need to retain the use of one of the rear seats (or leave a child behind which may be easier). Would be great if I could install ply and a fridge slide to only half but I can't work out to secure it.
Will keep the updates coming if I sort it out jaysea. After taking delivery of the car on Thursday and have a looking the back I can't see a half floor working. It is looking more and more like I will have to use the ARB cargo gear rails.
Leave a comment: